Uncategorized
Does Grass Spread on it’s Own? A Guide, By Grass type
Picture-perfect lawns seem like a distant dream. You fight those stubborn bare spots, only to find your carefully cultivated grass creeping into the flowerbeds. Understanding how different grasses spread is the key to achieving the lawn of your dreams – whether lush, full coverage, or perfectly manicured borders.
Grass Spreading 101
Not all grasses are created equal regarding how they fill your lawn. Some diligently spread to cover every inch, while others stayed within their designated area. Let’s break down the main ways your grass might be expanding its territory:
- Spreading Underground: Rhizomes (Kentucky Bluegrass)
- Think of rhizomes as tiny underground stems. Kentucky bluegrass sends out these rhizomes, which then sprout new grass shoots. This results in a slow but steady spread.
- Spreading on Top: Stolons (Zoysia, St. Augustine, Centipede)
- Stolons are like above-ground runners. These grasses send out long shoots that root at various points, creating new plants. This leads to a much faster spread than rhizome grasses.
- Staying Put: Bunch Grasses (Fescue)
- Fescue grasses grow in clumps or bunches. They don’t spread outward aggressively, relying mainly on seed dispersal for new growth.
- The Wild Card: Seed Dispersal (Ryegrass)
- Ryegrass and many other types are spread primarily by seed. Wind, animals, and your lawnmower can carry the seeds to new areas, leading to unexpected patches.
Filling Those Bare Spots
Those bare patches are every lawn enthusiast’s nemesis. But before you toss down some seeds, let’s ensure the best possible results:
- Optimal Seeding Conditions
- Cool-season grasses (Kentucky bluegrass, fescue, ryegrass): Fall is prime time. The soil is still warm for germination, but the air is cooler, reducing competition from weeds.
- Warm-season grasses (zoysia, St. Augustine, etc.): Seed in late spring or early summer when the soil has fully warmed.
- Avoid extremes: Don’t seed too close to winter (frost risk) or during the peak of summer heat.
- Seeding Tips
- Invest in quality: Choose seeds specifically formulated for your grass type and climate zone.
- Prep the soil: Lightly rake bare spots to ensure good seed-to-soil contact.
- Protection: Minimize foot traffic on seeded areas, and water gently to avoid washing away seeds.
- The Importance of Healthy Soil
- Break it up: Aerate compacted soil to improve water and nutrient flow, promoting deeper root growth. Learn more about aerating.
- Feed your lawn: A consistent lawn care program, including fertilization, supports a thick, healthy lawn that naturally resists bare spots.
When the Grass Gets Too Ambitious
Sometimes, the very qualities that make grasses like zoysia or St. Augustine desirable – their vigorous spread – can become problematic. If your lawn is starting to invade flowerbeds or creep into your neighbor’s yard, here’s a quick overview of ways to control the spread:
- Physical Barriers: Installing deep edging (6 inches or more) made of plastic, metal, or concrete can create a boundary that stolons struggle to cross.
- Targeted Herbicides: Some herbicides are specifically designed to stop certain grasses without harming other plants. Use these with extreme caution and follow label instructions precisely.
- Manual Removal: For small incursions, you may be able to carefully dig out the grass and its stolons. This is labor-intensive but effective for limited areas.
When to Call in the Reinforcements
While DIY lawn care is rewarding, sometimes seeking professional help is wise. Here are a few situations where a lawn care expert might be the best solution:
- Large Bare Areas: If you have extensive patches of missing grass, a professional can quickly assess the situation and recommend the most efficient reseeding method.
- Severe Soil Problems: Issues like extreme compaction, poor drainage, or significant nutrient deficiencies may require specialized equipment and treatments that a lawn care company can provide.
- Grass Identification: If you’re unsure what type of grass you have, a pro can help. This knowledge is crucial for choosing the right management approach.
- Time Constraints: Sometimes, life gets busy! If you don’t have the time or inclination for extensive lawn repairs, outsourcing the work can be a stress-saver.
Now that you’re armed with the secrets of grass growth, you’re well on your way to achieving your lawn goals. Whether you desire a lush carpet of green or a perfectly contained space, understanding how your grass spreads is the key to success.
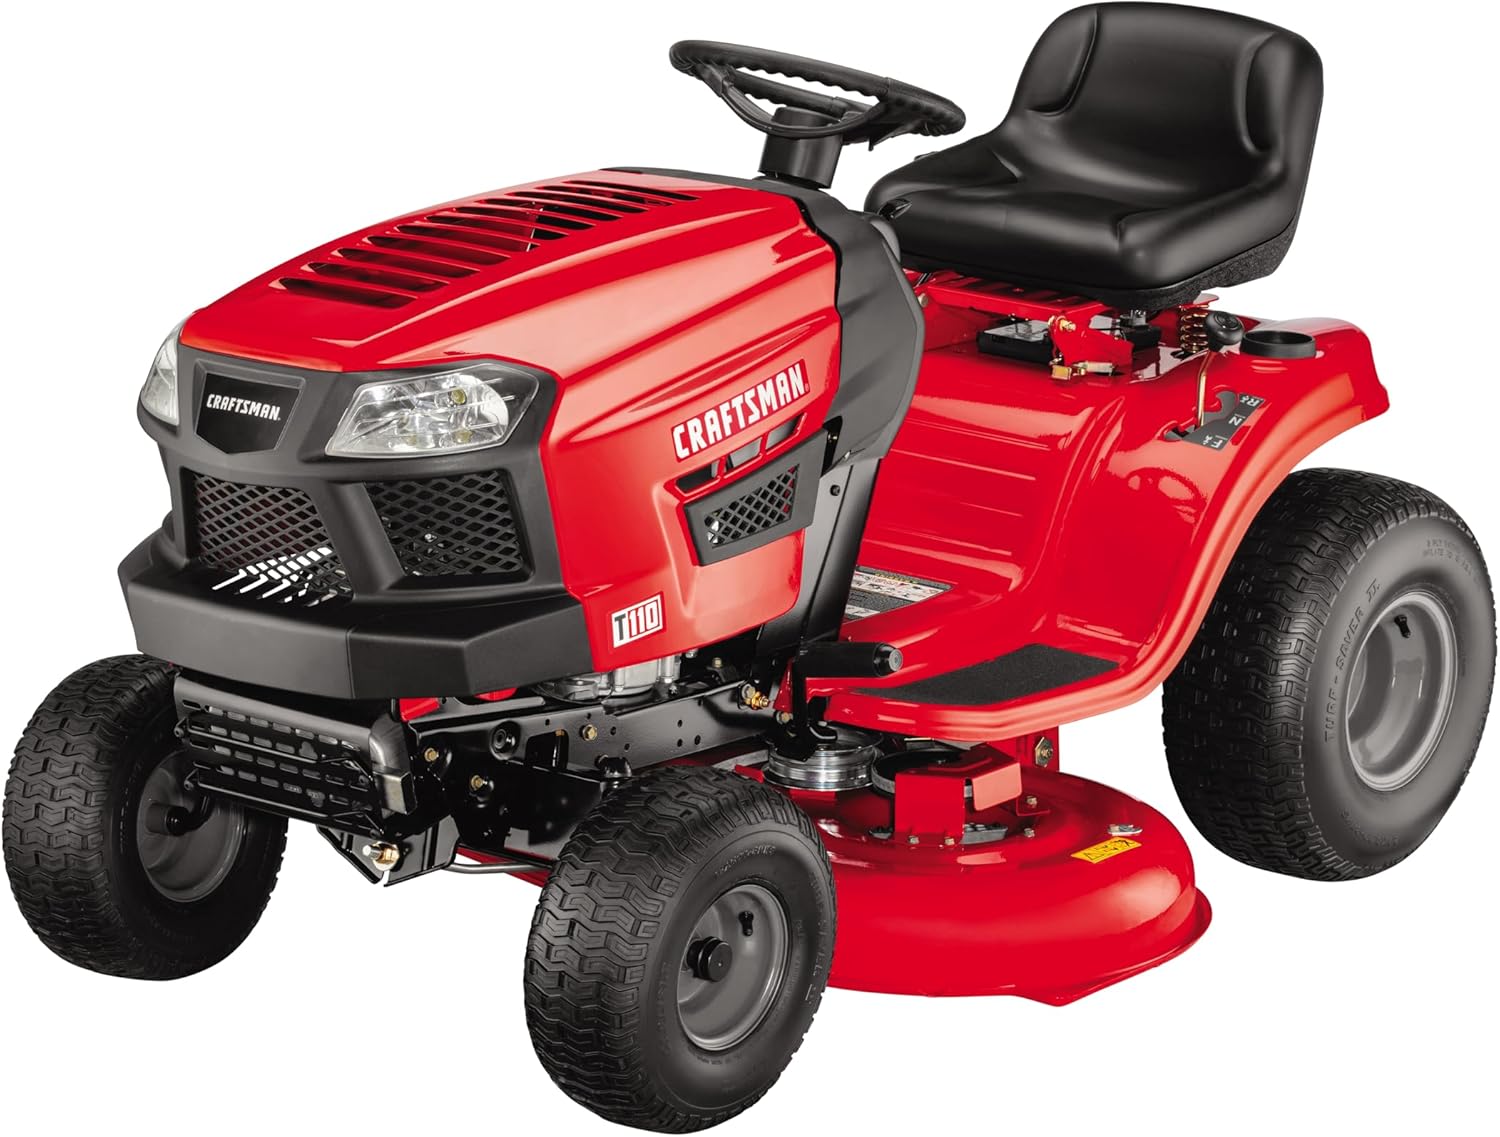
Best Riding Mower for 1 Acre? Don’t Buy Until You Read This

If mowing your acre takes forever, you’re not alone. Many homeowners hit the tipping point where a push mower just isn’t practical anymore. At around 1 acre, mowing by hand can eat up over an hour every week. That’s where a riding mower comes in.
But which riding mower is best for a 1-acre yard? And should you go gas or electric? This guide—built on mower research, expert insights, and product testing—will help you choose the right machine so you can reclaim your weekends.
Why 1 Acre Is the Tipping Point
On a small suburban lawn, a push mower is manageable. Once you hit an acre, though:
- A push mower can take 70–90 minutes.
- A riding mower can get the job done in 35–50 minutes.
With a riding mower, you also cut down on physical strain and enjoy a smoother, more consistent cut.
What to Look For in a 1-Acre Riding Mower
Deck Size
- Sweet spot: 38–42 inches. Wide enough for efficiency, but still nimble around trees and garden beds.
Power
- Gas: 10–18 HP engines are plenty for 1 acre.
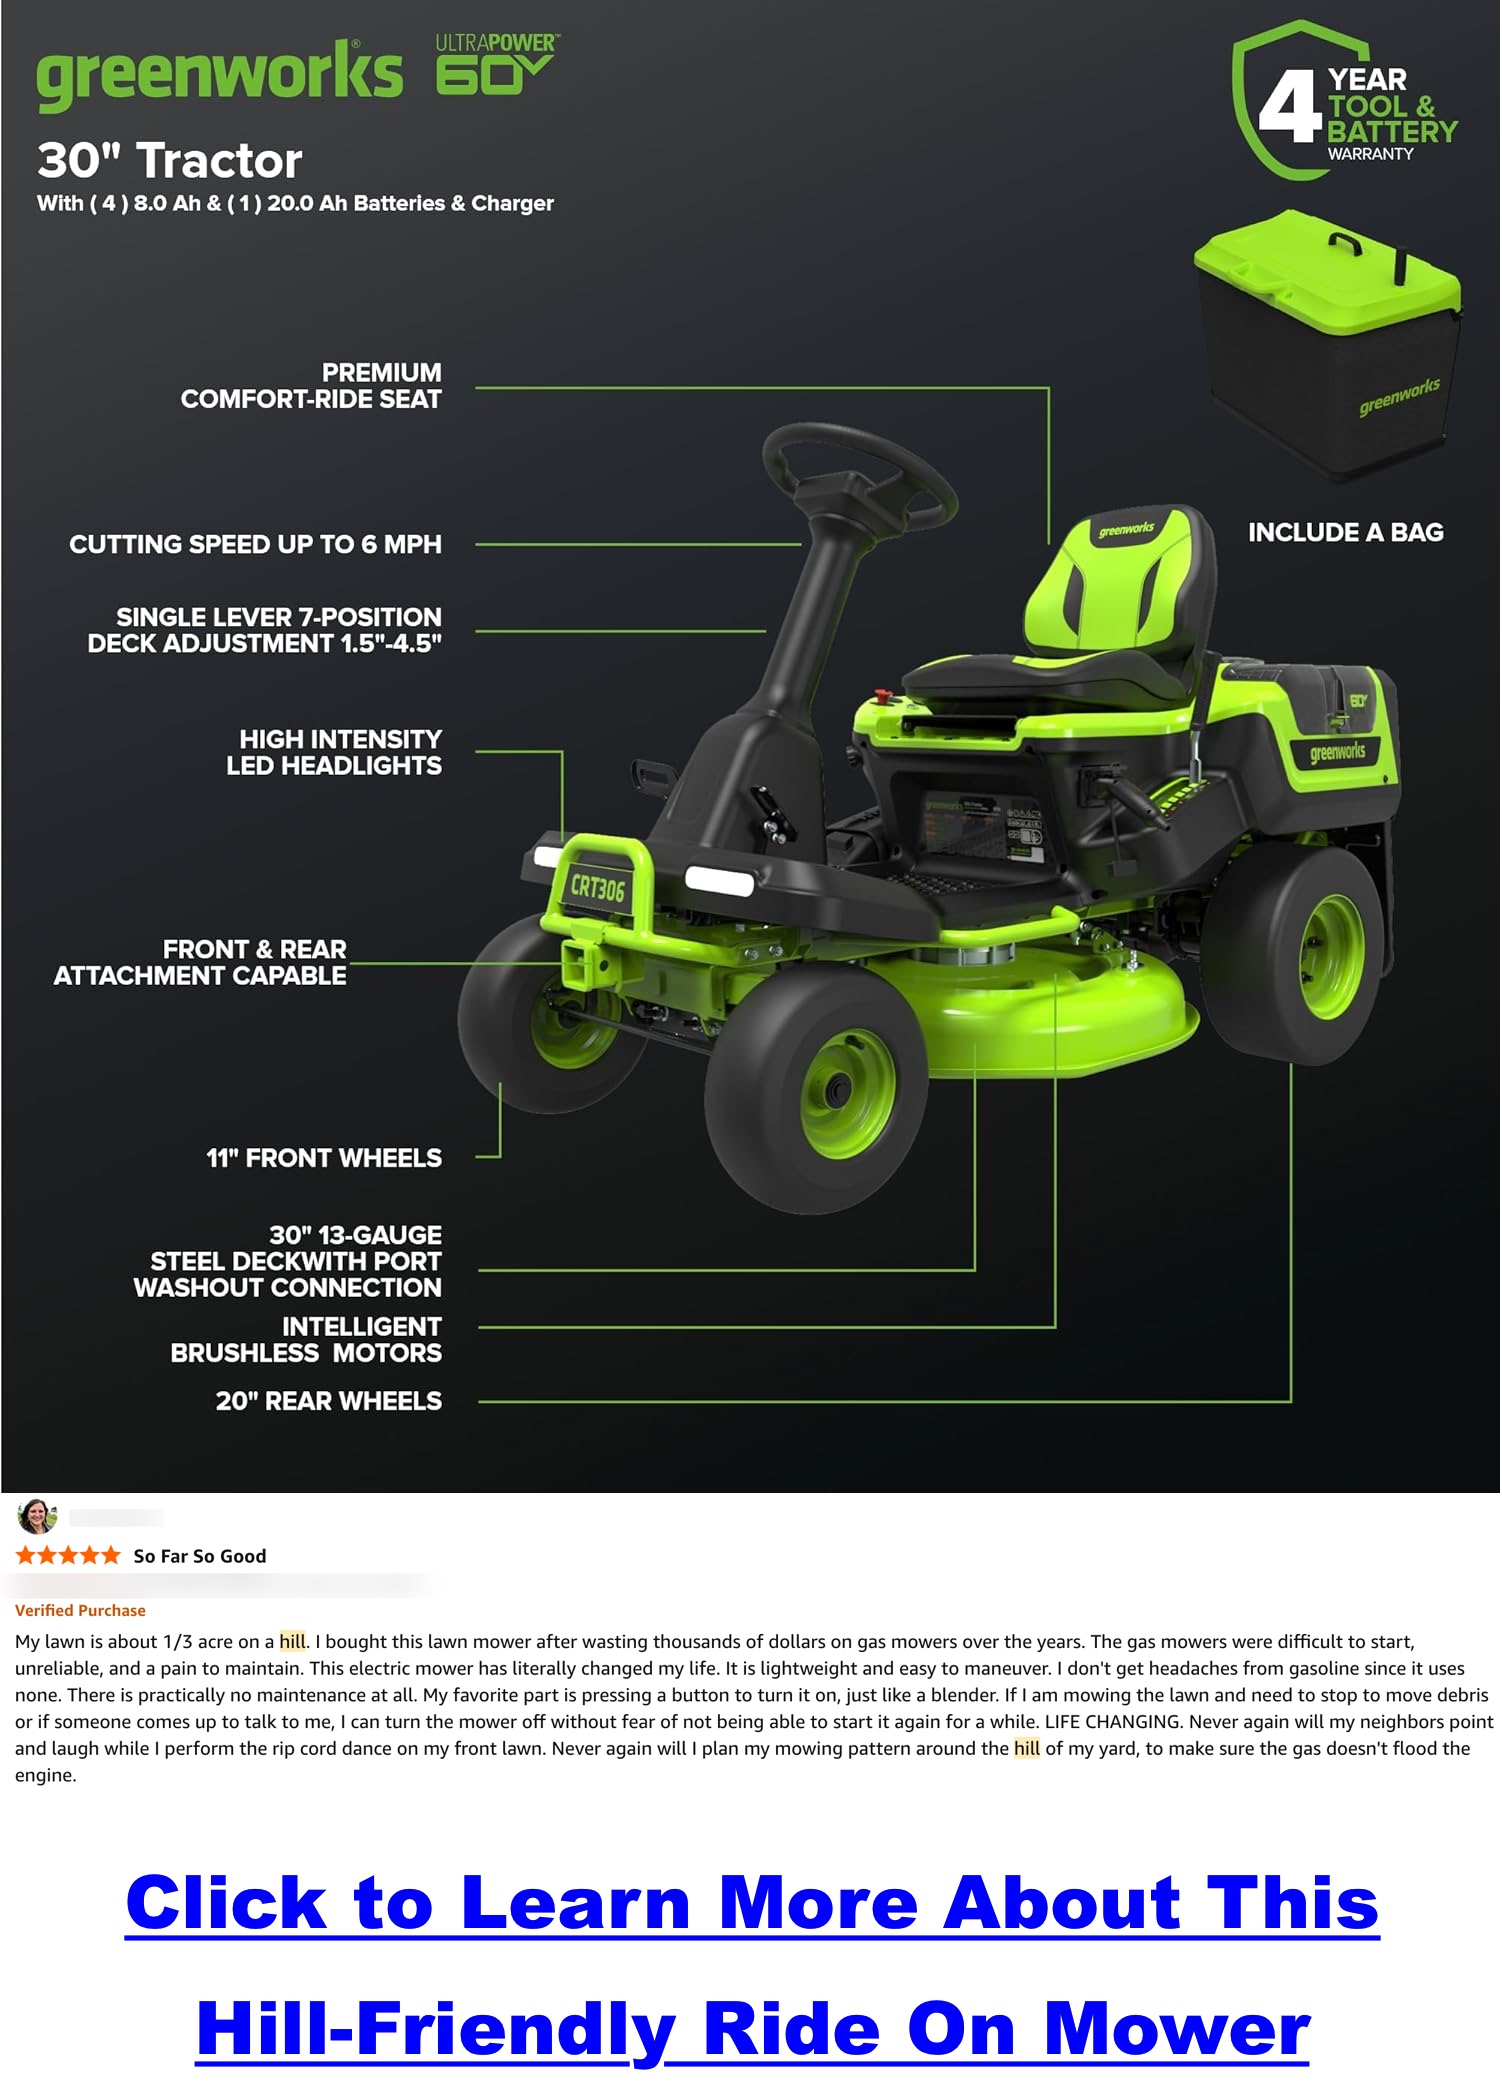
- Electric: Mid-range 80V systems cut up to 2 acres per charge.
Maneuverability
- Lawn tractors handle well in open space.
- Zero-turns are great for yards with many trees or landscaping obstacles.
Comfort
- Look for hydrostatic transmission (no shifting).
- Padded seat and smooth steering make a big difference over time.
Gas vs. Electric for 1 Acre
Gas Riding Mowers
- ✅ Unlimited runtime, just refuel.
- ✅ More raw power for thick/wet grass.
- ❌ Louder, requires regular maintenance.
Electric Riding Mowers
- ✅ Quiet, eco-friendly, push-button start.
- ✅ Low maintenance.
- ❌ Limited runtime (usually 1–2 acres per charge).
- ❌ Higher upfront cost, battery replacements every 3–5 years.
💡 Example: The Ryobi 80V 42″ Electric Tractor can cover up to 2 acres per charge, making it a strong fit for a single acre.
Best Riding Mower Options for 1 Acre
| Model | Deck Size | Power | Price Range | Best For |
|---|---|---|---|---|
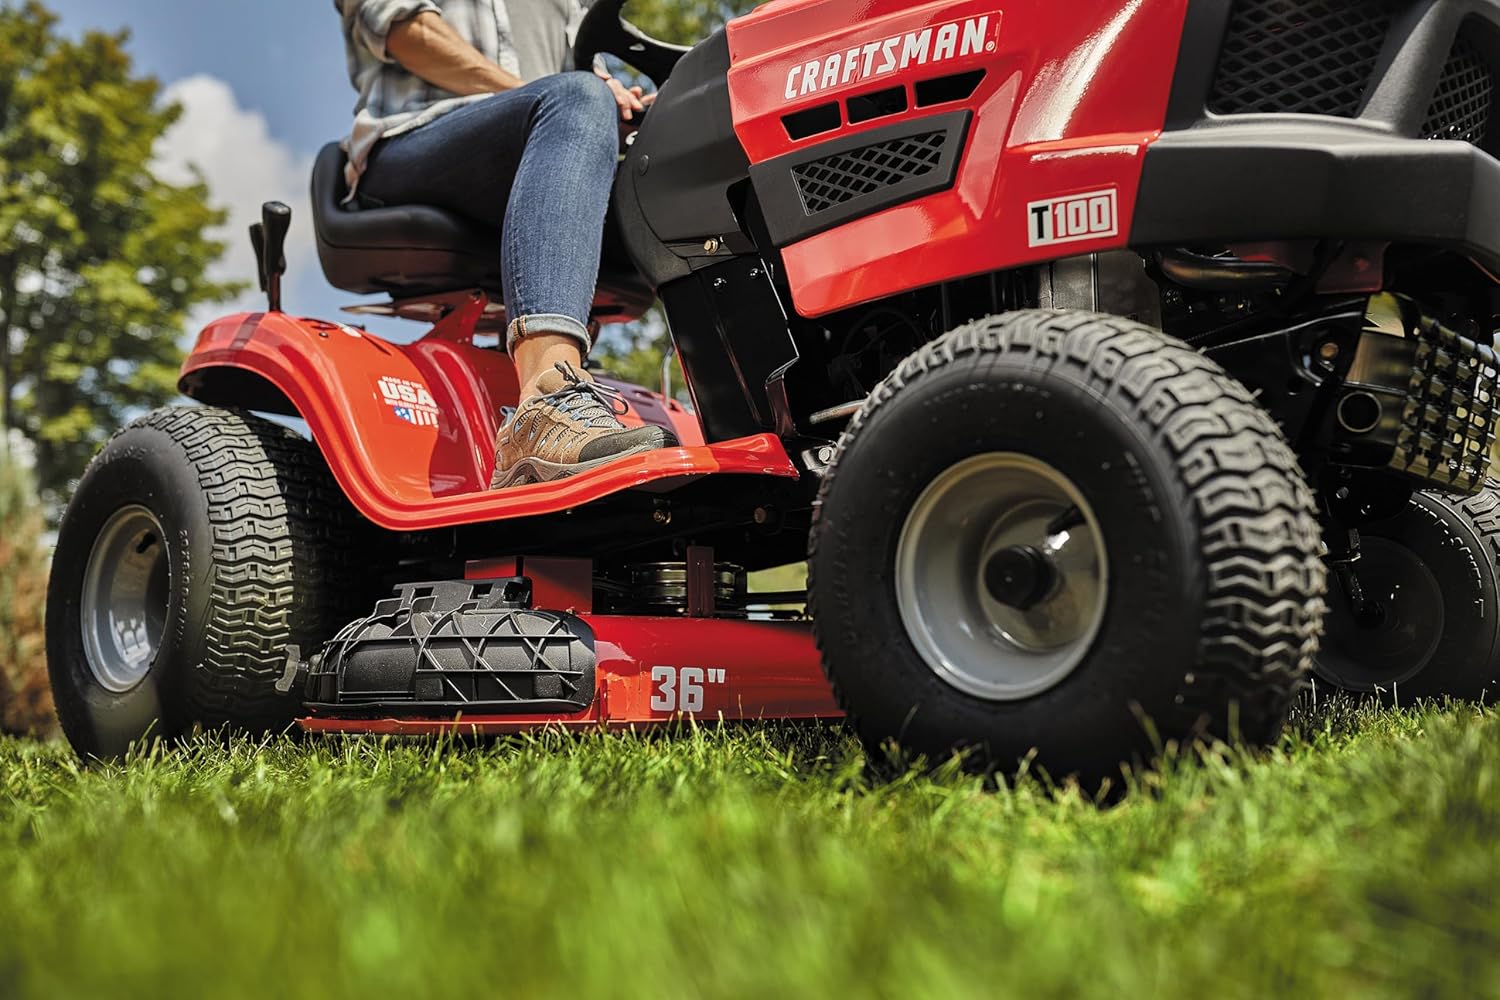
| Troy-Bilt TB30 | 30″ | Gas, 10.5 HP | $1,600–$1,800 | Budget buyers, small 1-acre yards |
| John Deere S130 | 42″ | Gas, 22 HP | $2,300–$2,500 | Reliable all-around choice |
| Ryobi 80V 42″ Electric Tractor | 42″ | Battery, up to 2 acres per charge | $3,000–$3,500 | Quiet operation, low maintenance |
| John Deere Z370R Electric ZTrak | 42″ | Battery, zero-turn | $4,000+ | Yards with trees & landscaping |

FAQ: Choosing the Best Riding Mower for 1 Acre
Do I really need a riding mower for just 1 acre?
At around 1 acre, push mowing becomes impractical. A riding mower saves time and effort while giving a cleaner cut.
What cutting deck size is best for 1 acre?
38–42 inches is ideal. Larger decks (46–60″) are better for 2+ acres.
Should I choose gas or electric for a 1-acre yard?
Both can work. Gas offers unlimited runtime and more muscle, while electric gives you quiet, low-maintenance mowing.
How long will it take to mow 1 acre with a riding mower?
About 35–50 minutes with a 38–42″ deck.
Can a zero-turn mower be worth it for 1 acre?
Yes—especially if you have trees, flower beds, or tight turns. For open yards, a standard lawn tractor is usually enough.
How much should I expect to spend?
Budget models start at $1,600–$1,800. Mid-range gas tractors run $2,000–$2,500, while electric models range from $3,000–$4,000+.
What if my acre has slopes or uneven ground?
Choose a mower with strong traction and a stable frame. Avoid traditional zero-turns on slopes unless designed for it.
Expert Tips for Getting the Most Out of Your Mower
- Mow at the right height for your grass type.
- Keep blades sharp for efficiency.
- Store your mower indoors; charge batteries properly if electric.
- Use efficient mowing patterns to save time and fuel.
Conclusion
For a 1-acre lawn, the right riding mower balances deck size, power, and convenience.
- Gas mowers excel if you want power and flexibility.
- Electric mowers win if you value quiet, low-maintenance operation.
Choose the mower that fits your yard—and your weekends—best.
Homeowner’s Guide to Robotic Weeders
Weeding is one of the least-loved garden chores. It’s time-consuming, tough on the back, and never-ending. But what if a robot could take care of it for you? Enter robotic weeders—devices designed to patrol your garden and keep unwanted plants under control. While advanced versions exist for commercial farms, this article focuses on what’s available to homeowners and backyard gardeners.
1. What Are Robotic Weeders?
Robotic weeders are small, automated devices that move through your garden and disrupt weeds before they take over. Think of them as the garden version of a Roomba. Unlike robotic mowers that trim grass, robotic weeders use tools like small string trimmers or stirring wheels to prevent weeds from growing. Most are solar-powered, weatherproof, and designed to live in your garden throughout the season.
2. Spotlight: The Tertill Weeding Robot
The Tertill Weeding Robot, created by one of the co-founders of Roomba, is the main consumer-friendly option today. Here’s how it works:
- Solar-powered with an onboard battery → no charging cables needed.
- Bump-and-go navigation → drives straight until it hits a border or object, then changes direction.
- Weeding action → uses a small string trimmer underneath and wheels that stir the soil, stopping weeds while they’re small.
- Coverage → about 200 square feet (roughly a 10×20-foot plot).
- Setup needs → flat soil beds with at least 4-inch borders to keep it inside.
For homeowners with a modest veggie garden, it’s a fun and functional gadget that reduces the time spent bent over pulling weeds.
3. Pros of Robotic Weeders for Homeowners
- ✅ Convenience: Works automatically; just place it in the garden.
- ✅ Eco-friendly: Runs on solar power and avoids herbicides.
- ✅ Always on duty: Prevents weeds before they mature.
- ✅ Weatherproof: Stays outside all season.
- ✅ Low maintenance: Occasional string replacement only.
4. Cons and Limitations
- ❌ Small coverage → only suitable for small plots (~200 sq ft).
- ❌ Basic weed detection → can’t tell weeds from seedlings (plants need protective collars).
- ❌ Not for raised beds or containers.
- ❌ Dependent on sunlight → cloudy days may reduce run time.
- ❌ Theft risk → no anti-theft or GPS tracking.
- ❌ Manual backup needed → won’t eliminate all weeds completely.
5. FAQs About Robotic Weeders
Do they really work?
Yes, but they’re best at keeping small weeds from sprouting. Large weeds still need manual removal.
Will they damage my plants?
They avoid anything taller than about an inch, but seedlings should be protected with collars.
How much do they cost?
Around $300–$400.
Are they safe for pets and kids?
Yes, the trimmer is small and low-power, though supervision is still recommended.
Can they handle all garden types?
No, they’re designed for flat, bordered garden plots—not raised beds or pots.
6. Who Should (and Shouldn’t) Buy One
Great for:
- Backyard veggie gardeners who want less weeding.
- Eco-conscious homeowners avoiding herbicides.
- Tech lovers who already enjoy robotic vacuums or mowers.
Not ideal for:
- Container or raised-bed gardens.
- Large plots or acreages.
- Gardeners expecting 100% weed-free results with no effort.
7. Alternatives to Robotic Weeders
If a robotic weeder doesn’t fit your setup, you still have options:
- Mulching → suppresses weeds naturally.
- Hand-weeding tools → tried-and-true method.
- Selective herbicides → faster, but less eco-friendly.
- Robotic lawn mowers → if weeds in the grass are your main problem.
Conclusion: Are They Worth It?
Robotic weeders aren’t a miracle cure for weeds, but for the right garden, they can be a real time-saver. If you’ve got a small, flat, sunny plot, a device like the Tertill can help keep weeds in check all season with minimal effort. For homeowners who value convenience and eco-friendly gardening, they’re worth considering.
Best Zero-Turn Mower for the Money? These Picks Save Time and Your Wallet
Click To See Zero Turn Mowers
If you’re tired of spending hours every weekend mowing, you’ve probably wondered if a zero-turn mower is worth the money. With their unmatched speed, precision, and maneuverability, zero-turn mowers can literally cut mowing time in half compared to lawn tractors. But here’s the real question: which zero-turn gives you the most bang for your buck? In this guide, we’ll break down what makes these machines worth it, who they’re best for, and reveal 15 top models that save both time and money.
What is a Zero-Turn Mower?
Zero-turn mowers (ZTRs) use independent wheel motors for tight, pivot-like turns—allowing you to mow right up against trees, flower beds, and fences without needing a trimmer. The result: faster mowing, fewer passes, and a professional-quality cut.
- Advantages: Speed, maneuverability, efficiency, striping ability.
- Drawbacks: Higher upfront cost, storage size, and sometimes less stable on steep slopes (though modern models are solving this).
Why Choose a Zero-Turn “For the Money”
A ZTR is a bigger investment than a traditional lawn tractor, but here’s why they can actually be the best value long-term:
- Saves time: Cut mowing sessions by up to 50%.
- Professional cut: Cleaner lines and even grass height.
- Durability: Fabricated decks and heavy-duty frames last longer than budget tractors.
- Resale value: Hold value better than most riding tractors.
- Electric options: Lower operating and maintenance costs.
Who Should (and Shouldn’t) Buy a Zero-Turn?
Zero-turns are great if:
- You mow 1–4+ acres regularly.
- Your yard has lots of trees, gardens, or fences to maneuver around.
- You value speed and professional-looking results.
You might skip them if:
- Your yard is tiny or under ½ acre (a walk-behind or robotic mower makes more sense).
- You mow on very steep hills (tractors or remote-control mowers are safer).
Best Zero-Turn Mowers for the Money (2025 Picks)
We’ve split the top choices into budget, mid-range, and premium tiers so you can find the right fit for your lawn and wallet.
Budget-Friendly (Under $3,500)
- Toro TimeCutter 42: Compact, affordable, great for suburban yards.
- Cub Cadet Ultima ZT1 50: Excellent comfort + durability at an entry price.
- Craftsman Z5800: Widely available, 54-inch deck, strong value buy.
Mid-Range Value ($3,500–$5,000)
- Husqvarna Z254F: Kawasaki engine, tough fabricated deck, homeowner favorite.
- Ariens Ikon XD 52: Prosumer build, reliable, built to last.
- Bad Boy MZ Magnum 54: Rugged, commercial-style design at a fair price.
- Hustler Raptor XD 48: Smooth handling, backed by a pioneer in zero-turns.
- Ryobi 80V 42-Inch (Electric): Up to 2 acres per charge, low-maintenance option.
Premium Residential/Light Commercial ($5,000–$7,500)
- Toro Titan MyRide 60: Heavy-duty, suspension comfort, strong on slopes.
- John Deere ZTrak (Z345R / Z370R Electric): Legendary cut quality; Z370R offers quiet electric mowing with 42″ or 48″ deck options.
- Gravely ZT XL 52: Commercial DNA in a residential package.
- Scag Liberty Z 52: Pro-level cut quality, built to last decades.
- Exmark Quest E-Series: Trusted by landscapers, tuned for homeowners.
- EGO Power+ Z6 (Battery): Available in 42″ and 52″ decks, expandable battery system, quiet, eco-friendly.
- Snapper 360Z XT: Unique combo of mower + small utility cart.
Zero-Turn Comparison Table (2025)
| Model | Deck Size | Power | Price Range | Best For |
|---|---|---|---|---|
| Toro TimeCutter 42 | 42″ | Gas | <$3,500 | Small suburban yards |
| Cub Cadet Ultima ZT1 50 | 50″ | Gas | <$3,500 | Budget-friendly comfort |
| Craftsman Z5800 | 54″ | Gas | <$3,500 | Affordable wide deck |
| Husqvarna Z254F | 54″ | Gas | $3,500–$5,000 | Durability + strong engine |
| Ariens Ikon XD 52 | 52″ | Gas | $3,500–$5,000 | Prosumer reliability |
| Bad Boy MZ Magnum 54 | 54″ | Gas | $3,500–$5,000 | Rugged build quality |
| Hustler Raptor XD 48 | 48″ | Gas | $3,500–$5,000 | Smooth maneuverability |
| Ryobi 80V 42″ | 42″ | Electric | $3,500–$5,000 | Quiet, low-maintenance |
| Toro Titan MyRide 60 | 60″ | Gas | $5,000–$7,500 | Large lawns, slopes |
| John Deere ZTrak (Z345R) | 42–48″ | Gas | $5,000–$7,500 | Legendary cut quality |
| John Deere Z370R Electric | 42–48″ | Electric | $5,000–$7,500 | Premium electric option |
| Gravely ZT XL 52 | 52″ | Gas | $5,000–$7,500 | Long-lasting, semi-pro use |
| Scag Liberty Z 52 | 52″ | Gas | $5,000–$7,500 | Pro-level lawn finish |
| Exmark Quest E-Series | 50–54″ | Gas | $5,000–$7,500 | Commercial-grade cut at home |
| EGO Power+ Z6 | 42–52″ | Electric | $5,000–$7,500 | Expandable battery, eco-friendly |
| Snapper 360Z XT | 52″ | Gas | $5,000–$7,500 | Utility + mowing combo |
Quick Comparison: Zero-Turn vs Other Mowers
- Zero-Turn vs Lawn Tractor: Faster, cleaner cut vs better hill stability.
- Zero-Turn vs Robotic Mower: Efficiency and control vs set-it-and-forget-it convenience.
- Zero-Turn vs Compact Rider: Speed and precision vs smaller storage footprint.
How to Get the Best Value
- Choose a fabricated deck (lasts longer than stamped).
- Match deck size to yard size: 42–50″ for <2 acres, 54–60″ for 2–4 acres.
- Factor in dealer support and warranty (important for long-term ownership).
- Consider electric options for lower fuel + maintenance costs.
Conclusion
Zero-turn mowers are not the cheapest upfront, but for the right homeowner, they’re the best mower for the money — saving hours of work, delivering a professional cut, and lasting for years. Whether you’re looking for a budget-friendly Toro TimeCutter, a mid-range Ariens Ikon, or a premium John Deere ZTrak, the options above cover every type of yard and budget.
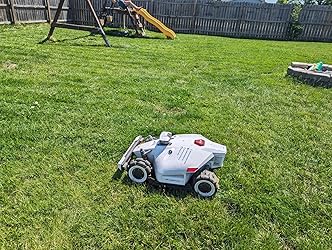
The Complete Guide to Electric Self-Driving Lawn Mowers
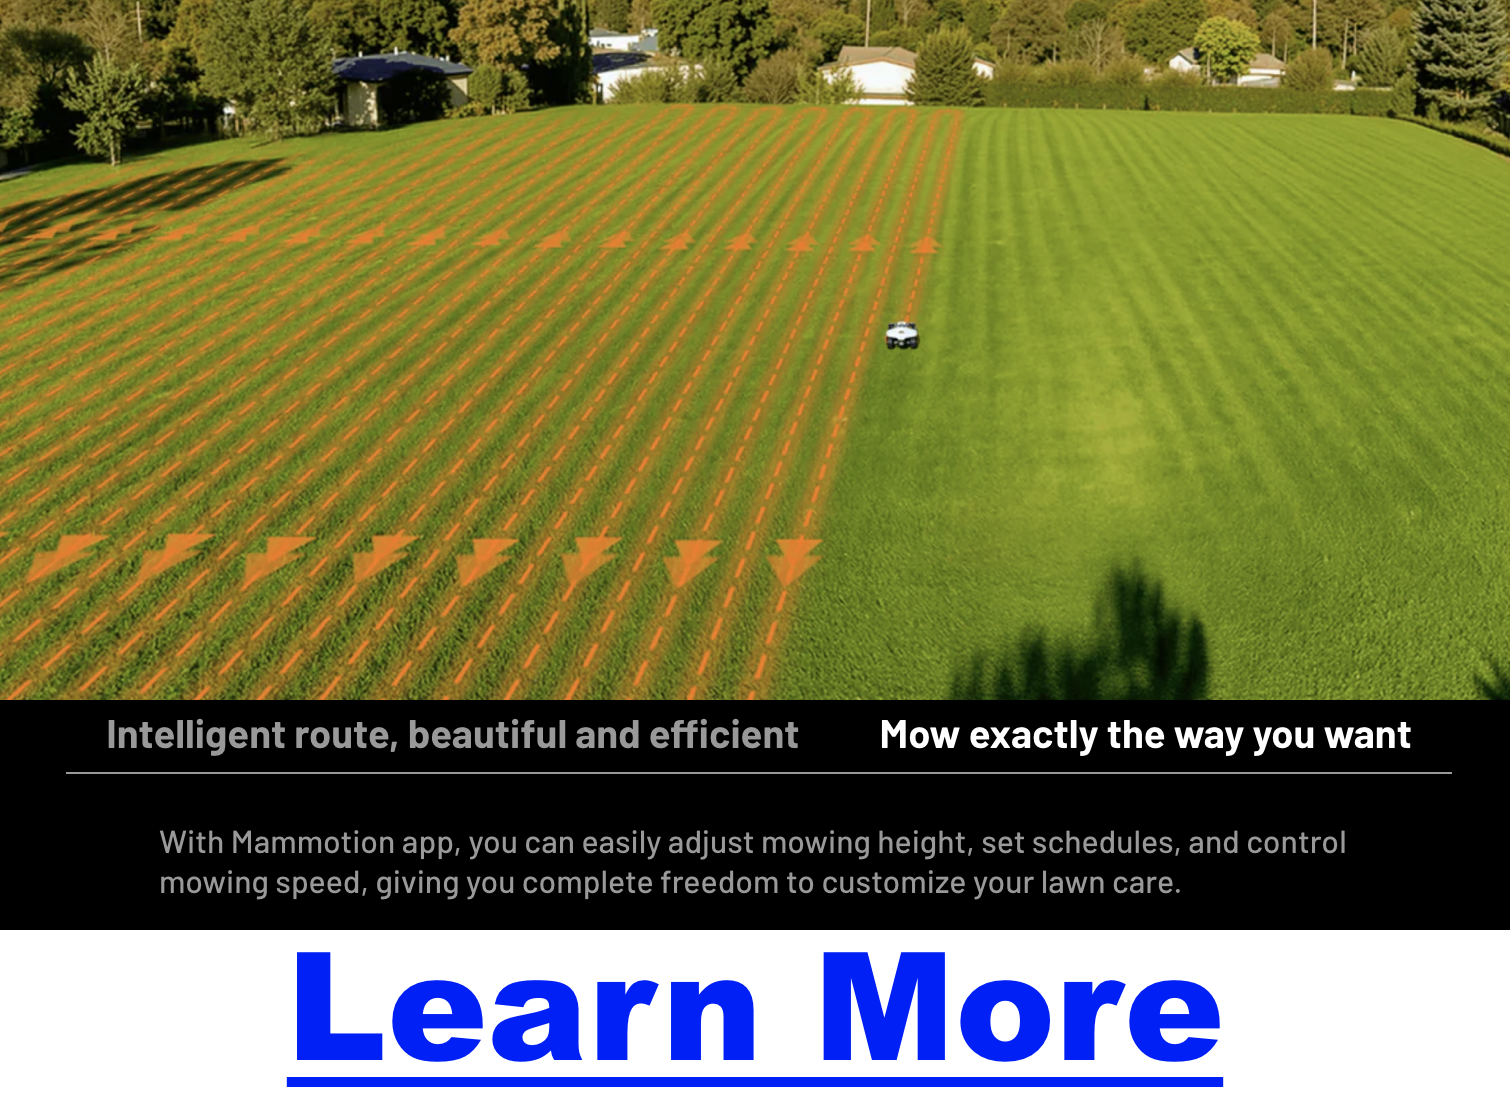
Mowing the lawn is one of the most common outdoor chores—and one many homeowners would rather avoid. Today’s electric self-driving mowers promise to change that. By combining battery power, GPS, AI vision, and smart apps, they automate lawn care while offering quieter, eco-friendly operation. In this guide, we’ll cover how they work, what to consider before buying, and which models stand out in 2025.
How Self-Driving Lawn Mowers Work
Self-driving lawn mowers operate much like a robotic vacuum for your yard. Here’s what makes them tick:
- Navigation Systems:
- Traditional: Boundary wires define the mowing area.
- Next-gen: Wire-free navigation with RTK GPS, AI cameras, or ultrasonic radar.
- Cutting Style: Multiple small blades cut grass continuously, leaving fine clippings that mulch the lawn naturally.
- Safety Features: Tilt/lift sensors stop blades instantly, obstacle detection prevents collisions, and PIN locks + GPS protect against theft.
Key Buying Considerations
Choosing a self-driving mower is about matching the machine to your lawn and lifestyle. Key factors include:
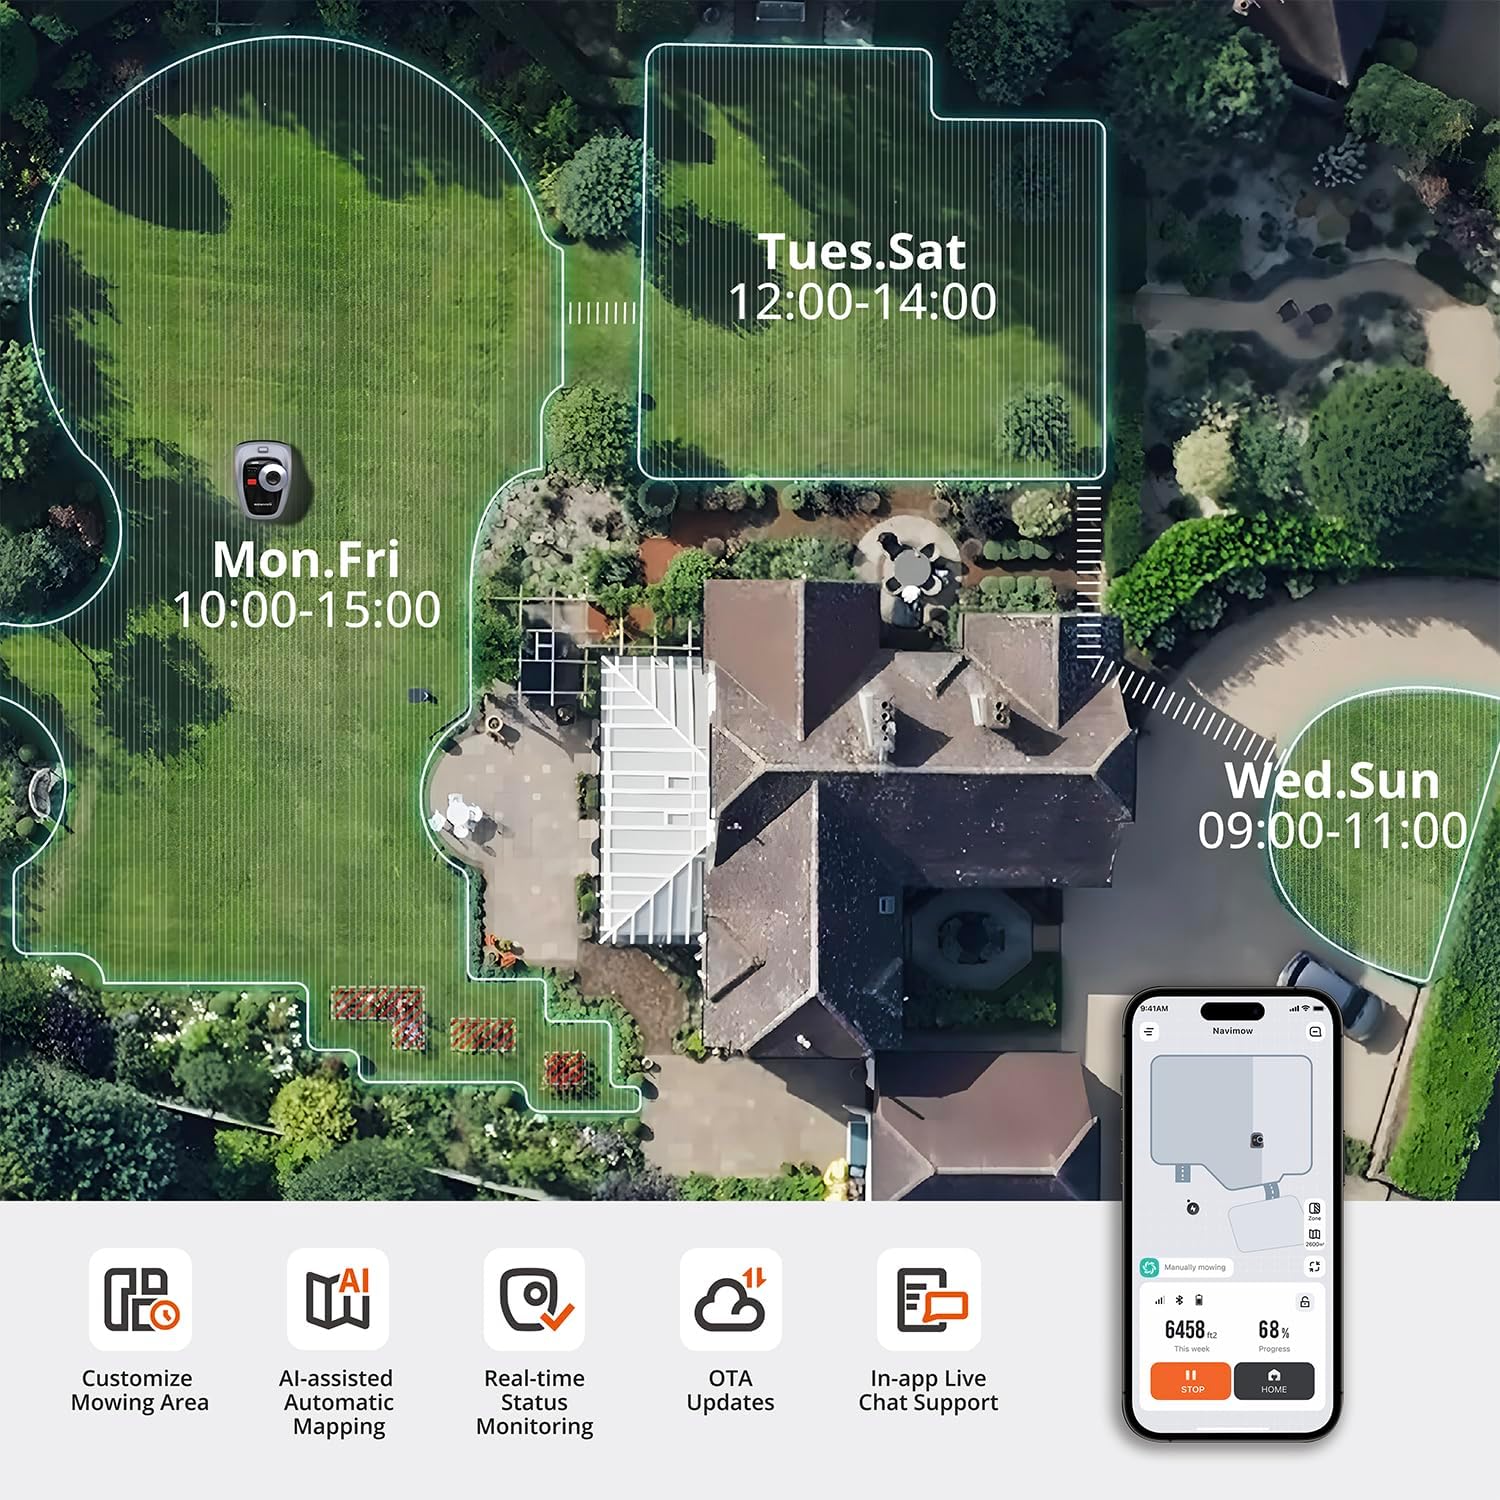
- Navigation & Setup: Do you want wire-free AI mapping or don’t mind installing boundary wires?
- Lawn Size: Models cover anywhere from ¼ acre to 3 acres.
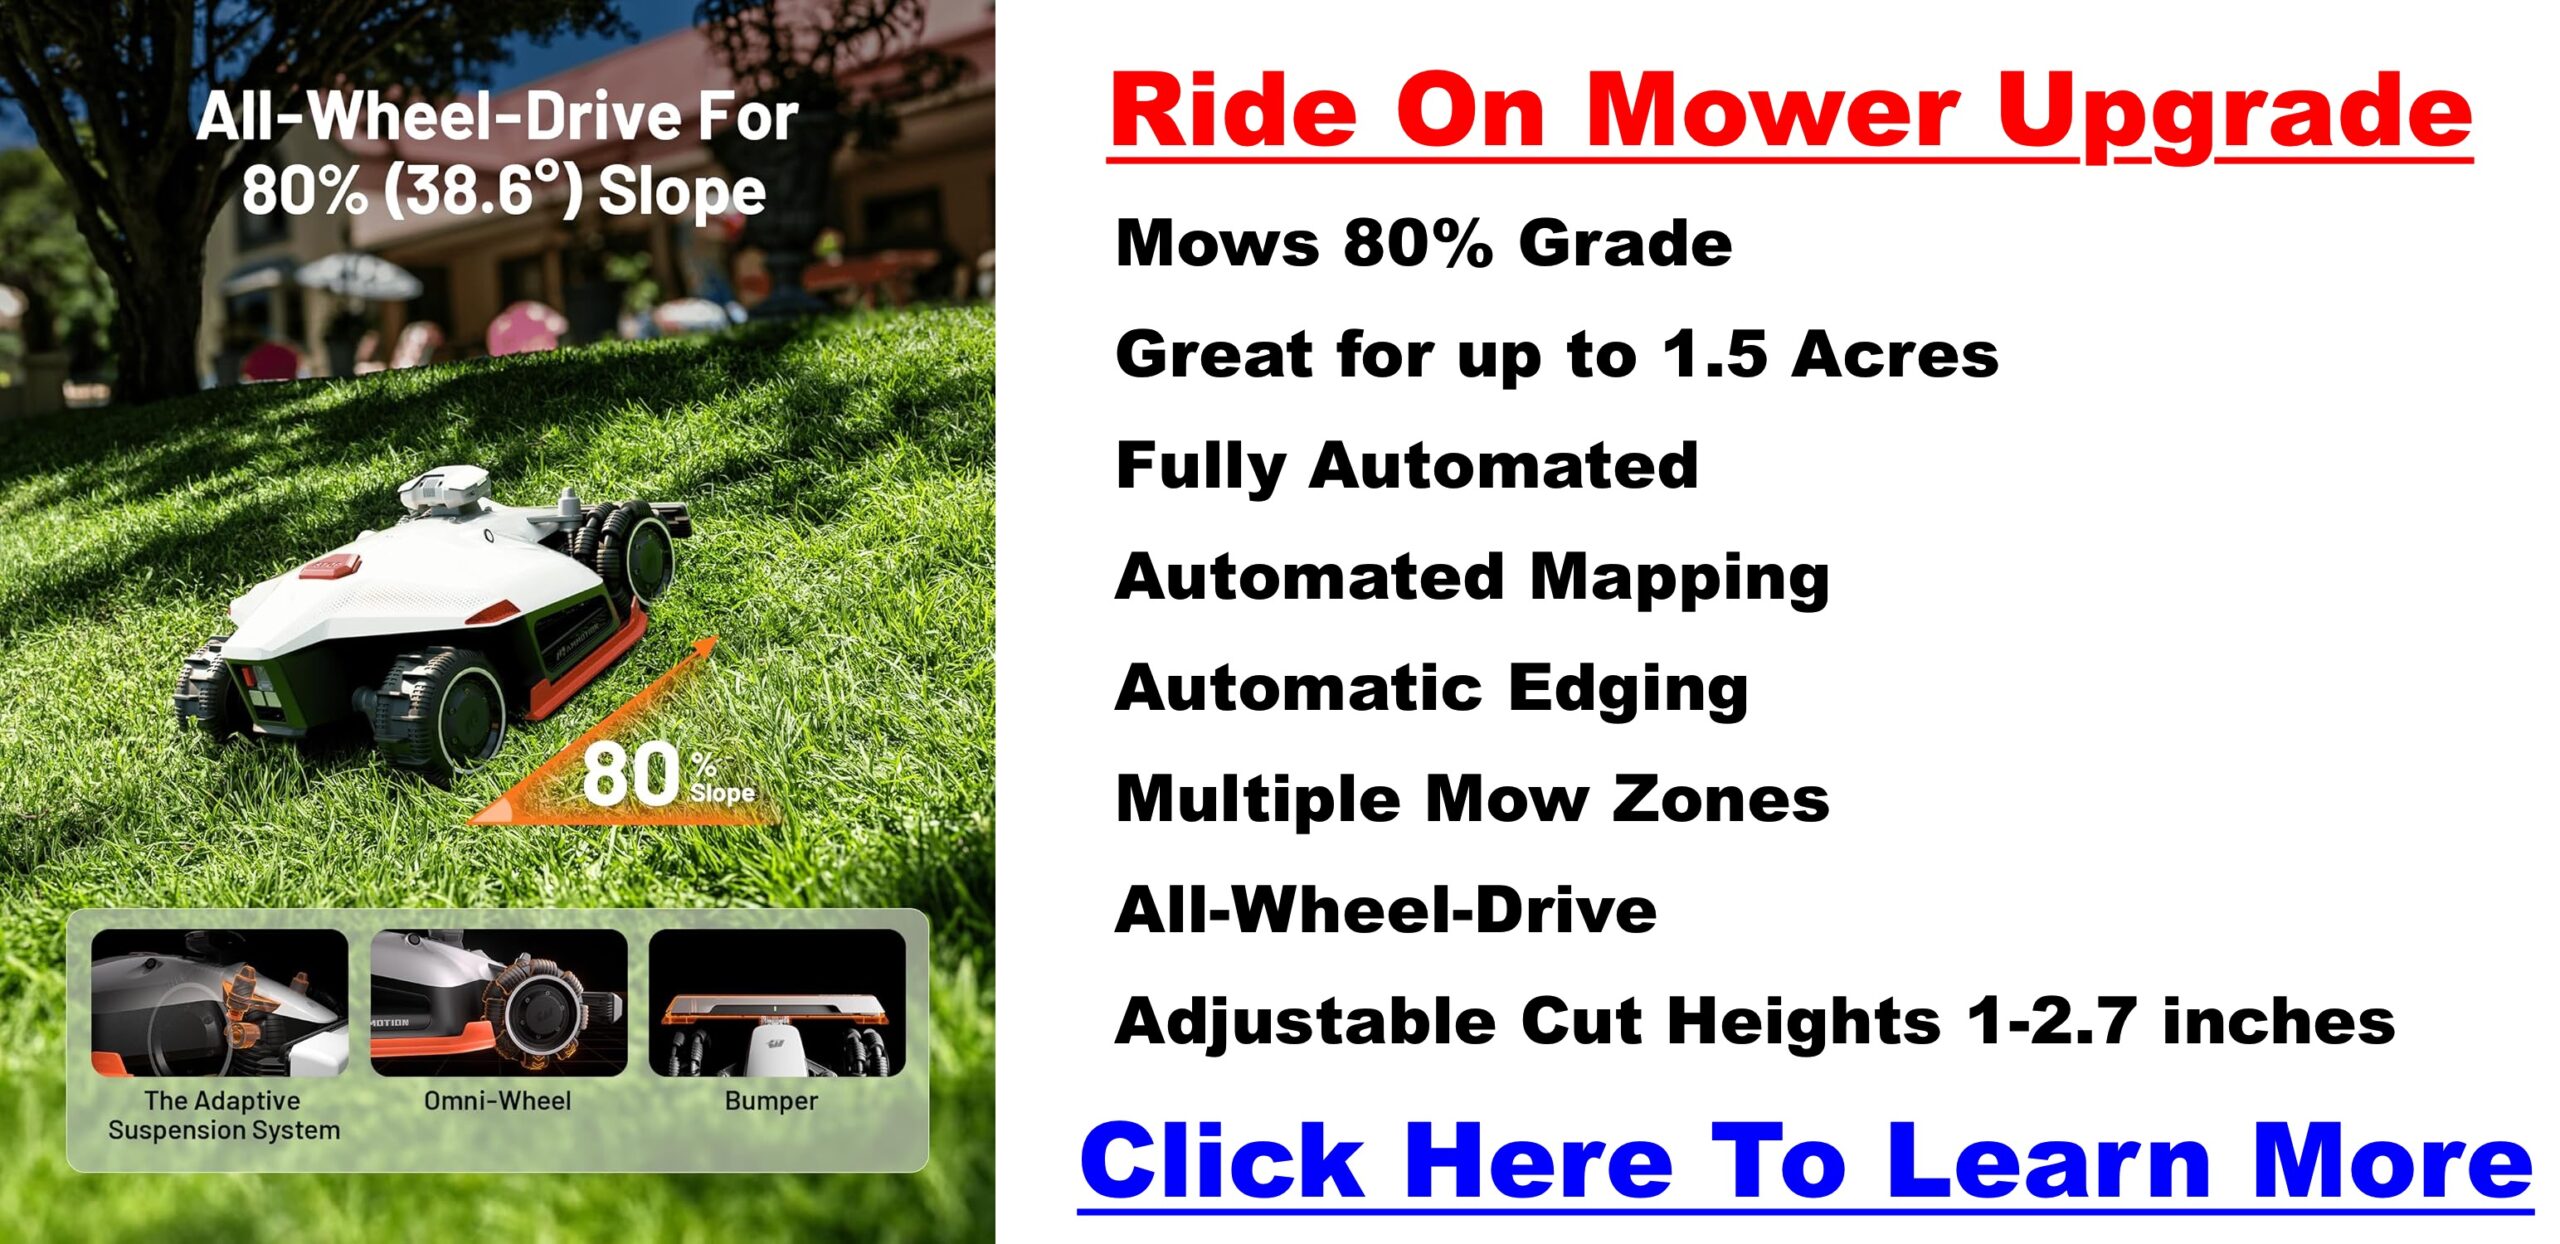
- Terrain & Slopes: Basic models handle 20–25° slopes; premium AWD units manage up to 35–38°.
- Cutting Performance: Check cutting width, height adjustment, and edge-trimming ability.
- Reliability & App Quality: A stable app with zone control and no-go zones makes a huge difference.
- Maintenance: Expect to change blades every few weeks and keep sensors clean.
- Safety & Security: Look for PIN codes, GPS tracking, and auto-stop features.
- Cost vs. Value: Prices range from $900 entry-level to $4,500+ for premium AWD units.
Best Electric Self-Driving Mowers in 2025
| Model | Coverage | Slope Rating | Navigation | Price Range | Best For |
|---|---|---|---|---|---|
| Segway Navimow i Series | Up to 0.7 acres | ~25° | Wire-free GPS + AI | $$$ | Tech-savvy homeowners, mid-sized yards |
| WORX Landroid Vision | ¼–½ acre | ~20° | Camera vision (no wires) | $$ | Small lawns, budget-friendly wire-free option |
| Husqvarna Automower 420iQ AWD | ~1 acres | 35° | GPS + AWD | $$$$ | Steep or complex lawns |
| Mammotion LUBA 2 AWD | 0.9–3 acres | 38° | GPS + AI vision + AWD | $$$$ | Large, uneven yards, slope-heavy terrain |
| Ecovacs Goat O1000 RTK | 0.25 acres | ~25° | Beacon + AI vision | $$$ | Smart home users, medium lawns |
FAQs: Common Questions About Self-Driving Mowers
Do I still need to trim the edges?
Yes. Most robotic mowers leave a narrow strip along fences or walls that needs manual trimming.
Can they mow in the rain?
Most are weather-resistant and can mow in light rain. For best results, schedule mowing on dry days.
Are they safe around kids and pets?
Yes. Safety sensors stop blades instantly if lifted or tilted. Still, supervision is recommended.
What if someone tries to steal it?
Premium models feature GPS tracking, PIN locks, and app alerts.
How noisy are robotic mowers?
Most operate at 55–65 dB—quiet enough to run overnight.
How much lawn can they mow?
Entry-level covers ¼ acre; high-end models like LUBA 2 AWD handle up to 3 acres.
How much maintenance is required?
Replace blades every 1–3 months, clean sensors/wheels regularly, and update software via the app.
Tips for Getting the Most Out of Your Mower
- Place the charging dock in an open, accessible spot.
- Schedule frequent mowing sessions for the healthiest lawn.
- Keep blades sharp for consistent cutting.
- Update firmware regularly for improved navigation.
- Mow side-to-side on slopes for stability.
Who Should (and Shouldn’t) Buy a Self-Driving Mower
- ✅ Best for: tech-savvy homeowners, yards under 3 acres, people who value convenience, quiet, and eco-friendliness.
- ❌ Not ideal for: heavily wooded yards, properties over 3 acres, or buyers who prefer low upfront cost.
Alternative: If your lawn is too large or rugged, a riding mower may still be the better option.
Conclusion & Recommendations
Electric self-driving mowers have evolved from niche gadgets into powerful, practical tools. Whether you choose the affordable WORX Landroid Vision, the wire-free Segway Navimow, or the slope-master Mammotion LUBA 2 AWD, you’ll save time, enjoy a quieter yard, and keep your lawn consistently healthy.
👉 Ready to automate your lawn care? Explore the latest models and see which fits your property best.
Stop Wasting Weekends: The Fastest Way to Mow Your Lawn (Without Lifting a Finger)
Most homeowners spend 1–2 hours every week mowing their lawns. That’s 60–100 hours a year — more than two full work weeks lost to grass cutting. Lawn care experts, from university turf programs to professional landscapers, agree: mowing is the most time-consuming part of lawn maintenance.
If you’ve ever thought, “There has to be a faster way,” you’re not alone. In this post, we’ll share expert-backed mowing strategies to save time, plus a look at smarter technology that can free you from mowing altogether.
Why Mowing Takes So Long
According to turfgrass specialists at the University of Minnesota Extension, mowing is time-intensive for reasons beyond just pushing the mower:
-
Setup time: pulling equipment from storage, fueling or charging, checking oil.
-
Overgrown grass: long blades clump and force extra passes.
-
Edges and cleanup: trimming fences, sidewalks, and bagging clippings often doubles the work.
-
Inconsistent schedule: skipping a week makes the next mow harder and longer.

25 Lawn Cutting Techniques to Save Time
These strategies are drawn from extension research, landscaper best practices, and homeowner experience:
-
Keep mower blades sharp for cleaner, faster cuts.
-
Mow when grass is dry to prevent clogging.
-
Start with a perimeter pass to create turning space.
-
Use straight-line stripes with slight overlap.
-
Alternate directions to reduce ruts.
-
Mow frequently so grass never gets out of hand.
-
Follow the one-third rule (don’t cut more than ⅓ at once).
-
Mulch clippings instead of bagging.
-
Raise mower height in summer to reduce stress.
-
Lower slightly in spring/fall for a crisp finish.
-
Adjust deck height based on conditions.
-
Break your yard into zones for efficiency.
-
Avoid extreme heat for energy savings.
-
Overlap wheel tracks to avoid missed strips.
-
Mow slopes side-to-side for safety.
-
Edge fences/beds first to cut trimming later.
-
Keep tires inflated and deck level.
-
Upgrade to a wide-deck mower if lawn size justifies it.
-
Clear debris first to avoid interruptions.
-
Maintain a consistent walking pace.
-
Aim for late-morning mowing (dew dried, heat low).
-
Keep blades balanced to reduce vibration.
-
Use self-propelled mowers for less effort.
-
Plan efficient mowing routes (rows or spirals).
-
Store equipment properly for faster setup next time.
Pro tip: The National Association of Landscape Professionals estimates that simply sharpening blades regularly can save 10–15% of mowing time each season.
Equipment Upgrades for Faster Mowing
Sometimes efficiency is about the machine, not just the method:
-
Self-propelled mowers: reduce fatigue and maintain a steady pace.
-
Wide-deck walk mowers (21–30″): cut more grass per pass, saving up to 30% on mid-size lawns.
-
Riding and zero-turn mowers: cut mowing time in half for large properties.
Lawn Mowing Options
Here’s how different mowing methods stack up side by side:
| Option | Best For | Time Savings | Upfront Cost | Ongoing Cost | Pros | Cons |
|---|---|---|---|---|---|---|
| Push/Manual Mower | Small lawns, budget | Minimal | $100–$200 | Low | Eco-friendly, low upkeep | Slow, physically demanding |
| Self-Propelled Gas/Electric | Small–medium lawns | 15–25% faster | $300–$600 | Medium | Less effort, versatile | Still time-consuming, fuel costs |
| Wide-Deck Walk Mower | Medium lawns | 25–30% faster | $500–$1,200 | Medium | Covers more per pass | Heavier, pricier |
| Riding/Zero-Turn Mower | Large lawns (½ acre+) | Up to 50% faster | $2,000–$6,000 | High | Fast, comfortable, pro look | Bulky, expensive |
| Robotic Mower (Basic) | Small–medium flat lawns | Automates 80–90% | $700–$1,500 | Low–Medium | Quiet, eco-friendly | Needs boundary wires |
| Robotic Mower (Premium/GPS) | Medium–large, complex lawns | Automates 90–100% | $2,000–$4,500 | Low–Medium | GPS mapping, slope handling | High upfront cost |
When You’re Still Spending Too Much Time
Even with sharper blades and bigger decks, mowing still takes up your weekends. Skip one session, and the grass is harder, taller, and more exhausting to tackle.
The real problem? You’re locked into a never-ending cycle — spring, summer, and fall.
The Smarter Way — Automating Lawn Care
This is where robotic mowers change the game.
-
Older models: required buried wires, ran randomly, struggled on slopes.
-
Newer models: GPS mapping, all-wheel drive, and edge precision for complex yards.
Instead of asking “How do I mow faster?” you can ask “How do I stop mowing altogether?”
Time Saved = Life Gained
The math is simple:
-
DIY mowing: 60–100 hours/year.
-
Hiring landscapers: $2,000+ annually.
-
Gas mower: $400 upfront + ongoing costs.
-
Robotic mower: one-time investment, pays itself off in a few summers.
That’s dozens of weekends returned to you.
FAQ: Common Questions About Saving Time Mowing
Will a robotic mower handle hills?
Yes — advanced models manage slopes of 30–40°.
Safe with kids and pets?
Yes — sensors pause blades when obstacles appear.
Do I need wires?
Some models do, but premium units use GPS or virtual perimeters.
What if it rains?
Most are weather-resistant and auto-pause in unsafe conditions.
Is it worth the cost?
For most homeowners, yes — the time savings and reduced service fees pay off quickly.
Conclusion
Yes, there are dozens of small ways to mow more efficiently. But the only way to truly reclaim your weekends is to step out of the mowing cycle altogether.
With modern automation, your lawn can look pristine — while you spend your time on family, hobbies, or rest.
That’s not just faster mowing. That’s smarter living.
Best Push Mowers for Rough Terrain: Everything You Need to Know
 If your lawn is bumpy, hilly, or full of thick patches of grass, a standard push mower just won’t cut it—literally. Rough terrain demands a mower that prioritizes traction, durability, and ease of use. In this guide, we’ll explore what makes a mower suitable for uneven yards, share the best models, and answer the most common questions homeowners ask before buying.
Key Factors to Consider on Rough Terrain
Before you choose a mower, here are the features that matter most:
Power & Performance
- Gas engines typically offer more torque for tall or wet grass.
- Battery mowers are catching up with high-voltage systems (56V–80V) that rival gas without fumes.
Traction & Stability
- Rear-wheel drive (RWD) is superior to front-wheel drive on slopes.
- Larger wheels (8–11 inches) make it easier to roll over roots and ruts.
Ease of Use
- A self-propelled drive system prevents fatigue on inclines.
- Adjustable speeds let you match the mower to your walking pace.
Durability
- Steel decks last longer on rough ground than plastic composites.
- Look for reinforced wheels and strong axles.
Maintenance
- Gas = oil changes, spark plugs, carburetors.
- Battery = recharging, occasional battery replacement.
Comfort & Ergonomics
- Adjustable handle heights reduce strain.
- Low-vibration designs improve comfort on bumpy lawns.
Safety on Slopes
- Push mowers are best for gentle to moderate slopes.
- For steep hills, consider small riding mowers or specialized equipment.
Cost vs. Value
- Gas models often cost less up front, but battery mowers save on fuel and maintenance over time.
Top Push Mowers for Rough Terrain (2025 Picks)
| Model | Type | Key Features | Best For | Price Range |
|---|---|---|---|---|
| Toro Super Recycler (Gas) | Gas, RWD | 163cc Briggs & Stratton, Personal Pace system, steel deck | All-around performance | $$$ |
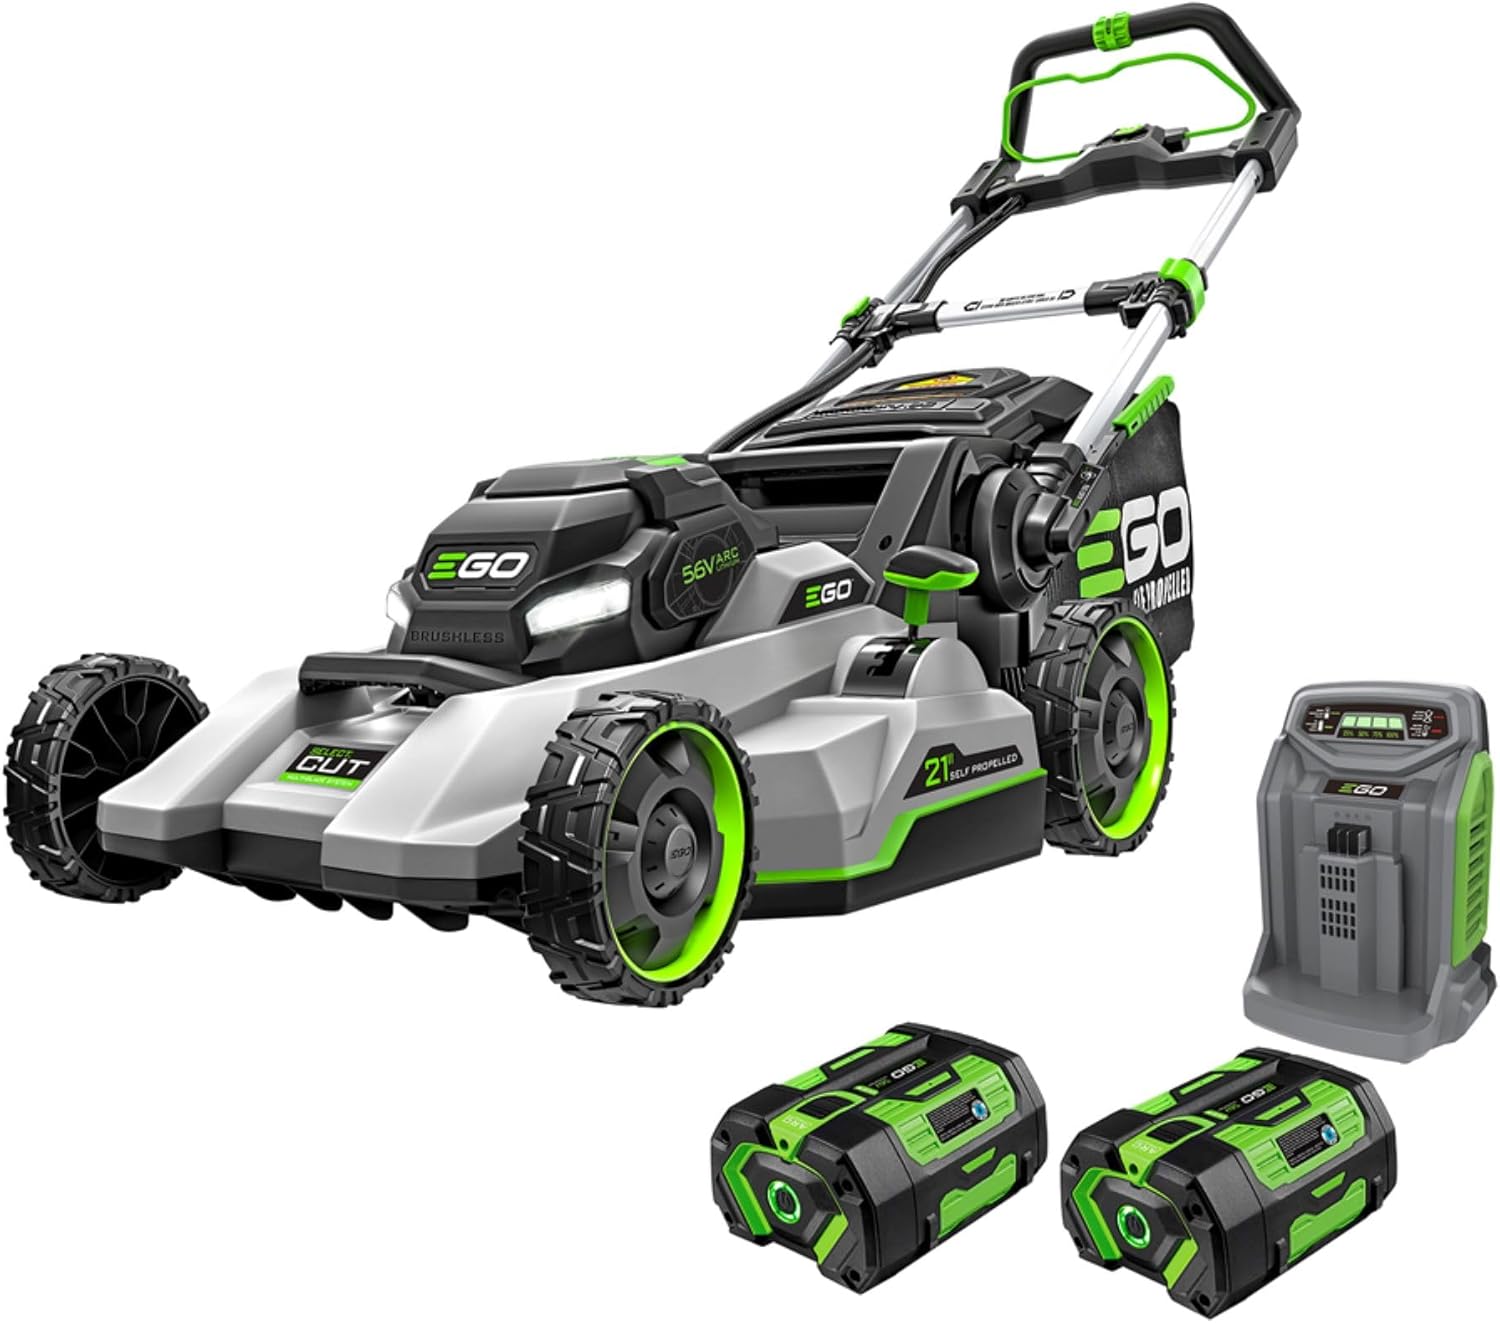
| Ego Power+ 21″ (Battery) | Battery, RWD | 56V brushless motor, variable speed, folds for storage | Quiet operation, eco-friendly | $$$ |
| Honda HRX217HZA | Gas, Hydrostatic | Hydrostatic drive, heavy-duty build, strong engine | Premium durability, large yards | $$$$ |
| Toro 60V Max Recycler | Battery, RWD | SmartStow vertical storage, strong runtime | Mid-sized rough lawns | $$$ |
| Greenworks Pro 80V 21″ | Battery, RWD | Lightweight, high-torque motor | Homeowners wanting easy handling | $$ |
FAQs for Rough Terrain Mowers
Can you use a push mower on hills?
Yes, but only on gentle to moderate slopes. Use side-to-side passes, not straight up and down.
What’s better for uneven ground—gas or electric?
Gas gives raw power; electric gives low maintenance. Choose based on grass thickness and yard size.
How big should mower wheels be for rough terrain?
At least 8 inches on the rear for better stability.
Do self-propelled mowers really help on slopes?
Yes—rear-wheel drive self-propelled systems make uphill mowing far easier.
Will battery mowers handle thick or wet grass?
Top-tier battery models (Ego, Greenworks Pro) perform well, but gas still has an edge in very heavy conditions.
What mower lasts the longest on rough yards?
Heavy-duty gas mowers like Honda HRX and Toro Super Recycler have reputations for longevity.
Tips for Mowing Rough Terrain Safely
- Mow across slopes, never directly up or down steep hills.
- Keep blades sharp to avoid bogging down in thick patches.
- Watch for hidden rocks, roots, or holes.
- Upgrade to a riding mower if your lawn is larger than ½ acre or steeply sloped.
Conclusion
The best push mower for rough terrain depends on your priorities:
- Toro Super Recycler → Best overall gas option.
- Ego Power+ 21” → Best cordless convenience.
- Honda HRX217HZA → Premium heavy-duty build.
With the right mower, you’ll save time, energy, and frustration while keeping your yard looking sharp—even on the bumpiest ground.
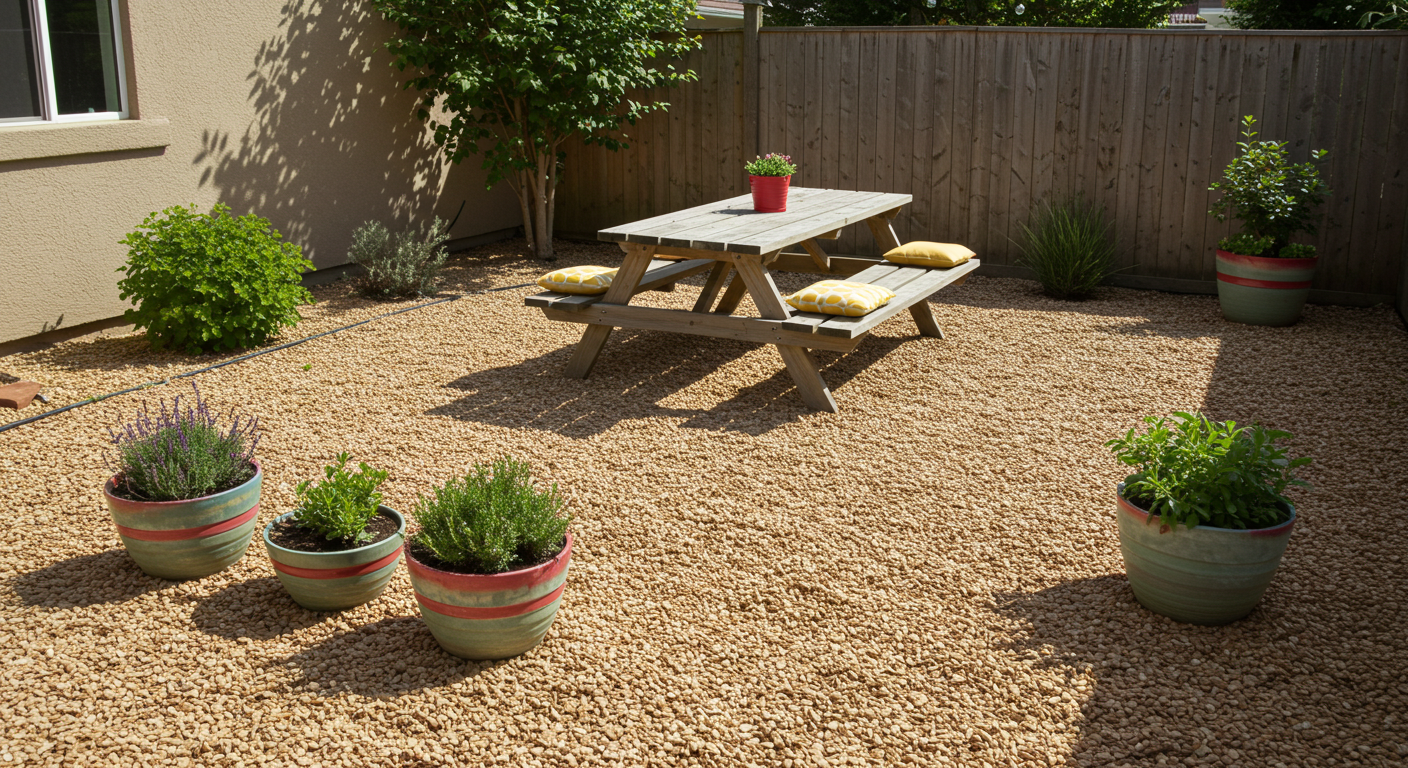
No Grass, No Problem: Pros and Cons of No-Grass Backyards
For generations, a lush green lawn has been the hallmark of a well-kept backyard. But times are changing. Rising water bills, stricter drought restrictions, and busy lifestyles have many homeowners rethinking whether grass is worth the effort. Across the country, more people are swapping traditional lawns for creative, low-maintenance alternatives.
If you’re considering going grass-free, it’s important to weigh both the advantages and the trade-offs. Below, we’ll explore the pros and cons of no-grass backyards, plus tips and expert insights to help you decide if this approach is right for you.
Why Homeowners Consider No-Grass Backyards
-
Water Costs: Lawns are thirsty. In some regions, they consume more water than any other residential feature.
-
Maintenance Burden: Mowing, edging, fertilizing, and reseeding add up in both time and money.
-
Eco Concerns: Many homeowners want to reduce pesticide use, chemical runoff, and carbon emissions from lawn equipment.
-
Lifestyle Needs: Entertaining spaces, edible gardens, and pet-friendly areas often work better without grass.

The Pros of a No-Grass Backyard
1. Low Maintenance
No mowing, edging, or reseeding. Fewer chemicals and less weekend yard work free up your time.
2. Water Conservation
Grass can guzzle thousands of gallons of water per year. Replacing it with gravel, native plants, or hardscapes significantly cuts water use.
3. Long-Term Cost Savings
While installation may cost more upfront, you’ll save on water bills, fertilizer, and lawn-care services over the years.
4. Design Flexibility
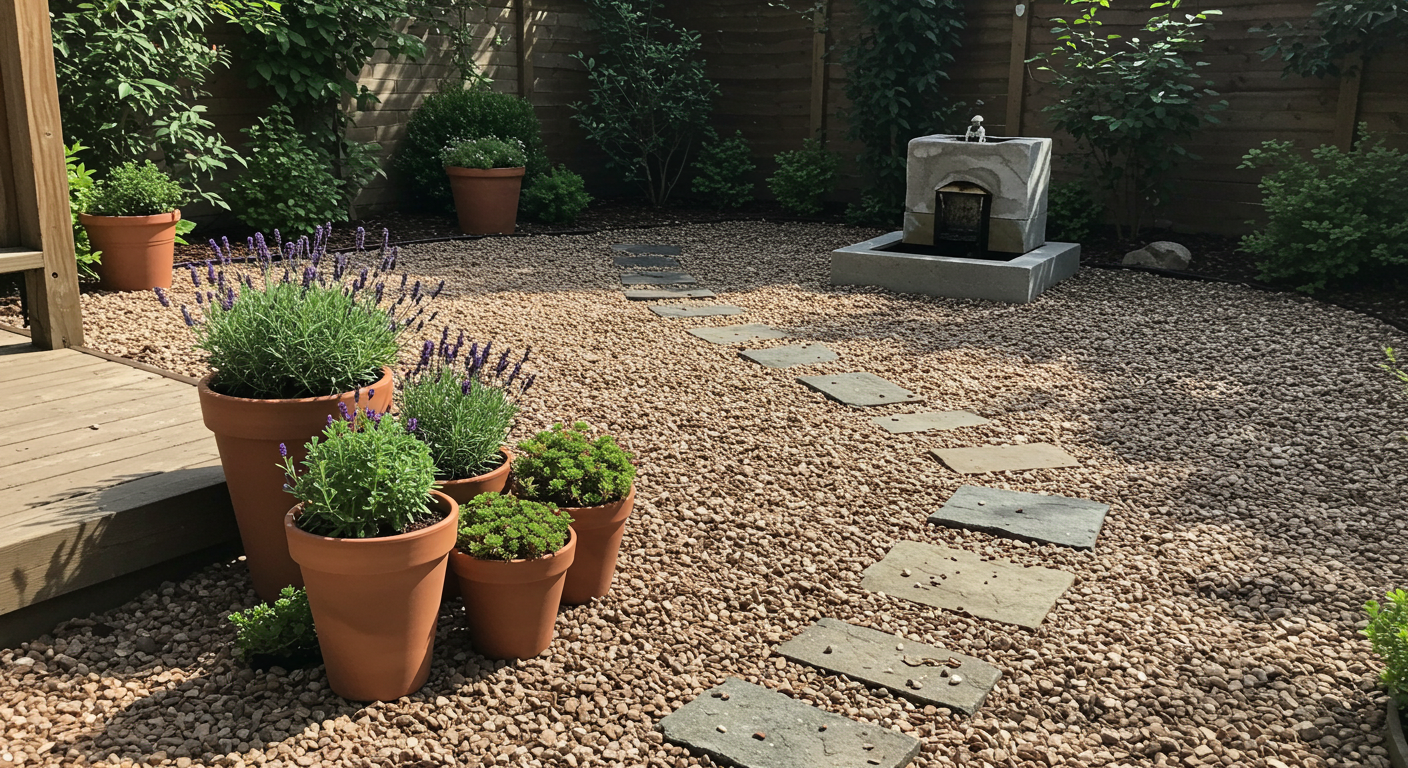
Without the limitations of a lawn, you can mix gravel paths, patios, raised beds, or drought-tolerant plantings to create outdoor “rooms.”
5. Eco-Friendly Benefits
Pollinator gardens and native plant beds support biodiversity. Permeable surfaces like gravel and pavers improve drainage and reduce stormwater runoff.
6. Year-Round Usability
Hardscaped areas can be enjoyed in all seasons, even when plants go dormant.
Click Here For Landscaping Ideas
The Cons of a No-Grass Backyard
1. Upfront Installation Cost
Pavers, stone patios, and composite decks often cost more to install than sod.
2. Heat and Comfort
Concrete, stone, and composite decking can become hot underfoot in summer. Gravel may be tough on bare feet.
3. Ongoing Maintenance (Different, Not Gone)
Weeds can creep through mulch or gravel if barriers aren’t installed. Organic mulches need replenishing every couple of years.
4. Pet and Kid Concerns
Dogs may track gravel or mulch indoors, and some pets prefer grass for play or bathroom needs. Hard surfaces can be less forgiving for falls.
5. Drainage and Runoff Issues
Poorly installed hardscapes can cause pooling water. Loose materials like gravel can wash away on slopes.
6. Loss of Green Softness
Lawns provide a cool, soft space for play and lounging. Without them, backyards can feel stark unless you add plantings for balance.
Comparing No-Grass Alternatives
| Alternative | Pros | Cons |
|---|---|---|
| Gravel/Stone | Affordable, drains well, rustic look | Can scatter, gets hot, tough for kids/pets |
| Mulch Beds | Cheap, good for plants, improves soil | Needs topping up, may attract insects |
| Composite Decking | Long-lasting, no watering, sleek | High upfront cost, surface heat |
| Native Plant Gardens | Eco-friendly, colorful, low water | Seasonal changes, some upkeep |
| Artificial Turf | Always green, low upkeep | Expensive, holds heat, not eco-friendly |
Who Should (and Shouldn’t) Go Grass-Free
Best suited for:
-
Busy homeowners who want less yard work.
-
Residents of drought-prone areas.
-
Families who prioritize entertaining, outdoor kitchens, or edible gardens.
Not ideal for:
-
Parents with young kids who need play lawns.
-
Dog owners who rely on grass potty areas.
-
People in climates where soft greenery is a seasonal luxury.
Expert Tips for Transitioning Away From Grass
-
Start small: Replace one section of lawn before tackling the entire yard.
-
Think regionally: Choose materials and plants suited to your climate.
-
Plan for drainage: Grade surfaces properly to prevent pooling.
-
Add edging: Steel, stone, or composite edging keeps gravel and mulch in place.
-
Balance hard and soft: Mix patios with plant beds so the yard still feels alive.
Frequently Asked Questions
What is the cheapest alternative to grass?
Gravel and mulch are typically the most budget-friendly, especially for large areas.
Does removing grass hurt property value?
Not necessarily. Well-designed no-grass yards often increase curb appeal, particularly in drought-sensitive regions.
Are no-grass yards pet-friendly?
Yes, but choose materials wisely. Dogs may prefer decomposed granite or designated potty zones with synthetic turf.
How do you prevent weeds in a gravel yard?
Install a compacted base and weed barrier fabric, then refresh gravel as needed.
Is artificial turf better than going grass-free?
Artificial turf looks green year-round, but it can be expensive, hot, and less eco-friendly than native plant landscaping.
Conclusion
No-grass backyards aren’t just a trend — they’re a practical response to modern challenges like water conservation, high maintenance costs, and eco-conscious living. While they offer impressive benefits, they also come with trade-offs. The key is to balance hardscapes, plants, and usability so your outdoor space remains both functional and inviting.
If you’re ready to make the switch, start small, choose the right materials for your climate, and design with your lifestyle in mind. Your backyard can be beautiful, low-maintenance, and grass-free.
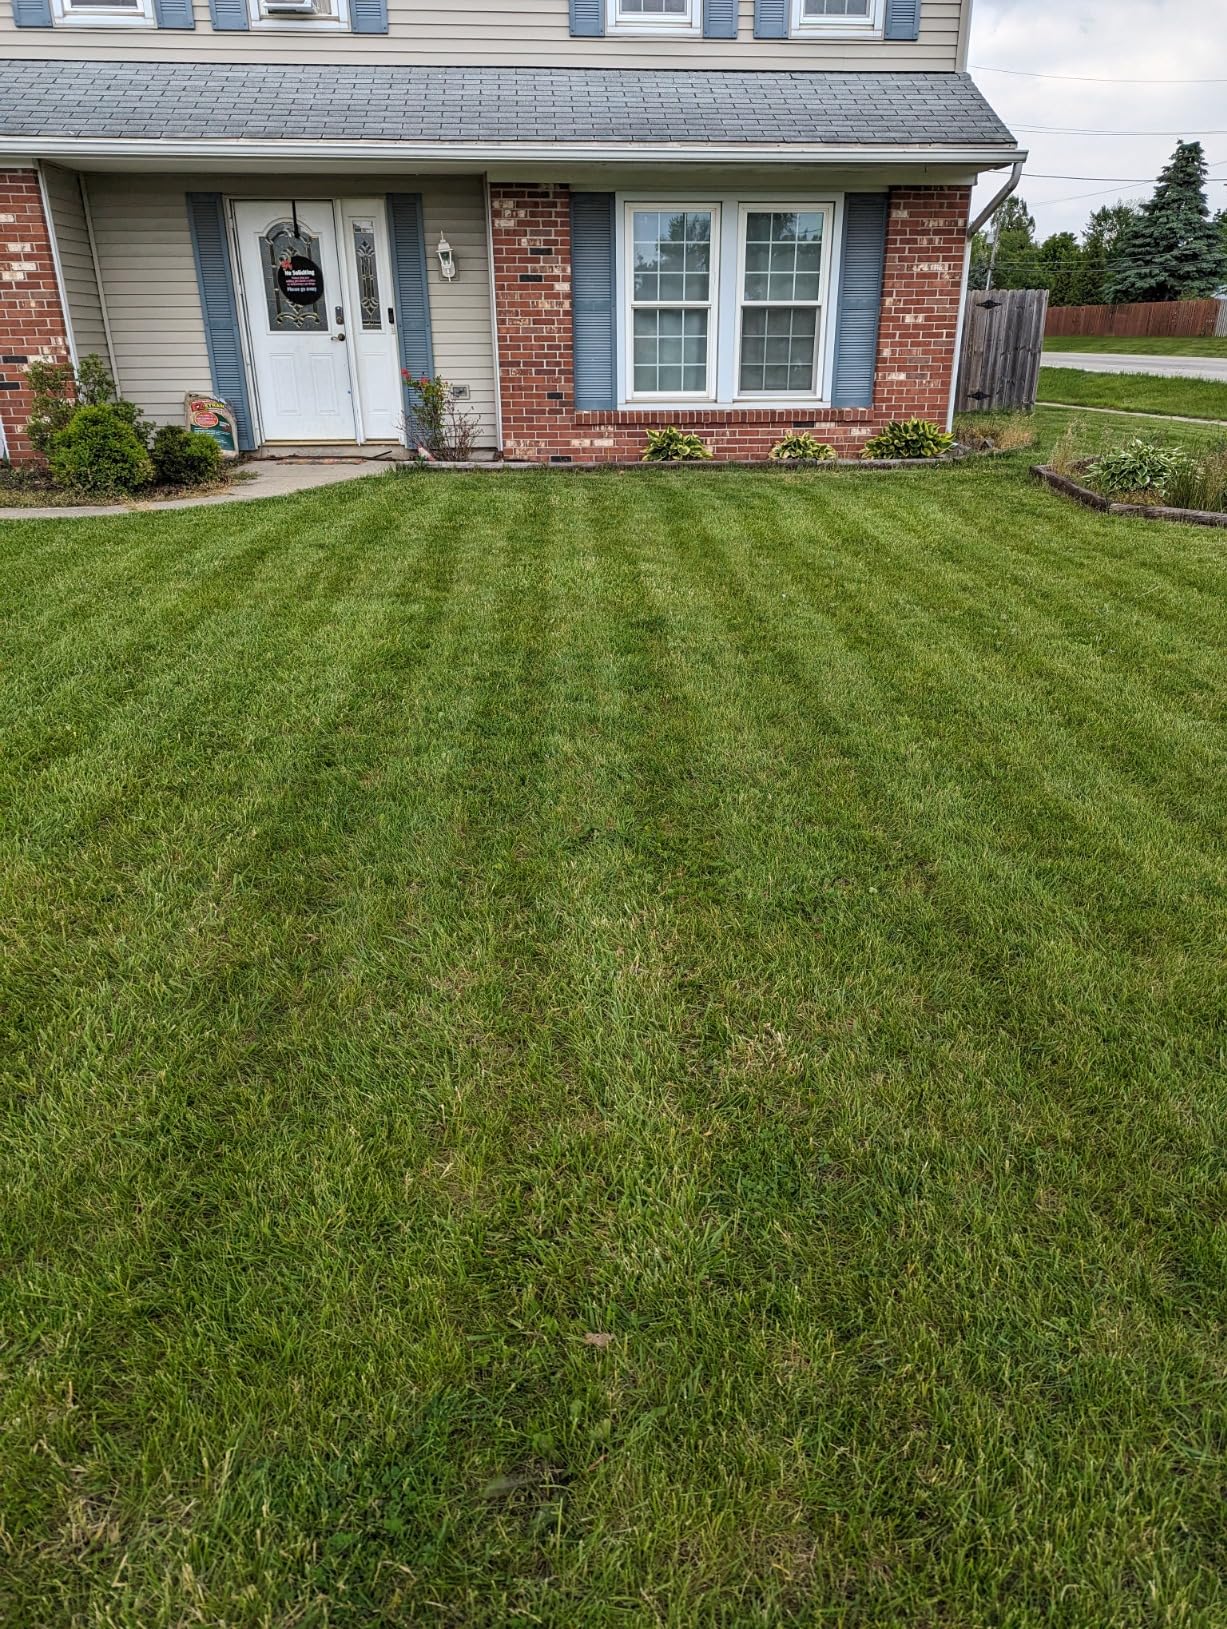
The Complete Guide to Lawn Striping: How to Get That Stadium Look at Home
There’s nothing quite like a freshly mowed lawn with crisp stripes running across it. That sports-field look isn’t just for professional groundskeepers—you can create it at home too. Lawn striping is both an art and a science, combining healthy turf, smart mowing techniques, and a little bit of planning. In this guide, you’ll learn exactly how to achieve those bold stripes that make your lawn look like it belongs in a stadium.
The Science Behind Lawn Stripes
Lawn stripes are an optical illusion, not different shades of grass. When grass is bent in one direction, it reflects sunlight differently than grass bent the other way. Grass bending away from you looks lighter, while grass bending toward you looks darker. Alternating these directions with each mowing pass creates the striped effect.
This is why lawn stripes look more vivid when viewed from a higher angle, like a porch or window. From ground level, the effect is less dramatic.
Grass Height, Health, and Type
- Ideal mowing height: For most home lawns, cutting at 2.5–3.5 inches produces the boldest stripes. Taller grass bends more dramatically.
- Healthy lawns stripe better: Fertilization, watering, and weed control build a thick turf that reflects more light.
- Grass type matters: Cool-season grasses (Kentucky bluegrass, ryegrass, fescues) bend easily and hold stripes well. Warm-season grasses (Bermuda, Zoysia) are stiffer and show lighter striping.
Equipment and Tools
- Sharp mower blades: Clean cuts reflect more light. Dull blades tear grass, muting the effect.
- Mower rollers or striping kits: These press grass blades down after cutting, deepening the contrast.
- DIY options: A PVC pipe filled with sand, or even a broom dragged behind your mower, can act as a roller.
Does the Type of Mower Matter?
- Reel mowers: Common in golf courses and sports fields; naturally create sharp stripes due to rollers.
- Rotary mowers: Most homeowners use these; they can stripe well with a roller attachment.
- Zero-turn mowers: Excellent for large lawns, allowing precise turns and consistent lines.
- Push vs. ride-on: Both can stripe, but ride-on and zero-turn mowers maintain straighter, more consistent lines.
- Robotic mowers: Entry-level models mow randomly and too short for striping. Premium models like the Mammotion Luba 2 AWD can mow in defined straight lines with GPS, making faint striping possible.
Bottom line: For bold stripes, a mower with a roller (built-in or attached) is the key.
Patterns You Can Try
- Straight Stripes: The simplest design; pick a landmark and mow directly toward it.
- Checkerboard: Mow straight stripes, then repeat at 90°.
- Diamonds: Like a checkerboard, but on a diagonal.
- Waves or curves: Freeform striping for a stylish look.
- Circles or spirals: Start from a tree or flagpole and work outward.
Pro tip: Always mow the perimeter first for clean edges.
Field vs. Home: Mowing Height Comparison
| Type of Turf | Typical Height | Purpose |
|---|---|---|
| Baseball outfield | 1–2 in | Smooth play, uniform look |
| Soccer/Football field | 1.5–2.5 in | Cushion, ball roll |
| NFL / Pro football fields | 0.5–1 in | Precision play |
| Home lawns (striping) | 2.5–3.5 in | Health + bold striping |
Striping on Slopes and Hills
Yes, you can stripe hills too—just take extra care:
- Mow across slopes, not up and down, to prevent slipping.
- Stripes on hills may appear less bold, depending on the viewing angle.
- Rollers don’t press evenly on slopes; lighter attachments work better.
- Taller grass on slopes bends more, enhancing the effect.
Maintenance Tips
- Alternate directions weekly to avoid compaction and grass lean.
- Avoid mowing wet grass, which clumps and flattens.
- Use “Y” turns instead of sharp U-turns to prevent wheel damage.
Viewing Angle and Impact
Your stripes will always look boldest from above—like in stadiums where fans watch from stands or on TV cameras. At home, the effect shines when viewed from windows, decks, or even with a drone photo.
Final Takeaway
Lawn striping is part turf science, part mowing technique, and part creativity. With the right mowing height, a healthy lawn, and a roller-equipped mower, you can transform your yard into a showpiece. Experiment with patterns, care for your turf, and enjoy the satisfaction of having a lawn that looks like a professional sports field.
Best Mini Ride-On Mowers: Compact Power for Small Lawns
Click to see our favorite small ride-on mower
Mini ride-on mowers are becoming increasingly popular among homeowners who want the convenience of a riding mower without the bulk, cost, or storage issues of a full-size tractor. Designed for smaller yards and tight spaces, these machines deliver plenty of cutting power in a compact, maneuverable package. In this guide, we’ll explore what makes mini ride-ons unique, their pros and cons compared to regular riding mowers, and the best models to consider for 2025.
What is a Mini Ride-On Mower?
A mini ride-on mower is essentially a scaled-down small version of a traditional lawn tractor. With deck sizes typically between 24 and 30 inches, smaller engines, and lightweight frames, they’re ideal for:
- Yards under 1 acre.
- Lawns with narrow gates or lots of obstacles.
- Homeowners with limited garage or shed space.
Unlike push mowers, mini riders save time and effort, and unlike full-size riders, they’re budget-friendly, compact, and easy to store.
Key Advantages of Mini Ride-On Mowers
- Compact Size: Fits through narrow gates and into small storage spaces.
- Maneuverability: Perfect for lawns with trees, sheds, or gardens.
- Affordability: Lower price point compared to full-size riders.
- Ease of Use: Simple controls and lighter weight.
Limitations Compared to Regular Riding Mowers
- Smaller Engines: Usually 190–380cc (~10–12 HP), less suited for thick or wet grass.
- Narrow Cutting Decks: 24–30 inches, which means longer mowing times for larger yards.
- Slopes & Terrain: Best on flat lawns; traction and stability are limited on hills.
- Fewer Features: Fewer attachments and comfort upgrades than full-size riders.
Best Mini Ride-On Mower Models
1. Victa Mini‑Ride 950HC
- Transmission: Hydrostatic (smooth, foot-operated)
- Deck: 24″ (60 cm)
- Features: Reverse Mowing Operation (RMO), 130L grass catcher
- Best for: Homeowners who want smooth control in tight spaces.
2. Victa Mini‑Ride 950G
- Transmission: Peerless 4-speed manual with reverse
- Deck: 24″ (60 cm)
- Features: Compact size, simple controls
- Best for: Budget-conscious buyers who prefer manual operation.
3. Rover Mini Rider Hydro (382/30)
- Engine: 382cc OHV Rover engine
- Deck: 30″ (76 cm)
- Transmission: Hydrostatic
- Best for: Slightly larger yards needing a wider cut.
4. Cub Cadet Mini‑Riders (LR1 / LR2 Series)
- Deck: 76 cm (30″)
- Transmission: Transmatic (shift-on-the-go, 6 speeds)
- Features: 200L rear catcher, mulching/discharge modes, step-through frame
- Best for: Premium features and versatility in a compact form.
Comparison: Mini vs Regular Riding Mowers
| Feature | Mini Ride-On | Regular Riding Mower |
|---|---|---|
| Cutting Deck Size | 24–30 inches | 38–60+ inches |
| Engine Power | 190–380cc (10–12 HP) | 500cc+ (18–25 HP) |
| Maneuverability | Excellent in tight yards | Good, but less nimble |
| Storage Needs | Small garages/sheds | Requires larger storage |
| Hill Capability | Limited to flat/slight | Handles moderate slopes |
| Price Range | $1,200–$2,000 | $2,500–$5,000+ |
Click to see our favorite mini ride-on mower
How to Choose the Right Mini Ride-On
- Yard Size: Best under 1 acre.
- Layout: Choose mini riders if you have narrow gates or obstacles.
- Terrain: Stick to flat or gently sloping lawns.
- Budget & Comfort: Hydrostatic (Rover, Victa HC) = smoother ride. Manual (Victa G) = cheaper.
FAQs About Mini Ride-On Mowers
Are mini ride-ons powerful enough for thick grass?
They handle normal growth well but may struggle with very tall, wet, or dense grass.
Can you use them on hills?
They’re safest on flat or gently sloping lawns. For steep slopes, stick to walk-behinds or specialized slope mowers.
Do they mulch clippings?
Yes, many models (like Cub Cadet LR1/LR2) offer mulching, bagging, or side discharge modes.
How long do they last compared to full-size riders?
With proper maintenance, minis can last just as long, though they are less durable under heavy-duty use.
Conclusion & Recommendations
Mini ride-on mowers are the perfect middle ground between push mowers and full-size riding tractors. If your lawn is under an acre, mostly flat, and full of obstacles, a mini ride-on could be the smartest investment for comfort and efficiency.
- Best budget option: Victa Mini-Ride 950G.
- Best smooth operator: Rover Mini Rider Hydro.
- Best premium option: Cub Cadet LR1/LR2 Series.
For homeowners who want riding comfort without the bulk, mini ride-ons deliver big value in a small package.