Matt
Does Grass Spread on it’s Own? A Guide, By Grass type
Picture-perfect lawns seem like a distant dream. You fight those stubborn bare spots, only to find your carefully cultivated grass creeping into the flowerbeds. Understanding how different grasses spread is the key to achieving the lawn of your dreams – whether lush, full coverage, or perfectly manicured borders.
Grass Spreading 101
Not all grasses are created equal regarding how they fill your lawn. Some diligently spread to cover every inch, while others stayed within their designated area. Let’s break down the main ways your grass might be expanding its territory:
- Spreading Underground: Rhizomes (Kentucky Bluegrass)
- Think of rhizomes as tiny underground stems. Kentucky bluegrass sends out these rhizomes, which then sprout new grass shoots. This results in a slow but steady spread.
- Spreading on Top: Stolons (Zoysia, St. Augustine, Centipede)
- Stolons are like above-ground runners. These grasses send out long shoots that root at various points, creating new plants. This leads to a much faster spread than rhizome grasses.
- Staying Put: Bunch Grasses (Fescue)
- Fescue grasses grow in clumps or bunches. They don’t spread outward aggressively, relying mainly on seed dispersal for new growth.
- The Wild Card: Seed Dispersal (Ryegrass)
- Ryegrass and many other types are spread primarily by seed. Wind, animals, and your lawnmower can carry the seeds to new areas, leading to unexpected patches.
Filling Those Bare Spots
Those bare patches are every lawn enthusiast’s nemesis. But before you toss down some seeds, let’s ensure the best possible results:
- Optimal Seeding Conditions
- Cool-season grasses (Kentucky bluegrass, fescue, ryegrass): Fall is prime time. The soil is still warm for germination, but the air is cooler, reducing competition from weeds.
- Warm-season grasses (zoysia, St. Augustine, etc.): Seed in late spring or early summer when the soil has fully warmed.
- Avoid extremes: Don’t seed too close to winter (frost risk) or during the peak of summer heat.
- Seeding Tips
- Invest in quality: Choose seeds specifically formulated for your grass type and climate zone.
- Prep the soil: Lightly rake bare spots to ensure good seed-to-soil contact.
- Protection: Minimize foot traffic on seeded areas, and water gently to avoid washing away seeds.
- The Importance of Healthy Soil
- Break it up: Aerate compacted soil to improve water and nutrient flow, promoting deeper root growth. Learn more about aerating.
- Feed your lawn: A consistent lawn care program, including fertilization, supports a thick, healthy lawn that naturally resists bare spots.
When the Grass Gets Too Ambitious
Sometimes, the very qualities that make grasses like zoysia or St. Augustine desirable – their vigorous spread – can become problematic. If your lawn is starting to invade flowerbeds or creep into your neighbor’s yard, here’s a quick overview of ways to control the spread:
- Physical Barriers: Installing deep edging (6 inches or more) made of plastic, metal, or concrete can create a boundary that stolons struggle to cross.
- Targeted Herbicides: Some herbicides are specifically designed to stop certain grasses without harming other plants. Use these with extreme caution and follow label instructions precisely.
- Manual Removal: For small incursions, you may be able to carefully dig out the grass and its stolons. This is labor-intensive but effective for limited areas.
When to Call in the Reinforcements
While DIY lawn care is rewarding, sometimes seeking professional help is wise. Here are a few situations where a lawn care expert might be the best solution:
- Large Bare Areas: If you have extensive patches of missing grass, a professional can quickly assess the situation and recommend the most efficient reseeding method.
- Severe Soil Problems: Issues like extreme compaction, poor drainage, or significant nutrient deficiencies may require specialized equipment and treatments that a lawn care company can provide.
- Grass Identification: If you’re unsure what type of grass you have, a pro can help. This knowledge is crucial for choosing the right management approach.
- Time Constraints: Sometimes, life gets busy! If you don’t have the time or inclination for extensive lawn repairs, outsourcing the work can be a stress-saver.
Now that you’re armed with the secrets of grass growth, you’re well on your way to achieving your lawn goals. Whether you desire a lush carpet of green or a perfectly contained space, understanding how your grass spreads is the key to success.
The Complete Seasonal Fertilization Plan for a Healthy, Resilient Lawn
Maintaining a lush, vibrant lawn isn’t just about mowing—it’s about feeding your grass strategically throughout the year.
After years of testing fertilizers on cool-season lawns like Kentucky bluegrass and fescues, and warm-season lawns like Bermudagrass and Zoysia, I’ve found that timing, soil balance, and moderation make all the difference.
Below is a research-backed, experience-tested fertilization plan that aligns with recommendations from university turfgrass programs across the U.S.
Click here to see my favorite liquid lawn fertilizer with sprayer
Why a Strategic Fertilization Plan Matters
Fertilizing isn’t about dumping nutrients—it’s about helping your lawn recover, grow, and store energy for the seasons ahead.
A proper plan will:
-
Strengthen roots and improve drought tolerance
-
Boost color and density naturally
-
Reduce weeds by thickening turf
-
Improve recovery from foot traffic and weather stress
🌱 Early Spring Fertilization Plan
Why Fertilize in Early Spring
After winter dormancy, grass begins to wake up hungry. As soil temperatures reach about 55°F, new roots start forming, and your lawn craves nutrients to rebuild energy reserves.
Early-spring fertilization helps:
-
Kickstart root development for stronger nutrient uptake
-
Jumpstart growth for faster green-up
-
Naturally suppress weeds through thicker turf
-
Aid recovery from winter damage
Pro Tip: In cool-season regions (Zones 5–7), the first application typically falls in mid-April—right after the second mowing of the year.
Step-by-Step Plan
1. Soil Test First
Use a home test kit or send a sample to your local extension office. Identify nitrogen (N), phosphorus (P), and potassium (K) needs before applying anything.
2. Choose the Right Fertilizer
Select a slow-release, balanced fertilizer (e.g., 20-5-10).
Nitrogen fuels growth, while phosphorus and potassium support roots and stress tolerance.
3. Timing & Application
Apply when grass is dry and actively growing. Use a broadcast or drop spreader for even coverage and follow the bag’s recommended rate.
4. Water It In
If rain isn’t expected within 24 hours, lightly water the lawn to help nutrients reach the root zone.
5. Monitor Growth
Expect increased growth within 10–14 days. Sharpen mower blades and trim only one-third of the grass blade per cut.
My Recommendation: Click here to see my favorite liquid lawn fertilizer with sprayer.
(Affiliate disclosure: I only recommend products I’ve personally tested and seen results from.)
🌿 Late Spring Fertilization Plan
Why Fertilize in Late Spring
By late spring, your lawn has used up much of its early-season nutrition. Fertilizing now helps maintain color, density, and resilience before summer stress arrives.
Benefits include:
-
Sustained growth and rich color
-
Strengthened cell walls for heat resistance
-
Improved drought and traffic tolerance
-
Natural weed suppression through dense turf
Step-by-Step Plan
1. Timing:
Apply 6–8 weeks after your early-spring feeding, usually late May to early June.
2. Fertilizer Choice:
Use a fertilizer with a slightly higher potassium content (for stress resistance), like a 24-0-10 formula.
If crabgrass or broadleaf weeds are a concern, use a combination weed-and-feed product approved for your grass type.
3. Watering:
Water within 24 hours to help nutrients move into the root zone.
4. Mowing Practices:
Mow regularly—never remove more than one-third of the blade height—and keep blades sharp for clean cuts.
5. Observation:
Look for uniform green color and steady growth. Yellowing may signal nitrogen deficiency or compacted soil.
☀️ Summer Fertilization Plan
Why Fertilize in Summer
Summer heat can be brutal on lawns.
While many homeowners skip feeding during the hottest months, a light, carefully chosen summer fertilizer can help grass survive stress and recover faster.
Benefits include:
-
Improved heat and drought tolerance
-
Enhanced recovery after heavy foot traffic
-
Reduced pest and weed pressure with stronger turf
Step-by-Step Plan
1. Timing:
Apply early in the summer—before the peak heat hits (June for cool-season lawns, early July for warm-season lawns).
2. Check Moisture:
Water deeply 24–48 hours before fertilizing to avoid stress or burn.
3. Select the Right Fertilizer:
Use a slow-release nitrogen product with added iron for color (e.g., 15-0-15 + Iron). Avoid high-nitrogen fertilizers during extreme heat.
4. Apply Carefully:
Never fertilize during midday heat. Early morning or evening is best. Always follow label rates.
5. Mow High:
Set mower blades higher (3.5–4 inches for most lawns) to shade roots and retain moisture.
6. Water Lightly After Application:
This helps activate the fertilizer without oversaturating.
🍂 Fall Fertilization Plan
Why Fertilize in Fall
Fall is arguably the most important feeding of the year.
Grass roots are still active even as growth slows, making fall fertilization critical for deep root development and winter preparation.
Key Benefits:
-
Stronger root systems for winter
-
Recovery from summer stress
-
Stored nutrients for early spring green-up
-
Improved disease and frost resistance
Step-by-Step Plan
1. Timing:
Feed once growth slows but before dormancy—typically late September to early October. For cool-season lawns, this may extend into early November in warmer zones.
2. Fertilizer Choice:
Use a product higher in potassium (K) for winter hardiness, like a 24-4-14 or 20-8-10 blend.
Opt for slow-release nitrogen to sustain feeding through late fall.
3. Soil Test:
If you skipped earlier tests, now’s the perfect time to evaluate soil health for next year.
4. Apply Evenly:
Use a calibrated spreader to avoid striping or over-application.
5. Water Lightly:
Activate the fertilizer but avoid pooling. Cool soil retains moisture longer.
6. Fall Lawn Care Tips:
-
Rake leaves weekly to prevent smothering.
-
Gradually lower mowing height for the final cuts.
-
Avoid overwatering as temperatures drop.
🌎 Environmental & Safety Tips
-
Avoid runoff: Sweep fertilizer granules off driveways and sidewalks.
-
Respect local laws: Some states restrict phosphorus use. Check your region’s guidelines.
-
Store safely: Keep fertilizer sealed and away from moisture or pets.
-
Use organic options when possible—compost-based and natural fertilizers can enrich soil structure over time.
🧩 Final Thoughts
Healthy lawns aren’t built overnight—they’re grown with consistency, timing, and care.
By aligning your fertilizer applications with the natural growth cycles of your grass, you’ll cultivate a deeper green, stronger root system, and a more resilient turf all year long.
How Often Should You Mow Your Lawn
Mowing frequency is a critical component of lawn care, which is influenced by various factors, including grass type, soil composition, climate, and seasonal changes.
Quick Reference Mowing Schedule
| Season | Cool-Season Grasses | Warm-Season Grasses (General) | How Often to Mow |
|---|---|---|---|
| Spring | Start at 3 inches, adjust to 3.5 inches as season progresses | Bermudagrass: As low as 0.5 inches for hybrids, up to 2 inches for common; Zoysiagrass: Start at 1.5 inches, 2.5 inches in partial shade; Centipedegrass & St. Augustinegrass: Maintain optimal height | Cool-Season: Every 5-7 days depending on growth; Warm-Season: Every 7-10 days, adjust based on growth rate |
| Summer | Increase to 3 – 4 inches to shade soil | Bermudagrass: 2 to 2.5 inches; Zoysiagrass: Maintain at 2 to 2.5 inches; Centipedegrass & St. Augustinegrass: Continue optimal height | Cool-Season: Every 7-10 days; Warm-Season: Every 5-7 days or as needed due to rapid growth |
| Fall | Reduce to about 2.5 inches before the first frost | Prepare for dormancy by slightly lowering height, but ensure not to stress grass | Cool-Season: Every 10-14 days as growth slows; Warm-Season: Reduce frequency as growth slows, prepare for dormancy |
| Winter | Generally not necessary; if mowed, around 2 inches | Not necessary; final mow to around 2 inches if done | Cool-Season: Mowing not required; Warm-Season: Mowing generally not required, except in warm climates where grass may not fully go dormant |

Grass Type
The type of grass in your lawn determines its growth patterns and when it should be mowed. Grasses are broadly categorized into two types:
-
Cool-Season Grasses
- Kentucky Bluegrass, Perennial Ryegrass, Fine Fescue: Ideal height ranges from 2.0 to 3.5 inches. Tall Fescue prefers a slightly higher range of 3.0 to 4.0 inches to maintain optimal health.
Warm-Season Grasses
- Bermudagrass: Common varieties should be mowed to between 1 and 2 inches, while hybrid varieties prefer a lower range of 0.5 to 1.5 inches for optimal health.
- Zoysiagrass: In partial shade, a height of about 2 to 2.5 inches is optimal. For other conditions, 1.5 inches is generally ideal.
- Centipedegrass: Recommended mowing height is between 1 to 1.5 inches.
- St. Augustinegrass: Best kept at a height of 2.5 to 3.75 inches.
Additionally, these optimal heights adjust slightly with the seasons:
- Spring: A shorter cut is recommended to remove winter-burned strands and prepare for the growing season. For cool-season grasses, mow to about 3 inches or more, and for warm-season grasses, as low as 0.5 to 1.5 inches.
- Summer: Increase the height to help shade the soil and prevent weeds. Cool-season grasses should be about 3 to 4 inches, while warm-season grasses should be 2 to 2.5 inches.
- Fall: Aim for a mid-length height, adjusting cool-season grasses to about 2.5 inches before the first frost. Warm-season grasses can also be adjusted in preparation for winter.
The One-Third Rule
Click here for my favorite handy grass measuring tool
The general guideline for mowing is the “1/3rd rule”: which is to never cut more than 1/3 of the blade height.

A cheap measuring tool makes it easy to know when to mow.
Weather Conditions
- Avoid mowing during wet conditions. Wet grass can clog your mower, lead to uneven cuts, and spread diseases. Wait for the lawn to dry.
- Mow in the morning or late afternoon. Early morning dew and midday heat can both make mowing less effective and more stressful for the grass. Late morning, after the dew has dried, or late afternoon, when the temperature cools, are ideal.
Growth Rate and Seasonal Changes
The growth rate of your lawn can vary with seasonal changes:
- Spring: Grass growth accelerates in spring. Weekly mowing may be necessary to keep up with the growth.
- Summer: Growth may slow, especially in hot, dry periods. Adjust mowing frequency accordingly, and consider leaving grass slightly taller to help shade and cool the soil, reducing moisture loss.
- Fall: As temperatures cool, growth may pick up again. Continue regular mowing until growth slows significantly or stops.
- Winter: In areas where grass remains somewhat active in winter or doesn’t go completely dormant, occasional mowing may still be required, albeit much less frequently.
Lawn Health and Appearance
Regularly monitoring your lawn’s health and appearance can also guide your mowing schedule. If the lawn looks uneven or unkempt, it might be time for a trim, even if it hasn’t reached the maximum height for cutting.
Environmental Stress
Consider environmental stresses such as drought or extreme heat. During these times, it’s often better to mow less frequently to avoid putting additional stress on the lawn. Allowing the grass to grow taller can shade the soil, helping retain moisture and protect the roots.

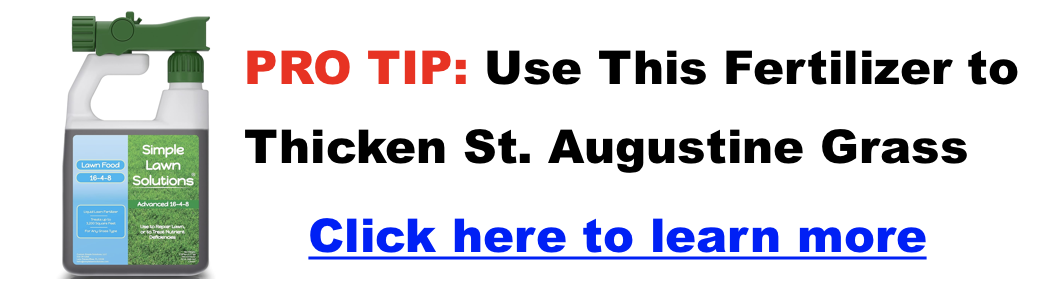
How to Make St Augustine Grass Thicker: 9 Expert Tips to Have a Thicker Lawn
A thick, lush lawn is not just a symbol of a well-maintained home; it’s a retreat, a play area for kids and pets, and a boost to your property’s curb appeal. Among the various grass types, St. Augustine stands out in warmer climates for its ability to form a dense, vibrant green carpet, making it a top choice for homeowners aiming for that perfect lawn. You can try watering and hoping for the best; but a thick lawn requires a dedicated strategy. Here are nine expert tips to help your St. Augustine lawn reach its fullest potential.
Quick Review
Click Here for My Favorite Way to Thicken St. Augustine Grass
Before diving into the details, here’s a quick overview of the nine essential tips for nurturing a thicker St. Augustine grass lawn:
- Test Soil pH (I use this kit)
- Improve Soil Structure
- Mow High
- Appropriate Watering
- Fertilization (this is what I recommend)
- Weed Control
- Aeration
- Thatch Removal
- Over-seeding
- Grass plugs
How to Make St Augustine Grass Thicker
Click here for landscaping ideas without hiring costly designers
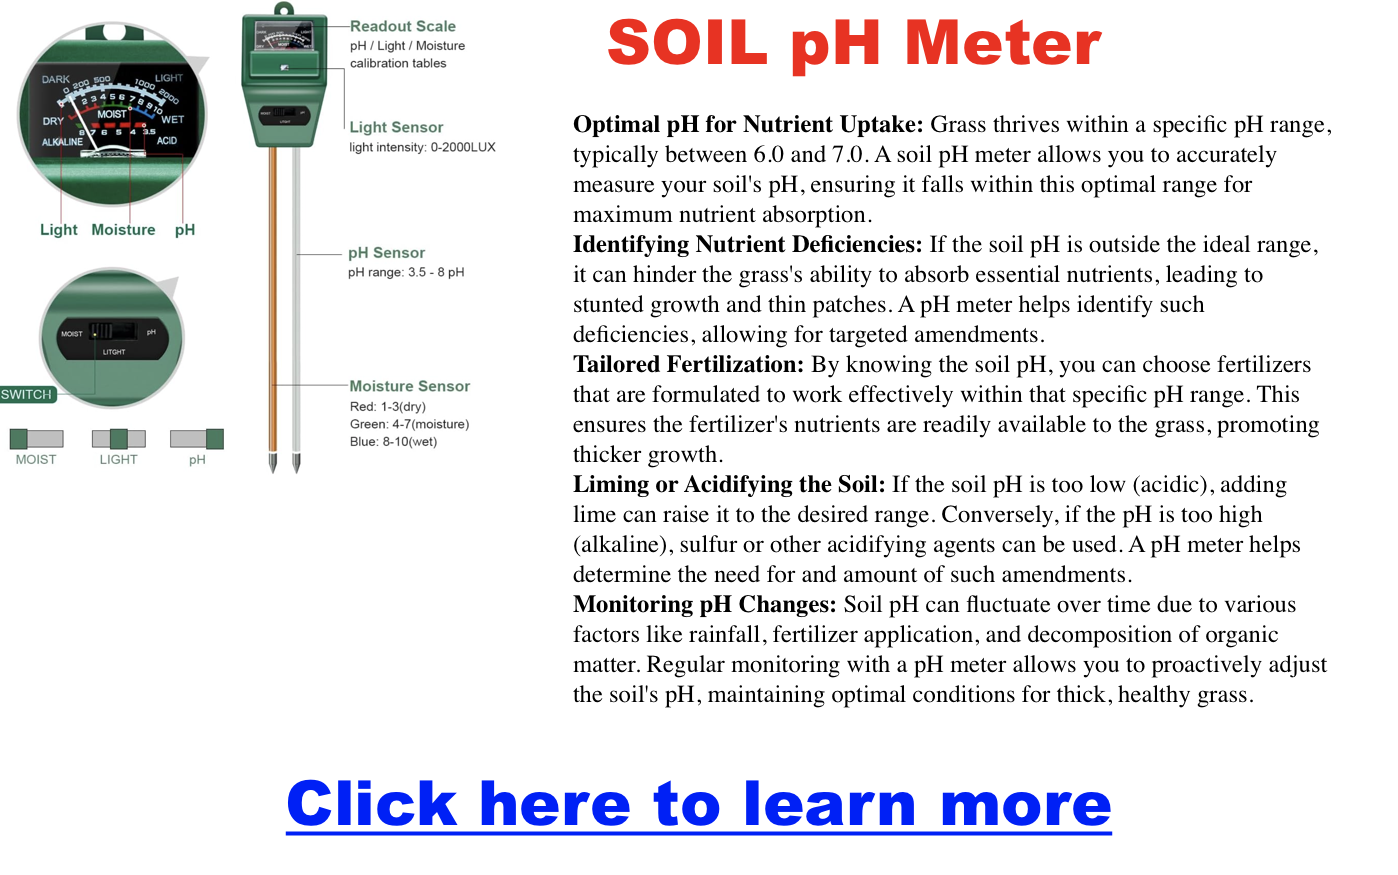
The foundation of a lush, vibrant St. Augustine lawn begins beneath the surface, with the soil. Soil pH—a measure of how acidic or alkaline the soil is—significantly affects the grass’s ability to absorb nutrients. St. Augustine grass thrives with a pH between 5.5 and 7.5.
Here’s how to ensure your soil’s pH is in the optimal range:
1. Test Soil pH
Click here for my favorite pH test gadget
- Acidic Soil (pH < 7): In acidic conditions, essential nutrients like nitrogen, phosphorus, and potassium become less available, potentially stunting grass growth.
- Alkaline Soil (pH > 7): Alkaline conditions can lead to deficiencies in iron, manganese, and zinc, leading to chlorosis (yellowing of the grass) and poor health.
Testing Soil pH
- Collect a Soil Sample: Use a soil probe or shovel to collect soil from several locations in your lawn, from the top 4-6 inches.
- Choose a Testing Method:
- Home Testing Kit: Available at garden centers, these kits provide a quick way to check pH.
- Digital pH Meter: Offers a more precise reading and can be used multiple times.
- Extension Service: For the most accurate results, have a local professional lawn service test the soil. They can also offer tailored advice for adjusting pH.
- Adjusting Soil pH
- Lowering pH (for alkaline soil): Apply elemental sulfur or aluminum sulfate. The amount needed depends on the soil type (clay, loam, sand) and the current pH level. It’s a gradual process, so patience is key.
- Raising pH (for acidic soil): To raise the pH of acidic soil, apply ground limestone. Dolomitic lime is preferred if your soil also needs magnesium. As with lowering pH, the amount varies with soil type and current pH, and adjustments should be made gradually.
- Maintenance and Monitoring
- Regular Testing: Soil pH can change over time due to environmental factors and lawn treatments. Test every 2-3 years to ensure it remains in the optimal range for St. Augustine grass.
2. Improve Soil Structure
Healthy soil is the backbone of a lush, vibrant St. Augustine lawn. Soil structure refers to how particles of soil aggregate together, affecting water retention, drainage, and aeration—key factors in root development and nutrient uptake. A well-structured soil supports a robust root system, which in turn supports thicker, healthier grass. Here’s how you can improve your lawn’s soil structure:
Understanding Soil Types
- Clay Soil: Dense and heavy, clay soil holds water and nutrients well but drains poorly and can be hard for roots to penetrate.
- Sandy Soil: Light and loose, sandy soil drains quickly but doesn’t hold nutrients or moisture well.
- Loam Soil: The ideal type, loam soil, is a balanced mix of sand, silt, and clay, offering excellent drainage, nutrient retention, and root support.
Enhancing Soil Structure
- Add Organic Matter: Incorporating organic material such as compost, aged manure, or leaf mold improves soil structure across all soil types. For clay soil, it enhances drainage and aeration; for sandy soil, it increases water and nutrient retention.
- Use a Topdressing: Apply a thin layer of organic compost over your lawn. Over time, earthworms and soil microorganisms will work the compost into the soil, gradually improving its structure.
- Practice Core Aeration: Core aeration removes small plugs of soil, creating space for air, water, and nutrients to penetrate and encouraging deeper root growth. This is especially beneficial for compacted or clay-heavy soils.
- Grow Cover Crops: In areas of your yard where you’re not growing grass, consider planting cover crops in the off-season. Legumes, clover, and rye can improve soil structure, add organic matter when tilled under, and fix atmospheric nitrogen, enriching the soil.
- Maintain Proper pH and Nutrient Levels: Balanced pH and nutrient levels encourage robust microbial activity in the soil, which is crucial for maintaining good soil structure. Regular soil tests can guide your fertilization and amendment practices.
Mowing high—leaving the grass taller—can encourage deeper root growth and result in a thicker, more resilient lawn. Here’s why higher mowing settings are beneficial and how to implement this practice effectively:
3. Mow High
Mowing your St. Augustine grass at a higher height is crucial for promoting a thick, healthy lawn.
Key Benefits
- Promotes Root Growth: Higher grass encourages deeper root systems, enhancing drought resistance and nutrient uptake.
- Increases Shade and Moisture Retention: Taller blades shade the soil, reducing moisture loss and suppressing weed growth.
- Improves Health: Longer blades support better photosynthesis, contributing to a denser, greener lawn.
Practical Steps
- Mower Setting: Adjust your mower to cut the grass at 3-4 inches in height.
- Mowing Frequency: Mow often enough to avoid removing more than one-third of a grass blade length at a time, which can stress the grass.
- Maintenance: Ensure mower blades are sharp for clean cuts, reducing stress and disease risk to the grass.
4. Appropriate Watering
Key Principles
- Deep and Infrequent: Water deeply to encourage roots to grow deeper, improving drought resistance. Aim for about 1 inch of water per week, either from rainfall or irrigation.
- Morning Watering: Water in the early morning to reduce evaporation, generally before 10am to minimize the risk of fungal diseases.
- Adjust for Weather: Reduce watering frequency during cooler or rainy periods to prevent over-saturation and disease.
Implementation
- Measure Water: Use a rain gauge or straight-sided can to measure the amount of water your lawn receives from sprinklers to ensure it’s getting a full inch.
- Monitor Lawn Signs: Look for signs of dehydration in your lawn, such as wilting or a blue-gray tint, to adjust your watering schedule as needed.
- Soil Type Consideration: Sandy soils require more frequent watering than clay soils, as they drain faster. Adjust your watering schedule accordingly.
Efficiency Tips
- Use Smart Irrigation: If possible, install a smart irrigation system / sprinkler timer that adjusts watering based on weather conditions and soil moisture levels.
- Mulching and Soil Improvements: Enhance soil’s water retention by adding organic matter or using mulches in garden beds adjacent to your lawn.
5. Fertilization
Click here for my favorite St. Augustine fertilizer
Proper fertilization is essential for promoting the growth and health of St. Augustine grass. Here’s a concise guide to fertilizing your lawn effectively:
Key Guidelines
- Right Type: Use a slow-release nitrogen fertilizer that’s appropriate for St. Augustine grass. The ideal N-P-K ratio (Nitrogen-Phosphorus-Potassium) will depend on your soil test results.
- Right Time: Fertilize in early spring and avoid fertilizing during the peak of summer heat to prevent burning the grass.
- Right Amount: 2-4 pounds of nitrogen per 1,000 square feet annually, split over multiple applications.
Implementation
- Soil Testing: Before applying fertilizer, conduct a soil test to determine nutrient needs. This ensures you apply the right nutrients in the correct amounts.
- Application Technique: Use a spreader for even application, ensuring that the fertilizer is distributed uniformly across the lawn.
- Watering After Application: Lightly water the lawn after fertilizing to help the nutrients penetrate the soil and reach the grass roots.
6. Weed Control
Here’s how to manage weeds efficiently and the appearance of St. Augustine grass
Key Strategies
- Preventive Measures: Apply a pre-emergent herbicide in early spring before weeds start to grow.
- Post-Emergence Treatment: For weeds that have already sprouted, use a post-emergent herbicide that is safe for St. Augustine grass. Be sure to identify the weeds accurately to choose the most effective treatment.
- Manual Removal: For minor weed problems, hand-pulling or using a weeding tool can be effective, especially if done regularly before the weeds have a chance to establish or seed.
Best Practices
- Spot Treatment: When applying post-emergent herbicides, consider spot treatment for isolated weed patches to minimize chemical use and protect the rest of your lawn.
7. Aeration
Importance of Aeration
- Relieves Soil Compaction: Compacted soil hinders root penetration and reduces air, water, and nutrient absorption. Aeration creates holes in the soil, improving these essential flows.
- Enhances Root Growth: By improving soil structure and increasing oxygen levels, aeration encourages deeper and stronger root development.
- Improves Drainage: Aerated lawns have better water absorption rates, reducing runoff and puddling.
When to Aerate
- Optimal Timing: Aerate late spring or early summer.
How to Aerate
- Choose the Right Tool: Core aerators, which remove plugs of soil from the lawn, are most effective.
- Preparation: Water your lawn one or two days before aerating to soften the soil, making the process easier and more effective.
- Aeration Process: Pass the aerator over the lawn in a pattern that covers the area evenly. For areas with severe compaction, a second pass in a perpendicular direction may be beneficial.
Aftercare
- Leave Soil Plugs: Allow the extracted soil plugs to decompose naturally on the lawn. They contain microorganisms and nutrients that are beneficial to the soil.
- Watering: Increase watering slightly following aeration to support grass recovery and growth.
- Seeding or Fertilizing: If needed, overseeding or fertilizing after aeration can be more effective, as seeds and nutrients can reach the soil more easily.
8. Thatch Removal
Thatch control is essential for maintaining a healthy St. Augustine grass lawn. Thatch is a layer of dead and living plant material, including leaves, stems, and roots, that accumulates between the vegetation. Here’s how to manage thatch effectively:
Understanding Thatch
- Moderate Thatch Benefits: A thin layer of thatch (less than ½ inch) can be beneficial, providing insulation against temperature extremes and reducing soil compaction.
- Excessive Thatch Problems: However, when thatch exceeds ½ inch, it can prevent water, nutrients, and air from reaching the soil and grass roots, encourage pests and diseases, and inhibit root penetration.
Thatch Removal (Dethatching)
- Identify Need: First, determine if your lawn needs dethatching. Insert a trowel or hand into the turf and measure the thatch layer. If it’s over ½ inch, it’s time to dethatch.
- Choose the Right Time: For St. Augustine grass, the best time to dethatch is late spring through early summer, when the grass is actively growing and can recover quickly.
- Select a Method:
-
- Manual Raking: For minor thatch problems, a vigorous raking with a specialized dethatching rake might suffice.
- Power Dethatching: For more severe issues, consider renting a power dethatcher.
Aftercare
- Recovery Care: After dethatching, water the lawn adequately to help it recover. This is also an excellent time to fertilize and, if necessary, overseed, as the soil is more accessible and seeds can make better contact.
Preventing Thatch Buildup
- Proper Mowing: Avoid cutting more than one-third of the grass.
- Balanced Fertilization: Use slow-release fertilizers and follow recommended rates.
- Regular Aeration: Annual aeration can help prevent thatch buildup by improving soil structure and encouraging the breakdown of organic matter.
 Mid-Atlantic Mid-Atlantic |
 Northeast Northeast |
 MidWest MidWest |
 Texas Texas |
|---|
9. Over-seeding
Over-seeding St. Augustine grass is not commonly practiced due to its growth characteristics and propagation methods, as it typically spreads through stolons (above-ground stems) rather than seeds. However, in some cases, particularly for lawns that have become thin or patchy, introducing new grass can help improve lawn density and appearance. Here’s a focused approach if you choose to enhance your St. Augustine grass lawn, taking into account its unique traits:
Considerations for St. Augustine Grass
- Seed Availability: St. Augustine grass seed is less commonly available than sod or plugs, and it can be challenging to establish from seed. Research and source high-quality seeds or consider sod pieces or plugs for patchy areas.
- Preparation: Whether seeding, sodding, or plugging, proper preparation is key. Remove weeds, loosen the top layer of soil, and ensure the area is level.
Sodding and Plugging
- Sodding: Laying sod is an effective way to establish or repair a St. Augustine lawn quickly. Ensure sod is fresh and lay it on prepared soil, pressing down to remove air pockets and ensure good root-soil contact.
- Plugging: Plugs are small sections of sod that are planted into the lawn at intervals. Over time, they will spread and fill in the gaps. This method is more economical than sodding and is effective for repairing patches or establishing new lawns over time.
Care After Installation
- Watering: Newly seeded areas, sod, or plugs require consistent moisture to establish.
- Mowing: Wait until the new grass is well established and has reached mowing height before the first cut to avoid stressing the young plants.
- Fertilization: Apply a starter fertilizer at planting to encourage root growth. Follow up with regular fertilization based on soil test recommendations once the grass is established.
10. Grass Plugs
Grass plugs are an easy way to fill grass gaps. 
FAQs
- Watering Frequency and Amount: Water once or twice a week, rather than a little every day, to encourage deep root growth.
- Mowing Wet Grass: Avoid mowing wet grass to prevent clumping and uneven cuts, which can lead to disease.
- Fertilizer Types: Opt for a slow-release nitrogen fertilizer specifically formulated for St. Augustine grass.
- Aeration Necessity: Aerate annually, ideally in the early spring or fall, to maintain soil health.
- Over-seeding Timing: If necessary, over-seed in early fall when the temperature is cooler but still warm enough to support germination.
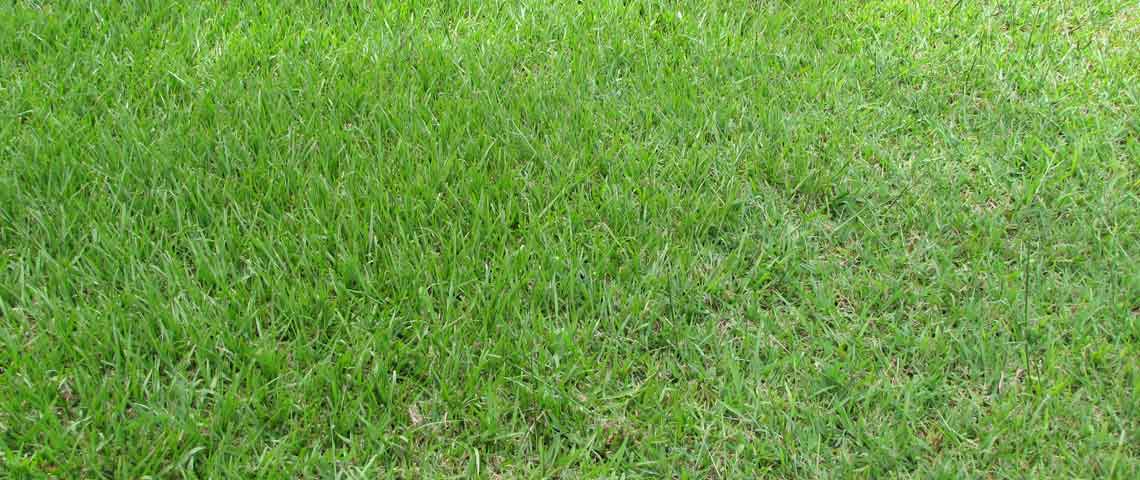
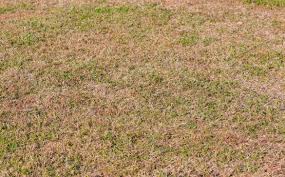
Why is My Grass Turning Yellow and Dying?
Is your once lush, green lawn suddenly fading to yellow and showing signs of distress? Don’t despair!
Here’s a breakdown of the usual suspects when it comes to yellowing, dying grass:
Causes of Yellowing and Dying Grass
- Lawn Rust
- Dry Patch
- Chafer Grubs
- Leatherjackets
- Pet Urine
Is lawn rust causing my lawn to die?
Lawn rust can cause your grass to look unhealthy, but it rarely kills the lawn. Lawn rust is a fungal disease that infects the leaves of grass. The visible orange or yellow “rust” is actually spores. While it weakens the grass, it doesn’t directly kill the roots.
- Stressed Lawn: Lawn rust thrives on lawns that are already stressed due to factors like:
- Drought
- Heat
- Poor nutrition
- Shade
- Temporary Damage: Healthy grass can usually recover from lawn rust once the conditions improve or the fungus is treated. However, if your lawn is already weak when rust hits, it might cause further decline or make your lawn more susceptible to other problems.
How to Tell if Lawn Rust is the Main Issue:
- The Rust Test: Rub your fingers across the yellowing grass blades. If an orange or yellow powdery residue comes off, that’s a strong sign of lawn rust.
- Look for Patches: Lawn rust often appears in patches rather than uniformly across your whole lawn.
- Consider the Season: Lawn rust is more common in late summer and fall.
What to Do To Improve It:
- Improve Lawn Health: Proper watering, fertilization, and mowing will help your lawn resist rust and bounce back faster.
- Fungicides: A fungicide specifically for rust might be necessary in severe cases.
- It Might Not Be Just Rust: If you don’t see clear signs of it, consider other causes of yellowing and dying grass, like those mentioned earlier.
Is Dry Patch turning my lawn yellow?
- Dry patches can definitely turn your lawn yellow. Dry patches are conditions in which the soil becomes hydrophobic—that means it repels water. This can be caused by a waxy coating that builds up from decaying organic matter or fungal activity in the soil.
- Symptoms:
- Irregularly shaped yellow or brown patches of grass.
- Water beads up on the surface and refuses to soak in, or it pools before slowly draining away.
- Soil is bone-dry even just below the surface within those patches.
- Why it’s bad: Even if you water your lawn, the roots in the dry patch areas won’t get the moisture they need. This causes the grass to become stressed, turn yellow, and potentially die if the conditions aren’t improved.
How to Confirm Dry Patch:
- Watering Test: Try watering the affected area directly. If the water beads up or takes a very long time to soak in, you likely have a dry patch.
- Check the Soil: Dig down a few inches into the yellow patch. If the soil feels completely dry even after watering, it’s further confirmation.
What to Do:
- Aeration: A core aerator punches holes in the dry patch areas, helping water penetrate the soil.
- Wetting Agent: These special surfactants help break down the waxy coating and allow water to soak in better. Follow application instructions carefully.
- Severe Cases: You might need to dethatch heavily or even topdress the area with new soil to improve conditions.
Are Chafer grubs turning my lawn yellow?
Chafer grubs are larvae from chafer beetles (like June bugs). They live in your soil and have a voracious appetite for grassroots. They munch away at the root system of your grass. This prevents the grass from getting the water and nutrients it needs, leading to yellowing, wilting, and patches that die off.
- Signs of chafer grubs:
- Yellowing, patchy, dying grass
- Grass that easily pulls up, revealing a lack of roots
- Increased bird activity on your lawn (they love to feast on grubs)
- Visible grubs if you dig into the soil (c-shaped, creamy-white with a brown head)
- Additional Damage: Badgers, foxes, and other animals will rip up your turf to get at the grubs, causing even more damage than the grubs themselves might.
How to be sure it chafer grubs:
- The Roll Test: Lift a section of the affected turf. If it rolls up like a carpet, with hardly any roots, grubs are a prime suspect.
- Dig and Look: Examine the soil under the dying patches. Look for those grub larvae.
What to do:
- Nematodes: These microscopic creatures are natural predators of chafer grubs and can be introduced into your soil.
- Chemical Treatments: There are insecticides designed for grub control, but these need to be timed correctly.
- Prevention: Keeping your lawn healthy with good watering practices and fertilization can make it less attractive to chafer beetles for egg-laying.
Are Leatherjackets turning my lawn yellow?
- Leatherjackets are the larvae of crane flies, and they love to munch on grassroots. Like chafer grubs, their feeding disrupts the grass’s ability to absorb nutrients and water, leading to yellowing and potential death.
- Signs of Leatherjacket Infestation:
- Patches of yellowish-brown, dead, or dying grass, often appearing circular.
- New grass shoots disappear mysteriously.
- Increased bird activity pecking at the ground (birds love to eat leather jackets).
- If you peel back the turf in affected areas, you might see the greyish-brown, legless leatherjacket grubs in the top layers of soil.
- Leatherjackets vs. Other Issues: While yellowing patches can signify several problems, leatherjackets often create these patches in a more circular pattern than others.
How to Confirm Leatherjackets:
The best way to confirm leatherjackets is to take a closer look at the soil beneath the yellowed areas:
- Lift and Check: Carefully lift a section of the affected turf. If you see greyish-brown, legless grubs in the top layers of the soil (around the first inch or two), you likely have leather jackets.
- Soak and Cover: Another method involves soaking a section of the affected area and then covering it overnight with a black plastic sheet. Leatherjackets will come to the surface to avoid darkness, making them easier to spot.
Combating Leatherjackets:
- Natural Methods: If the infestation isn’t severe, encouraging natural predators like birds can help control the population. Keeping your lawn short also discourages egg-laying.
- Nematodes: Introducing microscopic nematodes, natural predators of leatherjackets, into the soil can be an effective control method.
- Insecticides: There are some specific insecticides for leather jackets, but these should be a last resort due to potential environmental impact. It’s best to consult with a lawn care professional for safe and effective application.
Is pet urine causing my lawn to die?
Dog and cat urine contains a high concentration of nitrogen. While nitrogen is a fertilizer, too much in a concentrated area “burns” the grass, much like over-fertilization.
- Salt Matters Too: Urine also contains salts, which can further dehydrate the grass and damage the roots.
- Signs of Urine Damage:
- Yellow or brown spots, often with a dark green ring around them (this is the area receiving a slightly diluted amount of fertilizer).
- Spots that occur where your pet frequently urinate.
- Female dogs often cause more pronounced spots as they tend to squat and release urine in one place, while males may spread it around more while marking.
- Ruling Out Other Causes: While pet urine is a common culprit for dead spots on a lawn, some other issues can mimic its appearance. Consider:
- Lawn disease: Some fungal diseases cause similar-looking spots.
- Insect damage: Pests like grubs could be present.
What to Do about Pet Urine Damage:
- Dilution is the Solution: Immediately hose down areas where your pet urinates. This dilutes the nitrogen and salts, minimizing damage.
- Train Your Pet: If possible, train your dog to urinate in a designated area of the yard, like a mulched section or an area with gravel.
- Supplements: Dog food additives are claimed to neutralize the nitrogen in urine. These have mixed results.
- Reseeding: In severe cases, you might need to reseed damaged patches. If possible, choose a dog-urine-resistant grass variety.
To wrap things up, there are a lot of reasons why your grass might be turning different colors, including different shades of green. By pinpointing the cause, you’ll be equipped with what needs to happen next to remedy the situation so you can go back to having a healthy and happy lawn.
How to make bahia grass thicker
Credit: Pennington.com
How to Make Bahia Grass Thicker: 5 Expert Tips
Transforming your Bahia grass into a denser, more vibrant lawn requires attention to several key aspects of lawn care. Here are five expert tips to help you achieve a thicker Bahia grass lawn:
- Optimal Mowing Practices
-
- Mow High: Keep the mowing height on the higher side, about 3 to 4 inches. This height encourages deeper root growth and provides enough leaf area for photosynthesis, which is crucial for thickening your lawn.
- Mow Regularly: Regular mowing, without cutting more than one-third of the grass blade at a time, helps promote healthy growth and can encourage the grass to become denser.
- Regular Fertilization
Click here to see my favorite liquid lawn fertilizer with sprayer
-
- Right Timing: Fertilize Bahia grass during its active growing season, usually from late spring through summer.
- Appropriate Products: Use a fertilizer that’s well-suited for Bahia grass, typically one with a higher nitrogen content to promote leaf growth. Always follow the manufacturer’s instructions to avoid over-fertilization, which can harm your lawn.
- Use of Pre-Emergent Herbicides
-
- Weed Management: Apply pre-emergent herbicides in early spring to control weeds before they compete with your Bahia grass for nutrients and sunlight. A weed-free lawn allows Bahia grass to spread and thicken more easily.
- Selectivity: Choose a herbicide that’s safe for Bahia grass to ensure you don’t inadvertently damage your lawn.
- Proper Watering Techniques
-
- Deep, Infrequent Watering: Infrequent watering can encourage the roots to grow deeper, making your grass more drought-resistant and helping it to thicken over time.
- Morning Watering: Early morning watering reduces evaporation and helps prevent fungal diseases by ensuring the grass blades don’t remain wet overnight.
- Annual Aeration
-
- Relieve Soil Compaction: Use a core aerator once a year, ideally in the early fall. This process reduces soil compaction, improves water and nutrient penetration, and facilitates root growth.
- Enhanced Root System: Aeration allows the roots to expand more easily, contributing to a thicker, healthier lawn.

Bahia Grass Seed
Why Might Bahia Grass Be Thin?
Click here for landscaping ideas without hiring costly designers
Several factors can contribute to a Bahia grass lawn appearing thin or patchy. Understanding these can help in addressing the root causes effectively:
- Inadequate Sunlight: Bahia grass thrives in full sun. If your lawn is under-shaded, this might be limiting its growth.
- Poor Soil Conditions: Although Bahia grass is tolerant of less fertile soils, extremely poor soil conditions can affect its thickness. Compacted soil, poor drainage, or imbalanced pH levels can hinder root development.
- Over or Under-Watering: Bahia grass prefers deep, infrequent watering.
- Improper Mowing Practices: Mowing too short can stress Bahia grass and inhibit its ability to grow thick. The grass needs enough leaf surface to photosynthesize effectively.
- Pests and Diseases: Grubs, chinch bugs, and fungal diseases like dollar spot can damage Bahia grass, causing it to thin out.
- Nutrient Deficiencies: Bahia needs essential nutrients like nitrogen, phosphorus, and potassium for healthy growth.
How Long Does It Take for Bahia Grass to Become Thicker?
Overseeding is the fastest way to thicken existing Bahia. You’ll likely see noticeable changes within a few weeks and significant improvement within a couple of months. Other methods like fertilization and improved care practices make the existing grass healthier, and thicker growth takes longer to be visible.
- Starting Condition: If your Bahia lawn is severely thin, it will naturally take longer to fill in compared to a lawn with only minor patchiness.
- Overall Health: Healthy Bahia grass with good soil, sunlight, and proper watering will thicken faster than stressed grass.
- Time of Year: Bahia thickens most rapidly during its active growth period in late spring to early fall.
Here’s a general timeframe to keep in mind:
- Overseeding: Noticeable improvement in a few weeks and a well-established thicker lawn within 1-2 seasons.
- Improved Care Practices (fertilizing, watering, etc.): It may take several months to see significant thickening, and continuous care is needed to maintain the lushness.
How to Overseed Bahia Grass
The best time to overseed Bahia grass is late spring or early summer before the hottest summer temperatures hit. This allows the new seeds enough time to establish before winter.
Preparation
- Mow Short: Mow your existing Bahia grass shorter than usual (about 1-2 inches) to allow sunlight and contact with the soil for the new seeds.
- Rake/Dethatch: Remove thatch (dead grass buildup) and debris with thorough raking or light dethatching. This ensures good seed-to-soil contact for germination.
- Light Tilling (Optional): For extremely bare or compacted areas, you might lightly till the top layer of soil to expose it for better seed germination.
Seeding
- Seed Selection: Use high-quality Bahia grass seed. Pensacola Bahia usually establishes a thicker stand than Argentine Bahia.
- Spreading: Use a broadcast spreader or drop spreader for even distribution. Check the seed packaging for recommended seeding rates, usually around 5-10 pounds per 1000 square feet. Spread the seed in two passes, crisscrossing for optimal coverage.
- Rake Lightly: Gently rake the area again to incorporate the seeds into the top layer of soil.
Aftercare
- Watering: Keep the soil consistently moist but not waterlogged. Water lightly and frequently (multiple times a day) for the first few weeks to encourage germination. As the seedlings mature, switch to deeper and less frequent watering.
- Fertilizer: Apply a starter fertilizer a few weeks after germination to promote strong seedling growth.
- Weeds: Hand-pull any emerging weeds early to avoid competition with your new grass seedlings.
How Much Bahia Seed per Acre?
Seeding Method:
- Broadcast Seeding: This is the most common method and requires more seed due to less precise seed placement. When broadcasting, you’ll need about 10-15 pounds of Bahia grass seed per acre.
- Drill Seeding: A drill seeder places seeds directly into the soil with better precision and less waste. You can use a lower seeding rate of about 10-12 pounds per acre for drill seeding.
Seed Variety:
- Pensacola Bahia: This is the most common type of Bahia grass and generally has a slightly higher seeding rate of 12-15 pounds per acre.
- Tifton 9 Bahia: This variety is established faster and might need a slightly lower seeding rate of around 10-12 pounds per acre.
Does Bahia Grass Spread?
Yes, Bahia grass does spread, but it might not be in the way you expect. Unlike some turfgrasses that aggressively spread through stolons (horizontal above-ground stems) or rhizomes (horizontal below-ground stems), Bahia grass primarily spreads through seed production. This characteristic is both a strength and a limitation, depending on what you’re aiming for in your lawn.
FAQs about How to Make Bahia Grass Thicker
Q1: Why is my Bahia grass thin and patchy?
A: Several factors might contribute:
- Age: Bahia naturally thins over time.
- Poor Soil: Infertile or compacted soil limits grass growth.
- Shade: Bahia thrives in full sun, and shade hinders thickening.
- Mowing: Mowing too low stresses the grass.
- Competition: Weeds or other invasive plants stealing resources.
Q2: What’s the best way to thicken Bahia grass?
A: Overseeding is the most effective method. Sowing additional Bahia seed over your existing lawn increases density quickly.
Q3: When should I overseed Bahia grass?
A: The ideal time is in late spring or early summer, before the hottest period. This provides enough time for the new grass to establish before winter.
Q4: Do I need to prepare my lawn before overseeding?
A: Yes! Preparation is key for good seed-to-soil contact.
- Mow shorter than usual.
- Thoroughly rake to remove thatch and debris.
- In very compacted areas, light tilling could be beneficial.
Q5: How much Bahia seed should I use?
A: It depends on your seeding method and variety. Here’s a general guide:
- Broadcast seeding: 10-15 pounds per acre.
- Drill seeding: 10-12 pounds per acre.
- Pensacola Bahia: Slightly higher end of the range.
- Tifton 9 Bahia: Slightly lower end of the range.
Q6: Can I just fertilize my Bahia to make it thicker?
A: While fertilization promotes healthy growth, it won’t solve a severely thin lawn. Overseeding is often needed with proper fertilization for the best thickening results.
Q7: How long does it take for Bahia grass to thicken after overseeding?
A: Expect noticeable improvement within a few weeks, with a thicker lawn established over 1-2 seasons.
What Grass Turns Brown in Winter: How to Take Care of Your Lawn During Winter
The sight of your lush summer lawn turning a crispy brown in winter can be concerning, especially if you’re new to warm-season grasses. However, understanding this natural cycle is the key to ensuring your lawn bounces back strong in the spring.
Warm-Season Grasses: Built for Summer
If you live in a region with hot summers and mild winters, you likely have a warm-season grass like Bermuda, Zoysia, Centipede, or St. Augustine. These grasses thrive in the summer sun but aren’t built to withstand freezing temperatures and shorter days. Think of them as the sun-worshippers of the grass world!
| Grass Species | Winter Color |
|---|---|
| Zoysia grass | Green |
| Kentucky bluegrass | Green |
| Ryegrass | Green |
| Fescue grass | Green |
| Bermuda grass | Brownish-green |
Dormancy: Your Lawn’s Winter Survival Strategy
When temperatures consistently dip below a specific threshold (usually around 50°F), warm-season grasses enter a state of dormancy. This means they stop actively growing and conserve energy, turning brown in the process. Dormancy is a brilliant survival mechanism, allowing your lawn to prioritize root health and store nutrients to power new growth in spring.
Zoysia Grass Brown in Winter
If your once-lush Zoysia lawn has turned a golden brown as the temperatures dip, fear not! This is a completely normal phenomenon for warm-season grasses like Zoysia.
Understanding Dormancy: Zoysia’s Winter Survival Strategy
Zoysia thrives in hot summer weather, but when soil and air temperatures consistently fall below a certain point (usually around 50°F), it enters a state of dormancy. During dormancy, your Zoysia lawn isn’t dead; it’s simply taking a well-deserved winter break! It stops actively growing and conserves energy by turning brown. This clever survival mechanism protects the roots and ensures your lawn bounces back beautifully in spring.
Signs Your Zoysia is Dormant
- Brown Color: The most evident sign is your lawn turning brown. This is due to a reduction in chlorophyll production, which is the pigment responsible for the green color.
- Slower Growth: You’ll notice little to no growth as the grass focuses its energy on root health.
How to Care for Your Dormant Zoysia Lawn
While your Zoysia might look like it’s sleeping, there are a few things you can do to ensure a healthy spring awakening:
- Minimize Traffic: Avoid excessive foot traffic on your dormant lawn, as this can damage the weakened blades.
- Light Watering (if needed): Depending on your climate and winter precipitation, occasional light watering might be necessary, especially in drier regions.
Fall Prep: The Key to a Spring Comeback
While dormancy is natural, taking care of your lawn before winter sets in is crucial for a healthy spring revival:
- Mowing Matters: Gradually lower your mowing height as temperatures cool. Your final pre-winter mow should leave your grass slightly taller than normal to help insulate the roots.
- Feeding Frenzy: A fall fertilizer specifically formulated for warm-season grasses provides vital nutrients to fuel root growth and energy storage. Look for blends rich in potassium.
- Don’t Ignore Issues: Fall is the best time to tackle persistent weeds, diseases, or bare patches. Addressing problems now prevents them from getting worse during dormancy.
- Winter TLC: Even dormant grass needs some attention. Minimize foot traffic, clear fallen leaves to avoid smothering it, and be cautious with salt or deicers, which can damage your lawn.
Year-Round Green: The Cool-Season Option
If a year-round green lawn is your dream, consider grasses like fescues, Kentucky bluegrass, or ryegrasses. These cool-season varieties excel in colder climates. Another option is overseeding your dormant warm-season lawn with a cool-season grass for a temporary winter fix.
Reviving Your Lawn: Patience is Key
Warm-season grasses take time to wake up! Here’s how to encourage a lush lawn once temperatures rise:
- Spring Cleaning: Gently rake away matted leaves or debris that could block sunlight.
- Hydration Station: Once consistently warmer, provide deep, infrequent watering to encourage root growth.
- Nutrition Boost: Apply a balanced spring fertilizer to give your lawn a nourishing start.
Watch Out: Disease Defense
While dormant, your lawn might be more susceptible to diseases like brown patch or winter fungus. Fall prevention is vital, but keep an eye out for signs of trouble. Proper identification and treatment are key to a healthy spring.
Beyond Winter: Year-Round Care
- Aeration & Dethatching: Assess whether your lawn needs aeration in spring to reduce soil compaction and dethatching to remove excess dead grass buildup.
- The Mow-Down: Follow recommended mowing heights and schedules specific to your warm-season grass type.
- Feed & Water: Provide regular fertilization and deep watering as needed throughout the growing season for optimal growth and resilience.
FAQs
- How do I know if my dormant grass is dead? If the roots are still healthy, your lawn will green up in spring. Try a gentle tug test – if the grass holds firm, it’s likely still alive.
- When will the browning stop? Once consistent cold weather arrives, your warm-season lawn should fully enter dormancy.
- Can I do anything to prevent browning? Unfortunately, dormancy is a natural process for warm-season grasses.
- pen_spark
How Much Is a Pallet of St Augustine Grass: St Augustine Sod Pallet & Installation Costs
Pallets of St. Augustine grass varies, typically ranging from $130 to $400. Each pallet covers about 400 to 600 square feet of lawn area. The price can differ based on the grass’s quality, the supplier, and the region. Factors such as the season of purchase and the current demand for St. Augustine grass can also influence the overall cost. This price range does not include installation, which can significantly increase the total investment required to establish a new lawn.

How Much Does St Augustine Grass Cost?
Click here for my favorite filler grass seed to rejuvenate a lawn
Aside from pallets, you can also pick up sod — which typically comes in ‘plugs’ of various counts (16,32,64, etc), and they usually cost between $32-$55-$92 from Home Depot, respectively.
How Much Does a Pallet of St Augustine Sod Weigh?
A pallet of St. Augustine sod typically weighs between 4,000 to 5,000 pounds. This weight range accounts for the sod itself along with the soil attached to its roots and varies based on factors like soil moisture content at the time of purchase.
How Much Does St Augustine Sod Cost Per Square Foot?
Click here for our favorite landscaping advice that’ll save you money
The cost of St. Augustine sod per square foot ranges from $0.30 to $0.80, but of course, it depends on where you get it, the quality of the sod, the region where it is purchased, and the supplier.
To calculate the cost of St. Augustine sod for your lawn, you can use the following formula based on the price per square foot and the area coverage of a pallet:
Total Cost=Cost per Square Foot×Area CoveredTotal Cost=Cost per Square Foot×Area Covered
Given that St. Augustine sod costs between $0.30 to $0.80 per square foot and a pallet covers between 400 to 600 square feet, the cost for a full pallet can range from approximately:
- Minimum: $120 (at $0.30 per sq ft covering 400 sq ft)
- Maximum: $480 (at $0.80 per sq ft covering 600 sq ft)

How Much Is a Pallet Without Installation?
For those considering the DIY route, the primary expenses will be the cost of the sod itself and any necessary tools or soil amendments. However, for a professional installation, the costs include both the sod and labor.
- DIY Installation: Aside from the cost of the sod (ranging from $130 to $400 per pallet, covering 400 to 600 square feet), you may need to invest in soil preparation tools and materials, such as a rototiller, soil amendments, and a lawn roller. The additional costs for these materials and tools can range from $75 – $200, depending on what you already have and the condition of your lawn.
- Professional Installation: Hiring professionals to install your St. Augustine sod can cost between $400 to $900 for a pallet’s worth of coverage, including the sod cost. This price range accounts for labor, soil preparation, installation, and initial watering. The advantage of professional installation is the assurance that the sod will be correctly installed or at least guaranteed to some degree.
How Do You Take Care of St Augustine Grass After Installation?
Click here for landscaping ideas without hiring costly designers
Following installation, there are several key steps you should take to care for your new lawn:
- Watering: St. Augustine grass requires consistent moisture, especially in the first few weeks after installation. Water your new sod deeply at least once a day for the first 7-10 days to ensure the roots establish well. After that, reduce the frequency to 2-3 times per week, so that the soil can dry slightly between waterings. Once established, St. Augustine grass typically needs about 1 inch of water per week.
- Mowing: Wait until the grass has rooted firmly before the first mow, usually 2-3 weeks after installation. St. Augustine grass thrives when maintained at a height of 2.5 to 4 inches, which encourages deep root growth and weed suppression.
- Fertilization: Begin fertilizing your St. Augustine lawn about 4-6 weeks after installation, using a lawn fertilizer that’s specifically formulated for St. Augustine grass. Use fertilizer, typically once in early spring and again in late summer or early fall.
- Weed Control: It’s best to handle weeds before installing your sod. However, if weeds appear, use a weed killer labeled safe for St. Augustine grass, following the manufacturer’s instructions closely to avoid damaging the grass. Hand-pulling weeds is also effective and safe for your lawn.
How Much Sod is in a Roll: Size and Weight of a Sod Roll
Transforming a barren patch of land into a lush, green oasis is every homeowner’s dream. The key to achieving this transformation swiftly and effectively lies in the magic of sod. Unlike the slow and uncertain process of growing grass from seed, sod offers an instant solution to landscaping challenges, providing immediate aesthetic appeal and functionality to any outdoor space. Sod, often referred to as turf, is essentially a ready-made lawn. It consists of mature grass and a soil layer, held together by the grass’s root system or a thin layer of biodegradable material. This pre-grown grass is harvested in rolls or slabs from sod farms where it is grown under expert care to ensure health, density, and uniformity.

How Many Square Feet in a Roll of Sod
A roll of sod typically covers about 10 square feet. This will vary slightly depending on the supplier and the region, but 10 square feet is a common standard for many sod rolls, especially in the northern cool season markets. This standard size helps in calculating how much sod you’ll need for your landscaping project by simply multiplying the square footage of the area to be covered by sod with the size of a single roll.
Choosing sod for your landscape project offers a unique advantage – instant gratification. Unlike seeding, which requires time for germination and growth, sod installation results in an immediate green lawn. This makes it an excellent choice for homeowners looking to improve their home’s curb appeal quickly, for event planning, or to prevent soil erosion in areas prone to damage from rainwater runoff.
What Are the Pros and Cons of Installing Sod?
Pros
- Instant Lawn: The most compelling advantage of sod is its ability to transform a bare plot into a lush, green lawn almost immediately. This is particularly beneficial for quick aesthetic upgrades or when you need to use the area soon after installation.
- Erosion Control: Sod helps to prevent soil erosion.
- Weed Resistance: Due to its thickness and maturity, sod is less susceptible to weed invasions compared to newly seeded areas. This means less weeding and a cleaner lawn appearance.
- Versatility: Sod can be installed in almost any season, as long as the ground isn’t frozen. This flexibility allows homeowners in various climates to plan landscaping projects throughout the year.
- Water Efficiency: Once established, sod often requires less irrigation compared to seed. It’s already mature, so it typically adapts to the local environment quicker, leading to more efficient water usage over time.
Cons
- Cost: The primary drawback of sod is its cost. Purchasing pre-grown sod is more expensive than seeding. The initial investment includes the sod itself and potentially the cost of professional installation.
- Limited Variety: While there is a range of sod types available, the selection is generally not as extensive as that of grass seed. This could limit your options if you’re seeking a specific grass type for your lawn’s aesthetic or climate needs.
- Immediate Care: Sod requires significant attention immediately after installation, including frequent watering and monitoring for pests or diseases. This initial intensive care is crucial for its success.
- Soil Preparation: Healthy soil can mean additional labor and resources to prepare the ground before laying the sod. If the soil isn’t healthy, the new sod won’t thrive.
- Potential for Poor Rooting: If not properly installed or maintained, sod may have difficulty establishing a strong root system. This can lead to issues with water absorption, nutrient uptake, and overall health of the lawn.
Use our landscaping calculator!
Types of Sod
| Type of Sod | Climate Suitability | Characteristics | Ideal Use |
|---|---|---|---|
| Bermuda Grass | Hot, sunny climates | Durable, drought-resistant, quick growth, fine texture, deep green color | High-traffic areas like sports fields and residential lawns |
| St. Augustine Grass | Warm, coastal climates | Broad, flat blades, rich green color, shade-tolerant | Lawns with moderate to high shade |
| Zoysia Grass | Both cool and warm climates | Slow growth, dense carpet-like texture, soft, drought-resistant once established | Lawns where a premium, lush appearance is desired |
| Kentucky Bluegrass | Cooler, northern climates | Fine texture, vibrant green-blue color, excellent cold tolerance, recovers well from damage | Lawns experiencing cold winters and mild summers |
| Fescue | Cooler climates; some varieties adapt to warmer temperatures | Several types, including tall Fescue known for drought tolerance and thriving in shade | Lawns with varied conditions, including shady and dry areas |
Choosing the Right Sod
Selecting the right type of sod involves considering several factors:
- Climate: Choose a grass type that will thrive in your local weather conditions.
- Soil Type: Some grasses prefer sandy soil, while others do well in clay. Test your soil to determine which grass will be most compatible.
- Sun Exposure: Some grass types require full sun, while others can tolerate or even prefer shade.
- Water Requirements: Depending on your region’s water availability and restrictions, opt for a drought-resistant variety if necessary.
- Traffic: High-traffic areas need durable grasses like Bermuda or Zoysia that can withstand wear and tear.
How Many Square Feet in A Roll of Sod: Understanding Different Types
Click here to see my favorite liquid lawn fertilizer with sprayer
Single Slab Rolls
- Description: These are the smallest units of sod, often used for small patches or residential projects where precision is needed, or minimal area needs to be covered.
- Size and Coverage: A single slab of sod usually covers about 1 to 2.5 square feet. They are manageable by hand and ideal for detailed work or small spaces.
Mini Hand Rolls
- Description: Mini hand rolls are a step up from single slabs, offering a balance between coverage and manageability. These rolls are suitable for medium-sized projects that require more coverage but where full-size rolls might be impractical.
- Size and Coverage: These rolls typically cover between 5 to 10 square feet, making them manageable for one or two people to handle and lay down without specialized equipment.
Large Rolls
- Description: Large rolls are designed for expansive areas and commercial projects. They require machinery to move and install due to their size and weight but offer the most efficient way to cover large spaces quickly.
- Size and Coverage: Large rolls can cover anywhere from 20 to as much as 50 square feet per roll.
Ordering and Installation Considerations
- Measure Accurately: Ensure you measure your project area precisely to determine how many rolls of each type you might need.
- Factor in Overlap: When laying sod, overlapping the edges slightly can prevent gaps, so consider ordering a bit extra to account for this.
- Plan for Transportation and Installation: For larger rolls, ensure you have the necessary equipment or manpower to handle the sod upon delivery.

How Much Does Sod Weigh?
The weight of sod can vary significantly based on its type, soil moisture, and the thickness of the sod cut. Understanding these weights is essential for planning the logistics of your sod installation project, including transportation and labor requirements. Here’s an overview of how much different types of sod might weigh, keeping in mind that these are approximate values and actual weights can vary.
Bermuda Grass
- Weight Range: 15 to 30 pounds per roll. Bermuda grass has a fine texture, which might make it slightly lighter than some other types, but soil moisture can significantly affect its weight.
- Augustine Grass
- Weight Range: 20 to 40 pounds per roll. St. Augustine grass typically has broader leaves and a denser root system, contributing to its heavier weight compared to some other grass types.
Zoysia Grass
- Weight Range: 15 to 30 pounds per roll. Zoysia’s dense, carpet-like texture means rolls can be pretty heavy, especially if the soil is wet.
Kentucky Bluegrass
- Weight Range: 15 to 25 pounds per roll. Kentucky Bluegrass, with its fine texture and relatively shallow root system, tends to be on the lighter side of the sod weight spectrum.
Fescue
- Weight Range: 20 to 35 pounds per roll. Fescue varieties, especially tall fescue, have a robust root system and dense foliage, making their rolls heavier.
Factors Influencing Sod Weight
- Soil Moisture: Sod that has been recently watered or harvested during wet conditions will weigh significantly more due to the water content in the soil.
- Sod Thickness: The depth at which sod is cut can vary, with thicker cuts including more soil and roots, thus increasing the weight.
- Roll Size: The dimensions of the sod roll also play a crucial role in determining its weight. Larger rolls designed for commercial projects can weigh substantially more.
What Are Some Tips for Installing Sod?
Here are step-by-step tips to ensure your sod takes root and flourishes:
Soil Preparation
- Clear the Area: Remove weeds, debris, and old grass. Start with a clean slate for the best results.
- Soil Testing: Test to determine nutrient needs and to make sure it has the right pH and nutrient levels.
- Level the Ground: Use a rake to level the soil. This helps prevent water pooling and ensures the sod makes good contact with the soil.
Laying the Sod
- Start with Straight Lines: Lay sod along a straight edge, like a driveway or sidewalk.
- Stagger the Joints: Use a brickwork pattern to avoid long seams that can dry out. Staggering the joints helps with stability and appearance.
- Roll the Sod: A lawn roller will help press the sod into the soil, removing air pockets and ensuring good root-to-soil contact.
Watering
- Initial Watering: Water thoroughly immediately after installation, soaking the sod and the soil beneath. This is crucial for root establishment.
- Consistent Moisture: Keep the sod moist for the first two weeks. Water daily or more often during hot, dry conditions to ensure the roots don’t dry out.
Mowing and Traffic
- First Mow: Wait two to three weeks before mowing, and use a high setting.
- Limit Traffic: Keep foot and pet traffic to a minimum until the sod has established. This helps avoid shifting and compaction.
Monitoring
- Watch for Pests and Diseases: Early intervention can prevent serious damage to your new lawn.
- Adjust Watering: As the sod establishes, gradually reduce watering frequency but increase depth to encourage deeper root growth.
How Can I Maintain My Sod?
After successfully installing your sod, proper maintenance is vital to ensure it grows into a healthy, robust lawn. Here are essential tips to keep your sod in top condition:
Watering
- Deep and Infrequent: Transition to deeper, less frequent watering to encourage roots to grow deeper, enhancing drought resistance.
- Morning Watering: Water in the early morning to reduce evaporation and fungal growth.
Mowing
- Height: Keep the grass at its optimal height, typically between 2.5 to 3.5 inches, depending on the grass type. Cutting too short might stress the grass and make it prone to weeds and diseases.
- Frequency: Mow often enough that no more than one-third of a grass blade is removed at a time. This practice keeps the lawn healthy and prevents thatch buildup.
- Sharp Blades: Use sharp mower blades to ensure clean cuts, which help prevent disease from spreading in the grass.
Fertilization
- Test Soil: Test your soil to determine nutrient needs. Over-fertilizing can harm your lawn, while under-fertilizing can lead to weak growth and sparse coverage.
- Fertilizer Type and Schedule: Use a fertilizer that matches your grass type and climate. Generally, fertilizing in the spring and fall is recommended for cool-season grasses, while warm-season grasses benefit from summer fertilization.
Weed Control
- Early Intervention: Address weeds early before they can establish and spread. Use a pre-emergent herbicide if necessary and spot-treat weeds with a post-emergent herbicide, ensuring it’s safe for your type of sod.
- Manual Removal: For minor weed issues, manual removal may be sufficient. Ensure you get the roots to prevent regrowth.
Aeration
- Annual Aeration: Perform aeration once a year to alleviate soil compaction, allowing air, water, and nutrients to penetrate deeper into the soil. This process is especially beneficial for high-traffic lawns.
Dethatching
- When Necessary: If the thatch layer becomes thicker than 1/2 inch, dethatching might be necessary to ensure water and nutrients can reach the soil.
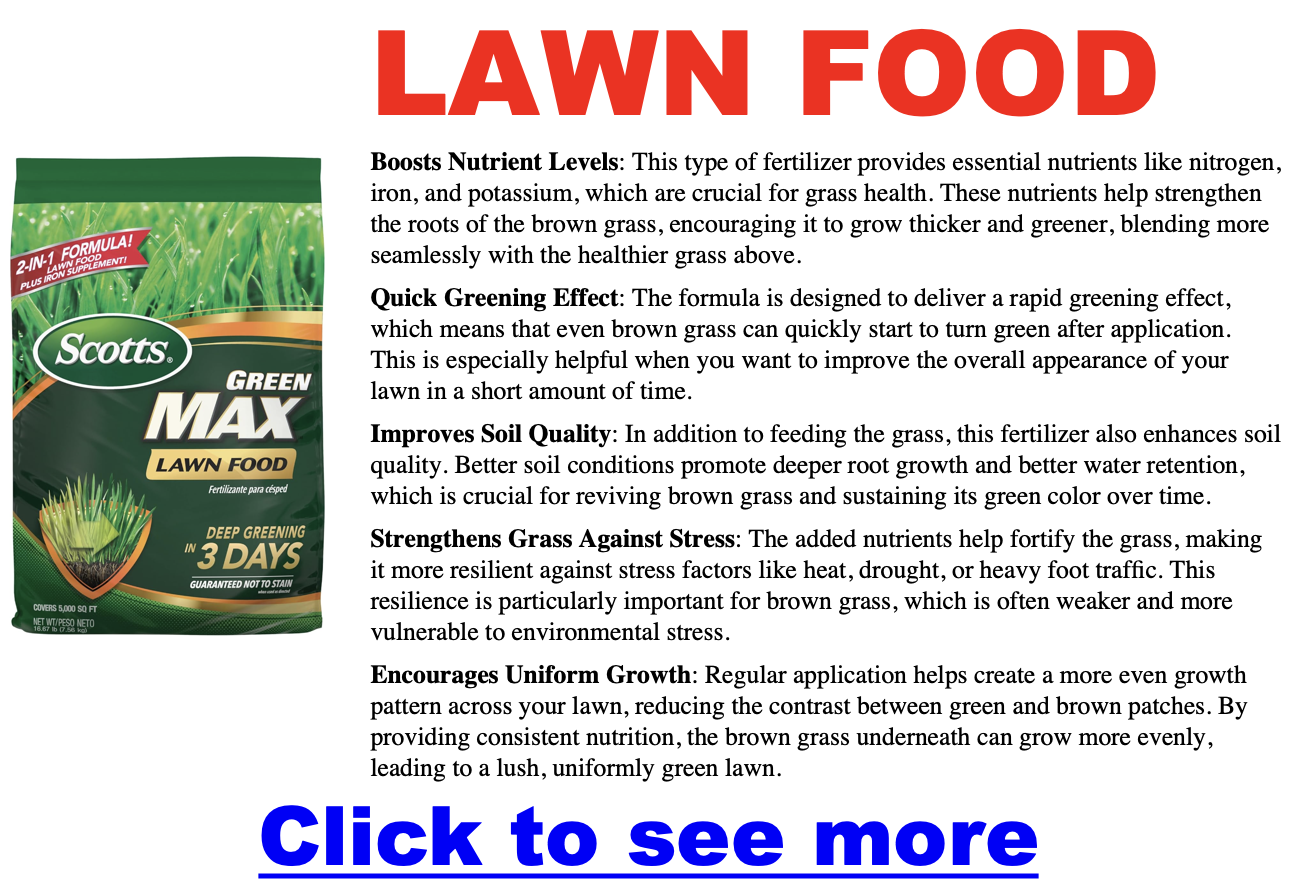
Brown grass underneath green grass 5 common causes explained
At first glance, your lawn appears healthy and vibrant. But beneath the surface, you might notice something less reassuring—patches of dry, brown grass hiding below the green blades. What’s really going on? This hidden issue is surprisingly common, and understanding the underlying causes can help you restore your lawn’s full health.
While you’re improving your lawn, why not consider transforming your entire yard? Use our free Landscaping Cost Calculator to plan your dream landscape — and explore over 7,000 professional landscaping ideas for inspiration.

Why Is Grass Brown Beneath the Green Surface?
There are a few typical reasons for this layered appearance. Below are five common causes—and how to tackle each one effectively:
Thatch Accumulation: The Suffocating Middle Layer
Click here for my favorite liquid dethatcher
Definition: Thatch is a layer of undecomposed roots, stems, and debris that builds up between the soil and the green blades.
Problems it causes:
- Restricts water, air, and nutrient flow
- Encourages disease and root suffocation
How to identify it:
- Cut out a small wedge of grass and inspect the thickness of the brown spongy layer
- A layer thicker than half an inch usually needs attention
Solution:
- Remove excess thatch.
Old Growth Hangover: Residual Grass from Past Seasons
Definition: Dead blades left over from a previous season that haven’t broken down yet
Why it happens:
- Common in seasonal transitions (especially spring)
- New growth pushes up through older, dead material
Solution:
- Rake thoroughly to remove old debris
- Regular spring & fall cleanups promote healthier lawns
Too Much Water: Oversaturation and Root Stress
Definition: When a lawn receives more water than it can absorb, roots become deprived of oxygen
What to watch for:
- Soil that stays soggy
- Browning grass at the lower layers
Solution:
- Water only once or twice per week, deeply
- Aim for about one inch of water weekly, including rainfall
- Improve drainage in problem areas
Limited Sunlight or Poor Airflow: A Lawn That Can’t Breathe
Definition: Grass hidden under dense canopies or compacted soil doesn’t get the light or circulation it needs
Contributing factors:
- Shady areas beneath trees or next to structures
- Grass that’s cut too short or growing too thick
Solution:
- Raise mower blades to recommended heights (usually 2.5–3.5 inches)
- Trim trees to allow more light
- Aerate compacted areas once or twice a year

Fungal Lawn Diseases: Trouble from Below
Definition: Lawn fungi often strike the base of the grass first, working upward
Signs to look for:
- Circular brown patches
- A musty or sour odor
- Wet, matted, or discolored lower blades
Solution:
- Apply a lawn-safe fungicide if symptoms appear
- Avoid watering in the evening
- Reseed or patch affected areas if needed
Quick Reference: Common Causes and Fixes
IssueVisible SignRecommended Action
Thatch Buildup Thick brown mat below green grass Dethatch manually or with powered equipment
Dead Grass Layer Brown blades from prior growth Rake and remove old matter
Overwatering Soggy soil, browning underneath Reduce watering, improve drainage
Lack of Light/Air Thin, pale, or brown in shaded areas Raise mower height, aerate, trim trees
Fungal Disease Discoloration, patchy growth Apply fungicide, adjust watering practices

What You Can Do Today
A few small changes in how you care for your lawn can help prevent brown grass from building up beneath the surface:
Assess Your Lawn:
- Inspect for compacted soil or a thick thatch layer
- Check how much sunlight your lawn receives
- Observe your watering schedule
Make Adjustments:
- Rake away old debris
- Aerate compacted soil
- Water wisely (morning, not evening)
- Apply treatment for fungus only if needed
Your lawn doesn’t have to be a mystery. With a little attention, you can ensure it’s just as healthy below the surface as it looks from above.