Uncategorized
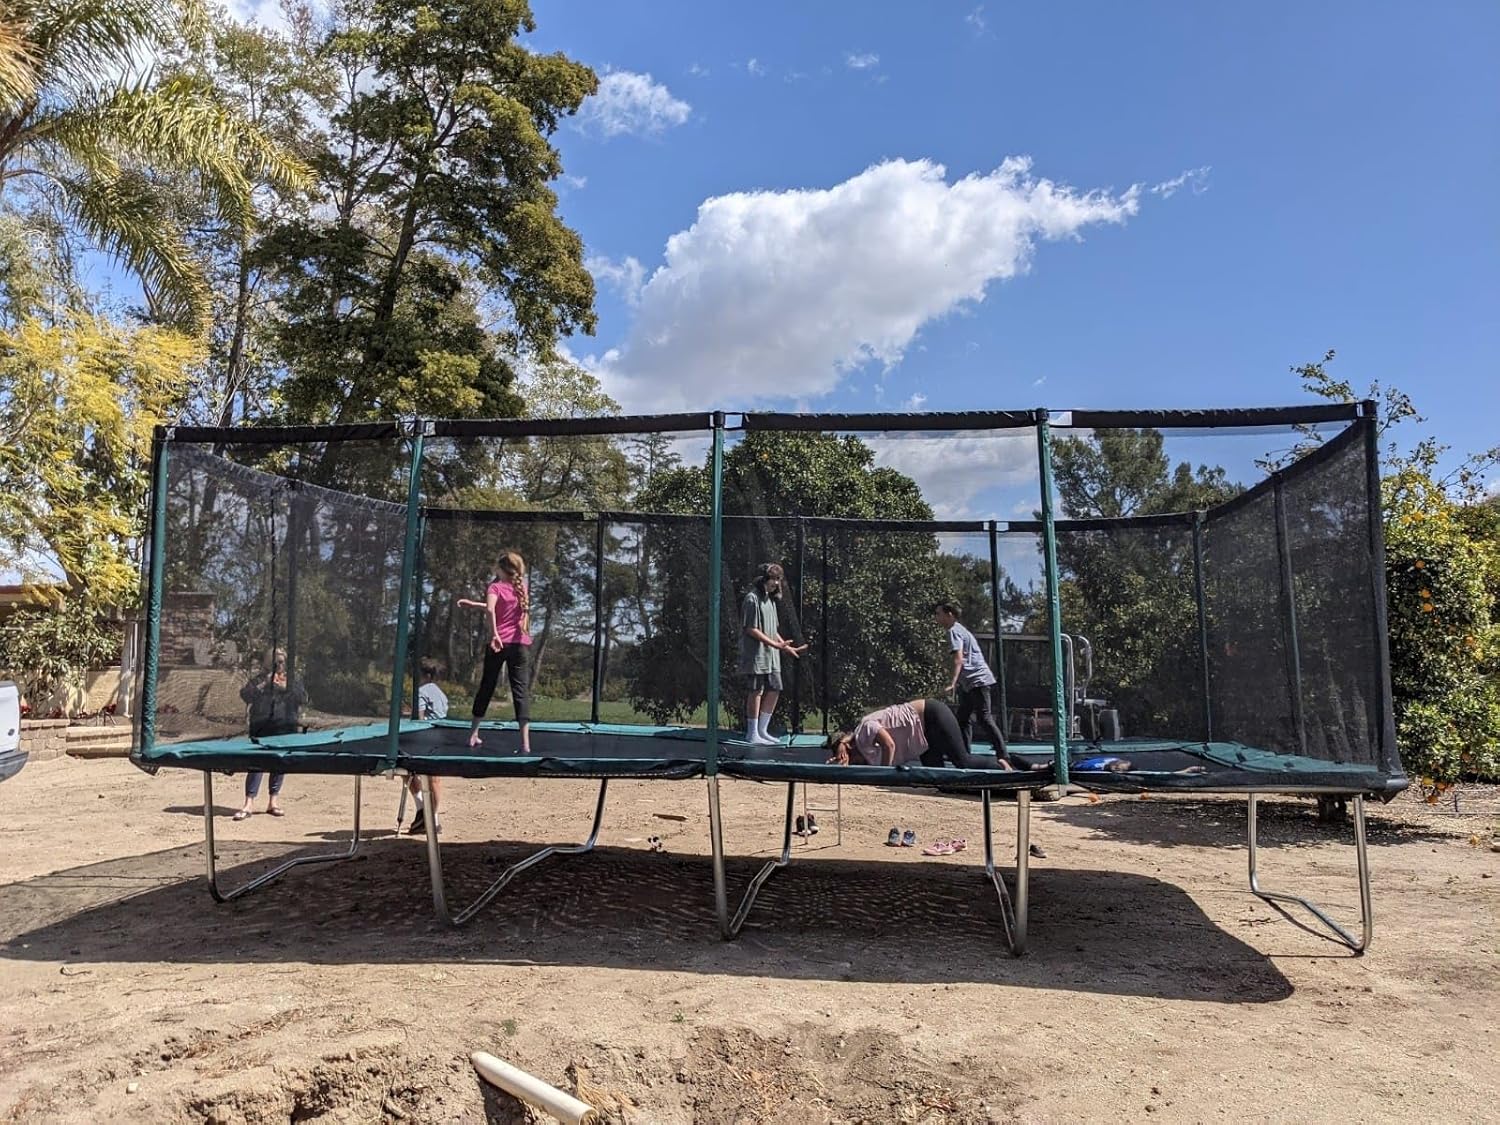
How to Prepare Your Backyard for a Trampoline (Without Ruining Your Grass)
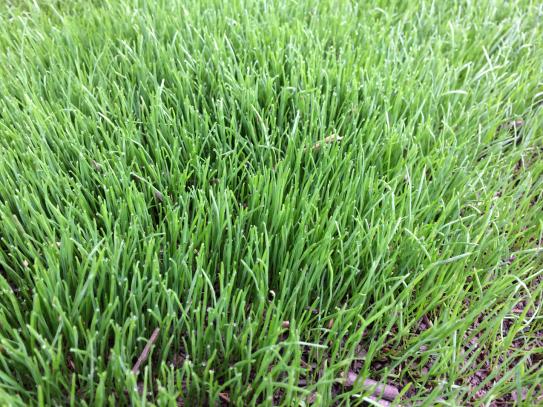
Installing a trampoline sounds simple—put it on the lawn and let the kids jump.
In reality, that’s how you end up with dead grass, muddy patches, and an uneven trampoline within a few weeks.
If you want your trampoline to stay level, safe, and not destroy your yard, the ground prep matters. Below is the grass-smart way to do it, based on real homeowner experiences and basic landscaping principles.
Step 1: Choose the Right Spot First
Before touching the grass, choose the location carefully.
Look for:
-
A flat or nearly flat area
-
6–8 feet of clearance on all sides
-
No overhead branches, fences, or wires
-
No low spots where water collects after rain
👉 If the area already puddles, putting a trampoline there will make it worse.
Step 2: Understand What Happens to Grass Under a Trampoline
Here’s the honest truth most people learn the hard way:
-
Grass under a stationary trampoline almost always dies
-
Shade + foot traffic + compacted soil = bare dirt
-
Once the grass is gone, rain turns it into mud
Some people move their trampoline regularly to keep grass alive—but for most families, that becomes unrealistic fast.
The smarter move: plan for the grass underneath to not survive and prepare accordingly.
Step 3: Remove the Grass (Don’t Just Flatten It)
Instead of letting the grass die slowly, remove it intentionally.
How:
-
Strip 2–4 inches of grass and topsoil
-
Make the cleared area slightly larger than the trampoline frame
Why this works:
-
Prevents muddy buildup
-
Stops weeds from pushing through later
-
Creates a stable base instead of soft, sinking turf
Step 4: Level the Ground Properly
A trampoline exaggerates even small slopes.
To level correctly:
-
Use a long straight board (2×4) with a level
-
Dig down high spots instead of filling low spots
-
Aim for fully level—not “close enough”
⚠️ Avoid building up low areas with loose soil. It will compact unevenly and cause the frame to tilt.
Step 5: Install a Weed Barrier (This Is Key)
Lay down landscape fabric over the cleared soil.
Benefits:
-
Blocks weeds and grass regrowth
-
Keeps soil from mixing into your base
-
Reduces mud and erosion
Secure it tightly with landscape staples.
Step 6: Choose the Best Surface Under the Trampoline
You have a few solid options depending on budget and aesthetics.
Option A: Crushed Stone (Best Overall)
-
2–3 inches of ¼” crushed stone or stone screenings
-
Lightly compacted
Pros: Excellent drainage, clean look, low maintenance
Cons: Slightly more labor upfront
Option B: Rubber Mulch
-
Soft and kid-friendly
-
Drains well
Pros: Clean appearance, no splinters
Cons: More expensive than stone
Option C: Landscape Fabric Only (Temporary)
-
Works short term
Cons: Dusty, wears quickly, not ideal long-term
Step 7: Install the Trampoline and Re-Check Level
Once assembled:
-
Make sure all legs sit firmly
-
No rocking or sinking
-
Re-check level after the frame is fully loaded
Optional but smart:
-
Place pavers or flat stones under each leg
-
Helps prevent sinking during wet seasons
Common Mistakes to Avoid
❌ Leaving the trampoline directly on grass
❌ Ignoring drainage issues
❌ Filling low spots instead of digging high spots
❌ Skipping weed barrier fabric
These mistakes lead to:
-
Mud pits
-
Rusted legs
-
Uneven bounce
-
Re-doing the entire setup later
Optional Upgrades That Make Life Easier
-
Edging around the base to contain stone or mulch
-
Stepping stones from the yard to the trampoline
-
Ground anchors for wind safety
Quick Rule of Thumb
If you want your trampoline to:
-
Stay level
-
Avoid mud
-
Look intentional in your yard
👉 Grass out → fabric down → draining base in.
Final Thought
A trampoline doesn’t have to wreck your lawn—but it will if you treat it like temporary yard furniture. A little prep upfront saves you months of mess and frustration later. By the way, here are some of the best backyard trampolines.
If you want help dialing this in further (yard slope, soil type, trampoline size), you can tailor this setup easily with a few small adjustments.
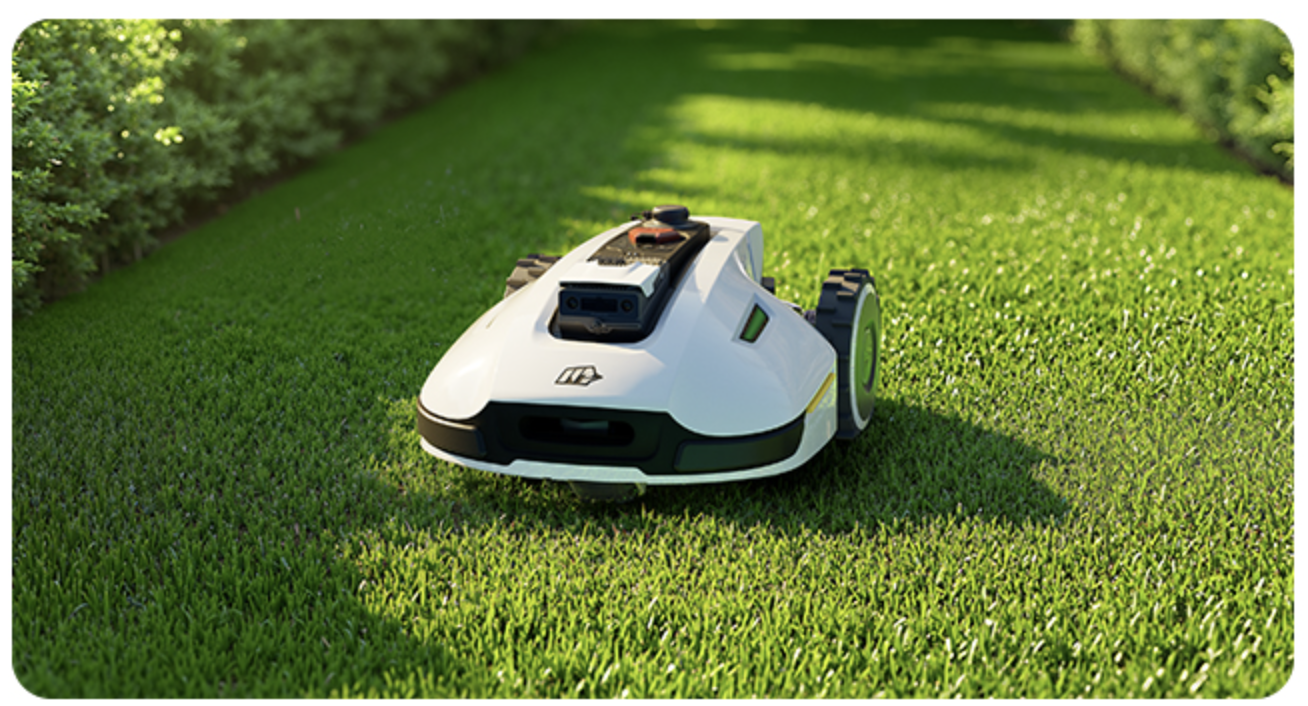
The Ultimate Turf Upgrade for Golfers Who Practice at Home
If you golf at home, you already understand something most homeowners don’t:
your grass isn’t just a lawn — it’s a playing surface.
Putting greens, fairway strips, and practice turf demand consistency, precision,
and repeatability. And that’s exactly where robotic lawn mowers shine.
This guide explains why robotic mowers are becoming the ultimate turf upgrade
for golfers — and where they fit naturally into a serious home practice setup.
How Golfers Actually Think About Grass
Most homeowners think mowing is about cutting grass shorter.
Golfers think in terms of:
- Consistent cut height
- Smooth, predictable ball roll
- Dense turf with no scalping
- Repeatable results week after week
This is why golf courses don’t mow once a week.
They mow frequently, lightly, and consistently.
Robotic mowers follow the same turf management principle:
they remove a small amount of grass often, instead of shocking the turf.
That single difference changes everything.

See robotic mowers designed for precision turf maintenance →
The Problem With Traditional Mowers for Golf Turf
Even high-quality push or riding mowers struggle with golf-style turf care:
- Inconsistent walking speed leads to uneven cutting
- Missed mowing days cause grass to get too long
- Heavy wheels compact turf and leave wear patterns
- Manual edging disrupts clean turf borders
- Every mow produces slightly different results
On a normal lawn, this might not matter.
On a practice green or fairway strip, it shows immediately — especially in ball roll.
Golfers don’t need to mow faster.
They need predictable turf conditions.
Why Robotic Mowers Match Golf Course Maintenance Logic
1. Frequent, Light Cuts
Robotic mowers trim daily or near-daily, removing only a small amount of grass each pass.
This mirrors professional turf management and helps:
- Maintain consistent height
- Encourage thicker turf density
- Reduce scalping and stress
View mowers built for daily precision cutting →
2. Fixed, Repeatable Cut Height
Once set, a robotic mower cuts at the same height every time.
No guesswork. No drift. No rushed adjustments.
For golfers, this is ideal for:
- Practice greens
- Fairway-style hitting zones
- Dedicated chipping areas
Compare robotic mowers with precise height control →
3. Lightweight, Low-Impact Design
Unlike riding mowers, robotic units are lightweight and consistent in movement.
That means:
- Less turf compaction
- No ruts or worn turning spots
- Better long-term turf health
This is especially important for golfers maintaining premium turf surfaces.
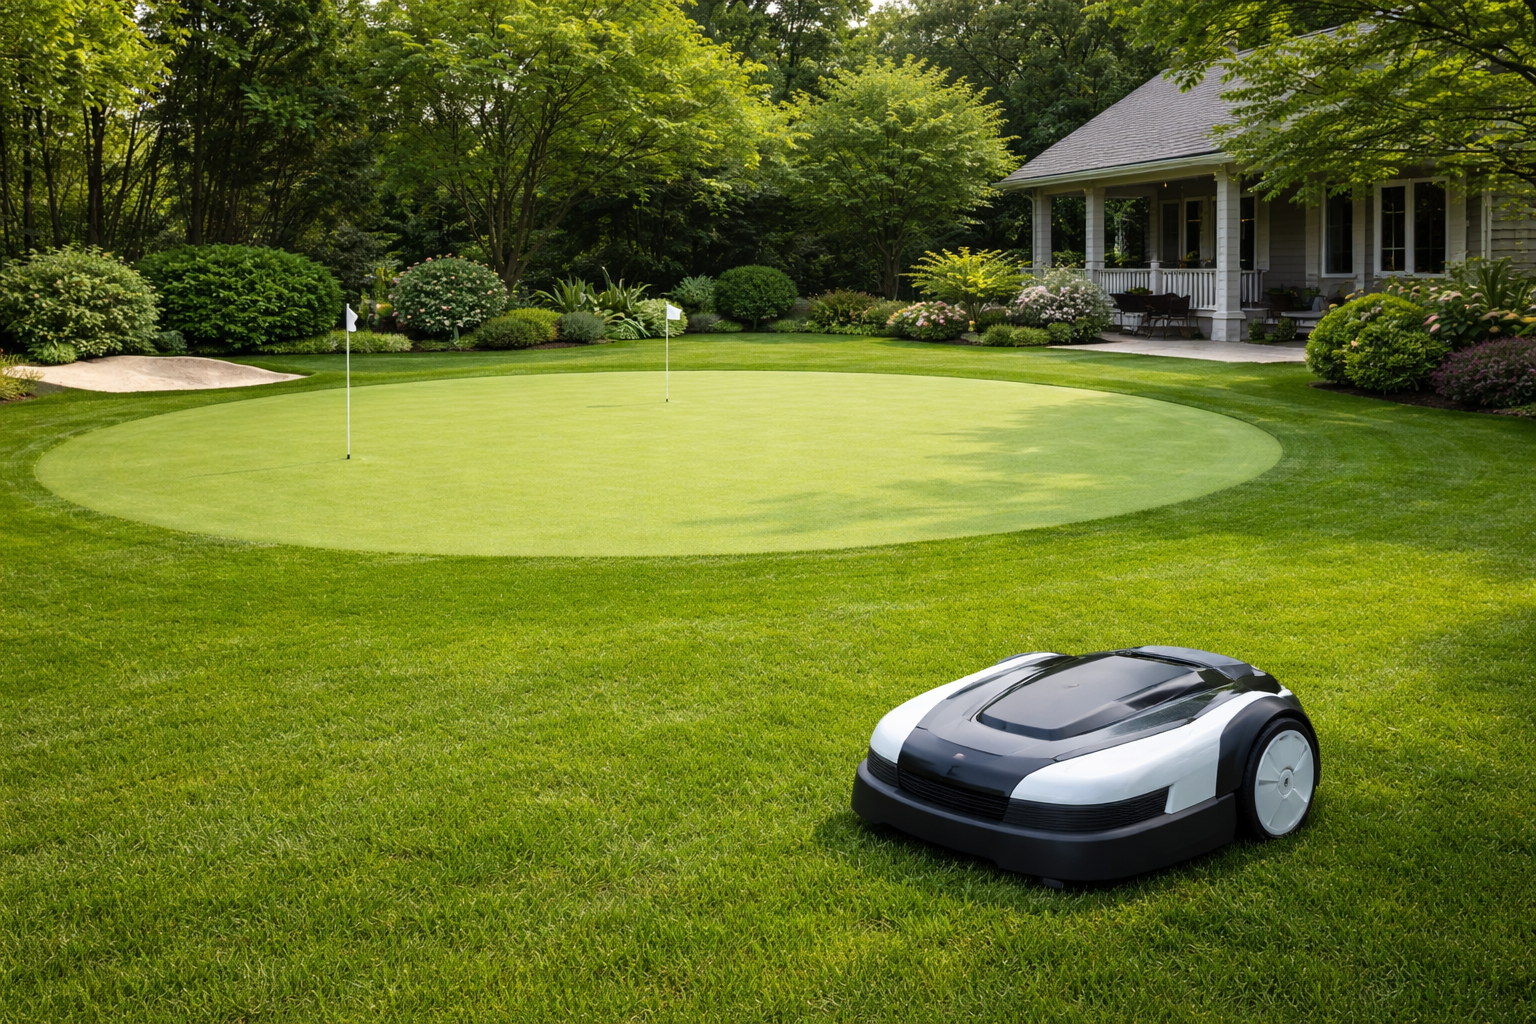
Perfect for Defined Golf Zones at Home
Most golfers don’t want their entire yard treated the same way.
They maintain specific zones, such as:
- Putting greens
- Chipping areas
- Fairway strips
- Practice turf near nets or simulators
Robotic mowers excel at maintaining defined areas with consistent schedules,
making them ideal for home golf setups.
See robotic mowers that support multiple mowing zones →
More Practice Time — Without Sacrificing Turf Quality
Golfers already spend time practicing, training, and playing.
The last thing they want is to:
- Schedule mowing sessions
- Redo cuts after rain
- Fix uneven turf before practice
A robotic mower removes the chore without lowering standards.
Your turf stays practice-ready even if you don’t touch it for weeks.
Explore set-and-forget robotic mowers for golfers →
Is a Robotic Mower Worth It for Golfers?
For golfers, the comparison isn’t:
robot mower vs cheap mower
It’s:
manual turf maintenance vs course-style consistency
When you factor in:
- Time saved
- Improved turf quality
- Reduced wear and mistakes
- Long-term turf health
A robotic mower becomes an equipment upgrade — not a convenience purchase.
Choosing the Right Robotic Mower for Golf Turf
When choosing a robotic mower for a golf-focused setup, prioritize:
- Precise cut height control
- Consistent scheduling
- Support for defined mowing zones
- Lightweight, turf-friendly design
- Clean, even cutting patterns
Recommended robotic mowers for golfers:
- Best robotic mower for putting greens
- Best robotic mower for fairway strips
- Best robotic mower for mixed-use yards + turf zones
Final Thoughts
If you’ve invested in practicing at home, your turf deserves the same level of care.
A robotic mower isn’t about mowing less —
it’s about maintaining golf-quality turf automatically.
Explore robotic mowers built for serious golfers →
How to Sharpen Mower Blades Like a Pro: Safe, Simple Steps for a Cleaner Cut
If you care about how your lawn looks, there’s one thing you can’t ignore: sharp mower blades.
They make or break that deep-green, velvety, professional look that separates a good lawn from a great one.
After years of experimenting with fertilizers, irrigation schedules, and mower settings, I discovered that blade sharpness has the biggest visual impact for the least effort. So here’s how I do it — safely, efficiently, and with results you’ll notice on the very next mow.
Why Sharp Blades Make All the Difference
When blades are dull, they don’t slice — they rip.
That ripping causes the grass tips to fray and brown within a day or two, ruining the clean, uniform look every lawn nut wants.
Sharp blades, though? They give you that perfect, even, “carpet cut” finish — like a putting green in your backyard.
Here’s what I’ve noticed firsthand since making blade sharpening part of my lawn routine:
-
My mower glides instead of fighting through thick turf.
-
The color stays rich and consistent for days after mowing.
-
I mow faster and use less fuel (seriously noticeable).
-
My stripes pop because the grass blades are uniform in height and color.
I used to think dull blades were fine because “the mower still cuts.”
Wrong. The difference between a dull blade and a sharp one is like trimming your hair with scissors versus tearing it with pliers.
How Often I Sharpen (and Why Timing Matters)
I sharpen my mower blades twice a season without fail — once in spring before the first cut and again around mid-summer.
If I scalp a hidden rock or notice brown grass tips after mowing, I sharpen sooner.
For most homeowners, sharpening every 20–25 mowing hours is ideal. If you mow weekly, that’s about every 6–8 weeks.
If you’ve got sandy soil or mow over rough terrain, you might need to touch up more often.
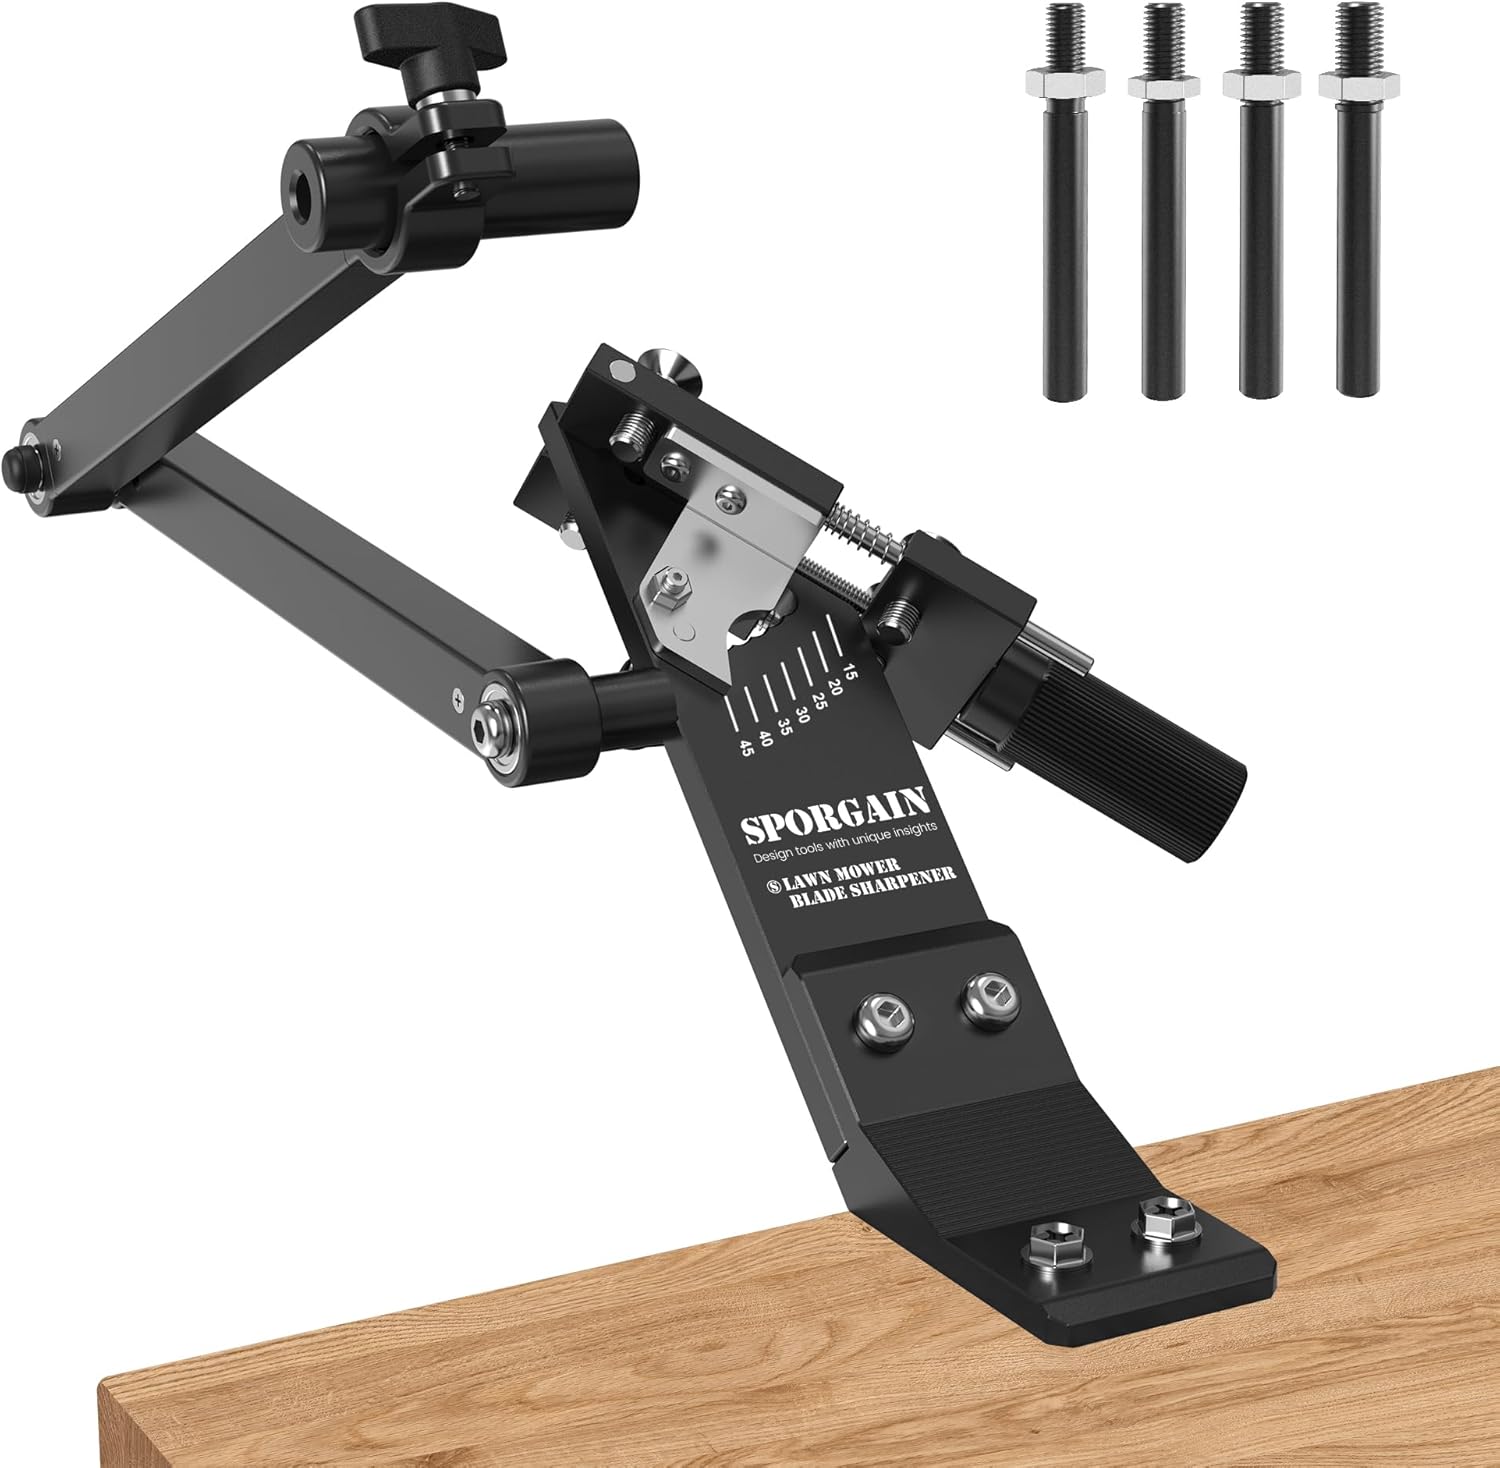
Click Here for Blade Sharpeners
My Go-To Tools for a Perfect Edge
Over the years, I’ve tried everything from hand files to bench grinders. Here’s what’s worked best for me:
| Tool | Why I Use It |
|---|---|
| Socket wrench | For quick blade removal |
| Bench vise | Holds the blade steady and safe |
| Flat metal file | Great control for fine sharpening |
| Angle grinder (optional) | Speeds up heavy touch-ups |
| Blade balancer | Ensures smooth, vibration-free mowing |
| Work gloves & safety glasses | Non-negotiable for safety |
Pro tip: I keep a spare blade handy. That way, I can swap them mid-season and sharpen the other at my leisure.
My Step-By-Step Sharpening Process
1. Disconnect Power
First rule of mower maintenance: no surprises.
I always pull the spark plug wire (gas mower) or remove the battery (electric). I’ve seen enough close calls online to never skip this.
2. Remove the Blade
I tip the mower on its side — carburetor facing up to prevent leaks — and mark the underside of the blade with a Sharpie. This little trick prevents reinstalling it upside down (we’ve all been there).
3. Clean and Inspect
I scrape off caked grass and rust, then check for cracks or bends. If a blade looks warped or thin at the edges, I replace it. You can’t fix metal fatigue.
4. Sharpen Along the Bevel
This part’s oddly satisfying.
I clamp the blade in the vise, grab my file, and stroke in one direction only, following the original bevel (usually around 30–45°). I like to think of it like honing a knife — smooth and controlled.
If I’m using the angle grinder, I go slow to avoid overheating. Overheating changes the metal’s hardness and shortens its life. You want a clean, silvery edge that’s sharp but not paper-thin.
5. Balance the Blade
Most people skip this. Don’t.
I hang the blade on a nail through its center hole. If one side dips lower, I grind a bit more off that side until it hangs level. This small step keeps your mower from vibrating like crazy and makes the cut perfectly even.
6. Reinstall and Tighten
I mount the blade back in the correct direction (marking helps!), torque it down firmly, and reconnect the spark plug wire.
Then I mow a small section to test. When the mower hums smoothly and the grass cuts clean — that’s when I know it’s right.
The Payoff: A Lawn That Looks Professionally Cut
After sharpening, the difference is instant.
My mower glides like it’s brand new, the lawn stripes line up cleanly, and the color is uniform across the yard.
I’ve had neighbors ask if I switched mowers — nope, just sharpened the blades.
Here’s what I’ve learned:
-
Sharp blades make mowing effortless.
-
They reduce engine strain, so you burn less gas and the mower lasts longer.
-
They improve turf health, which means greener, thicker grass over time.
I used to spend hours on fertilizers and irrigation schedules, but blade maintenance is the easiest upgrade of them all.
Mistakes I’ve Made (So You Don’t Have To)
-
Over-sharpening: Don’t aim for a knife edge — it dulls fast and chips easily.
-
Skipping balance: The first time I ignored it, my mower vibrated like a jackhammer.
-
Grinding too hot: Overheating weakens the steel. Take breaks if using power tools.
-
Wrong angle: Always follow the factory bevel — you’re refreshing the edge, not redesigning it.
-
Installing upside down: Trust me, it happens. Mark your blade first.
When It’s Time to Replace, Not Sharpen
If your blade is cracked, bent, or worn down to a thin edge, sharpening won’t save it.
I replace mine about every 2–3 years depending on wear. OEM blades (Toro, Honda, or your mower’s brand) always fit better and cut cleaner than cheap replacements.
My Routine for the Sharpest Blades Year-Round
-
Sharpen twice a season: Spring and mid-summer.
-
Clean after every mow: Prevents rust and buildup.
-
Rotate blades: Always have one sharp spare.
-
Keep tools handy: The fewer excuses, the better.
It’s a simple ritual now — I clean, sharpen, and balance while listening to music in the garage. The smell of fresh-cut grass afterward? Worth every minute.
Final Thoughts
You can have the best fertilizer, the perfect mowing height, and an irrigation timer set to the second — but if your blades are dull, your lawn will always look average.
Sharpening is the hidden secret behind that “golf course” finish.
It’s easy, satisfying, and one of those little homeowner rituals that pays off immediately.
So next weekend, skip the new gadget and grab a file instead. Your grass will thank you — and your neighbors might start asking what you’re doing differently.
Centipede Grass: The Low-Maintenance Lawn for Warm Climates
If you’ve ever dreamed of a lawn that stays green without demanding constant mowing, fertilizing, or watering, Centipede grass might be your new favorite turf. Often nicknamed “the lazy man’s grass”, it’s beloved across the Southeast for its slow growth and easy care — though it comes with its own quirks.
As someone who’s tested everything from Bermuda to Fescue, I’ve found Centipede to be one of the most forgiving options when planted in the right soil and climate. Let’s dig into what makes it unique, how to care for it, and when it’s the perfect fit for your yard.
🌿 What Is Centipede Grass?
Centipede grass (Eremochloa ophiuroides) is a warm-season turfgrass native to China and Southeast Asia, now common across the southern U.S. — particularly the Carolinas, Georgia, Alabama, and Florida Panhandle.
It forms a dense, light-green turf through stolons (above-ground runners), not underground rhizomes. Unlike fast-spreading Bermuda or Zoysia, it grows slowly and stays relatively short, making it one of the lowest-maintenance grasses you can grow.
Fill Dead Spots + Regrow Centipede Grass
Ideal Conditions
- USDA Zones: 7–10
- Soil Type: Sandy or low-fertility soils
- Soil pH: 4.5–6.0 (acidic)
- Sun Exposure: Full sun to partial shade
- Climate: Warm, humid, with mild winters
Centipede is happiest in acidic, sandy soils where other grasses struggle — but it won’t tolerate cold snaps or heavy foot traffic.
⚖️ How Centipede Grass Differs from Other Lawns
| Grass Type | Growth Speed | Fertilizer Needs | Cold Tolerance | Traffic Tolerance | Color |
|---|---|---|---|---|---|
| Centipede | Slow | Very low | Poor | Low | Light green |
| Bermudagrass | Fast | High | Moderate | High | Medium green |
| Zoysiagrass | Moderate | Moderate | Good | Moderate | Deep green |
| St. Augustine | Moderate | Moderate-High | Fair | Moderate | Blue-green |
| Tall Fescue | Cool-season | Moderate | Excellent | Moderate | Dark green |
Centipede thrives where others burn out or go hungry, especially in sandy or acidic soils. But it won’t recover quickly from wear, so it’s not ideal for sports or play areas.
Click for our favorite Centipede grass plugs
✅ Pros of Centipede Grass
-
Low Maintenance: Requires less mowing and fertilizer than most warm-season lawns.
-
Thrives in Poor Soils: Performs well in sandy, nutrient-poor conditions.
-
Moderate Drought Resistance: Once established, it handles dry spells fairly well.
-
Few Pest Problems: Dense stolons help choke out many weeds naturally.
-
Minimal Thatch: Its slow growth means you rarely need to dethatch.
❌ Cons of Centipede Grass
-
Cold Sensitivity: Prone to winter injury in areas with hard freezes.
-
Iron Deficiency Risk: Tends to yellow (chlorosis) in alkaline or compacted soils.
-
Slow Recovery: Damage or bare spots take time to fill in.
-
Limited Wear Tolerance: Not ideal for kids, dogs, or high-traffic lawns.
-
Winter Browning: Goes dormant and turns brown when temperatures drop.
🧑🌾 How to Care for Centipede Grass
Centipede is often described as “low maintenance, not no maintenance.” It still needs the right care — just less of it.
1. Mowing
-
Height: Keep it between 1.0–2.0 inches (1.5″ is ideal).
-
Frequency: Mow when it exceeds 2 inches; don’t scalp.
-
Blade Care: Always mow with a sharp blade to prevent tearing.
Pro Tip: Centipede’s stolons sit on the soil surface — scalping can kill them. Raise your mower during dry or hot spells.
2. Watering
-
Aim for 1 inch of water per week (rain + irrigation).
-
Water deeply and infrequently to promote deep roots (best times to water grass).
-
In sandy soil, short but more frequent watering may help prevent drought stress.
3. Fertilizing
-
Centipede has very low nitrogen needs — about 0.5–1 lb of nitrogen per 1,000 sq ft per year (how often to fertilize).
-
Apply once in late spring or early summer when growth begins.
-
Avoid over-fertilizing; it causes thatch buildup and weakens the grass.
-
If you notice yellowing, apply a chelated iron supplement rather than more nitrogen.
4. Weed & Pest Management
-
Maintain soil pH between 5.0–6.0.
-
Use pre-emergent herbicide in early spring if crabgrass or spurge is common.
-
Watch for mole crickets or nematodes in sandy soils.
-
Encourage healthy turf density to outcompete weeds naturally.
5. Seasonal Care Calendar
| Season | Maintenance Tasks |
|---|---|
| Spring | Test soil pH; apply light fertilizer; treat pre-emergent weeds |
| Summer | Deep watering; mow at 1.5–2″; spot-treat weeds |
| Fall | Reduce mowing; avoid late nitrogen; apply iron if yellowing |
| Winter | Allow dormancy; avoid foot traffic on brown turf |
🧩 Common Problems and Solutions
| Problem | Likely Cause | Fix |
|---|---|---|
| Yellowing leaves | High soil pH or iron deficiency | Apply chelated iron; lower soil pH |
| Bare spots | Drought or traffic damage | Patch with plugs in late spring |
| Thatch buildup | Too much fertilizer | Reduce nitrogen; dethatch if spongy |
| Patchy growth | Shade or compacted soil | Thin trees; aerate lightly |
🌤️ When Centipede Grass Is the Right Choice
Choose Centipede if:
-
You live in a warm, humid climate (Zones 7–10).
-
Your soil is acidic and sandy.
-
You want a low-input, easy-care lawn that doesn’t demand constant feeding.
Avoid Centipede if:
-
You have alkaline clay soil or frequent frost.
-
You need a lawn for kids, dogs, or sports.
-
You expect instant recovery from damage.
🧠 Expert Takeaway
Centipede grass shines where others fail — in low-fertility, sandy soils where homeowners want a simple, slow-growing lawn. But it’s not a universal solution. It needs the right pH, sunlight, and climate to look its best.
According to Clemson University’s Turfgrass Extension, Centipede is among the few grasses that can maintain decent color and coverage on nutrient-poor soils — but it must be kept acidic to stay green.
If you’re starting from scratch, test your soil first and confirm your region’s suitability. When conditions align, Centipede offers one of the easiest and most sustainable lawns you can grow.
🧾 Quick Reference Summary
| Category | Details |
|---|---|
| Scientific Name | Eremochloa ophiuroides |
| Type | Warm-season, stoloniferous |
| Soil pH | 4.5–6.0 |
| Sunlight | Full sun to partial shade |
| Mowing Height | 1.0–2.0 inches |
| Watering | 1 inch per week |
| Fertilizer | 0.5–1 lb N/1,000 sq ft yearly |
| Best For | Low-maintenance, acidic soils |
| Avoid If | Cold winters, alkaline soil, high traffic |
Bermudagrass: The Tough, Sun-Loving Lawn That Thrives in the Heat
If your goal is a lawn that can handle kids, pets, and blazing summer sun without missing a beat, Bermudagrass may be the grass for you. Known for its toughness, dense coverage, and quick recovery, Bermuda is the go-to turf for golf courses, athletic fields, and homeowners across the southern United States.
But this isn’t a set-it-and-forget-it grass. While it rewards regular care with thick, beautiful turf, it can also become a problem if neglected — or if it spreads where it’s not wanted.
This guide explains everything you need to know about Bermudagrass, including its characteristics, advantages, drawbacks, and expert care tips to keep it looking its best.
🌿 What Is Bermudagrass?
Bermudagrass (Cynodon dactylon) is a warm-season grass native to Africa and India that thrives in hot, sunny climates. It’s most common across the southern half of the United States — from California to the Carolinas — great for high temperatures, drought, and heavy use.
It grows through both stolons (above-ground runners) and rhizomes (underground stems), which helps it spread rapidly and recover from damage. That same growth habit, however, makes it aggressive and sometimes invasive if left unchecked.
Ideal Growing Conditions
| Factor | Ideal Range |
|---|---|
| USDA Zones | 7–10 |
| Soil pH | 5.8–7.0 |
| Sunlight | Full sun (6–8+ hours daily) |
| Soil Type | Well-drained sandy or loamy soil |
| Climate | Warm, humid to semi-arid regions |

Click for our favorite Bermuda grass seed
⚖️ How Bermudagrass Differs from Other Lawns
| Grass Type | Growth Speed | Fertilizer Needs | Shade Tolerance | Cold Tolerance | Traffic Tolerance |
|---|---|---|---|---|---|
| Bermudagrass | Fast | High | Poor | Moderate | Excellent |
| Centipede | Slow | Low | Moderate | Poor | Low |
| Zoysiagrass | Moderate | Moderate | Good | Good | Moderate |
| St. Augustine | Moderate | Moderate | Excellent | Fair | Moderate |
| Tall Fescue | Cool-season | Moderate | Good | Excellent | Moderate |
Bermuda grows aggressively and loves heat, making it ideal for full-sun lawns that get frequent use. Unlike Centipede or Zoysia, it requires more mowing, fertilizing, and attention — but it rewards the effort with lush, uniform turf.
✅ Pros of Bermudagrass
-
Exceptional heat tolerance: Stays vibrant during the hottest months.
-
Durability: Handles heavy foot traffic and recovers quickly from damage.
-
Fast establishment: Spreads rapidly from seed, sod, or plugs.
-
Drought resistance: Can go dormant during dry periods and green up quickly with rain.
-
Weed resistance: Forms a dense canopy that naturally suppresses many weeds.
❌ Cons of Bermudagrass
-
Poor shade performance: Needs full sunlight to thrive.
-
High maintenance: Requires frequent mowing and fertilizing.
-
Aggressive spread: Can invade gardens, driveways, and neighboring lawns.
-
Cold dormancy: Turns brown in winter when temperatures drop.
-
Disease susceptibility: Prone to fungal issues like spring dead spot in cooler zones.
🧑🌾 How to Care for Bermudagrass
Bermuda is a “high-performance” grass — it looks best when you stay consistent with mowing, watering, and feeding.
1. Mowing
-
Height: Keep between 1–2 inches for common Bermuda; 0.5–1 inch for hybrid varieties.
-
Frequency: Mow every 5–7 days during peak growing season.
-
Tip: Use a reel mower if you want that professional golf-course finish.
Pro Tip: Frequent mowing encourages horizontal growth and a thicker, more uniform lawn.
2. Watering
-
Needs 1 inch of water per week.
-
Water deeply and infrequently.
-
During dormancy (winter), watering can be reduced significantly.
3. Fertilizing
-
High nutrient demand: Apply 3–5 lbs of nitrogen per 1,000 sq ft per year, divided into 3–5 feedings from late spring through early fall.
-
Use a balanced fertilizer with micronutrients, especially iron and potassium.
-
Stop fertilizing 6–8 weeks before the first frost to prevent cold damage.
4. Weed & Pest Management
-
Apply pre-emergent herbicide in early spring and early fall.
-
Spot-treat broadleaf weeds as needed.
-
Watch for armyworms, mole crickets, and grubs during summer.
-
Maintain dense turf through proper mowing and feeding — a thick lawn is your best defense.
5. Aeration & Thatch Control
-
Bermuda can develop thatch quickly due to its rapid growth.
-
Core aerate annually in late spring or early summer.
-
Dethatch every 2–3 years or when the layer exceeds ½ inch.
6. Overseeding (Optional)
In cooler areas or if you want winter color:
-
Overseed with perennial ryegrass in early fall (5–10 lbs per 1,000 sq ft).
-
Gradually reduce watering and mowing in spring as Bermuda greens up again.
🗓️ Seasonal Care Calendar
| Season | Key Tasks |
|---|---|
| Spring | Aerate, fertilize, apply pre-emergent, begin mowing |
| Summer | Mow frequently, irrigate deeply, fertilize monthly |
| Fall | Apply final fertilizer, overseed if desired, reduce watering |
| Winter | Allow dormancy, limit traffic, clear debris |
🧩 Common Problems & Solutions
| Problem | Likely Cause | Solution |
|---|---|---|
| Yellowing grass | Iron deficiency or high soil pH | Apply chelated iron or acidify soil |
| Thinning under trees | Too much shade | Prune branches or plant shade-tolerant grass |
| Spring dead spot | Fungal disease | Avoid late-fall nitrogen; use fungicide if severe |
| Weed resurgence | Missed pre-emergent timing | Maintain feeding and mowing schedule |
🌎 When Bermudagrass Is (and Isn’t) the Right Choice
Choose Bermudagrass if:
-
You live in a warm, sunny region (USDA zones 7–10).
-
You want a durable, resilient lawn for kids, pets, or sports.
-
You’re comfortable with regular maintenance and mowing.
Avoid Bermudagrass if:
-
You have heavy shade or alkaline, compacted soil.
-
You live in an area with cold winters or frequent frost.
-
You prefer a low-maintenance or rarely-mowed lawn.
Click for our favorite Bermuda grass seed
Bermudagrass is the powerhouse of warm-season lawns — fast-growing, durable, and beautiful when cared for properly. It thrives in sunlight and heat, making it ideal for southern homeowners who don’t mind regular upkeep.
According to Texas A&M AgriLife Extension, Bermudagrass remains one of the most widely used turf species in warm climates because of its “exceptional resilience, drought tolerance, and quick recovery from damage.”
When properly maintained, a Bermuda lawn delivers the look and performance of a professional sports field — right in your backyard.
🧾 Quick Reference Summary
| Category | Details |
|---|---|
| Scientific Name | Cynodon dactylon |
| Grass Type | Warm-season, stolon & rhizome spread |
| Soil pH Range | 5.8–7.0 |
| Sunlight Needs | Full sun (6–8+ hours) |
| Mowing Height | 1–2 inches (common), 0.5–1 inch (hybrid) |
| Fertilizer Rate | 3–5 lbs N/1,000 sq ft annually |
| Watering | 1 inch per week |
| Best For | Hot, sunny, high-traffic lawns |
| Avoid If | Shady or cool climates |
Zoysiagrass: The Elegant, Durable Lawn for Warm and Transitional Climates
If you’re looking for a dense, soft, and foot-friendly lawn that handles both summer heat and occasional cold snaps, Zoysiagrass may be your best option. Known for its fine texture, carpet-like appearance, and strong resilience, Zoysia bridges the gap between low-maintenance grasses like Centipede and high-performance types like Bermuda.
While it’s not the fastest to establish, homeowners love Zoysia for its beauty, density, and versatility — making it one of the most sought-after warm-season grasses for lawns across the southern and transitional United States.

Zoysiagrass Plugs
What Is Zoysiagrass?
Zoysiagrass (Zoysia spp.) is a warm-season turfgrass native to East Asia. It’s often found in southern and transition-zone states — from Florida to Virginia, across Texas, and into parts of the Midwest.
Zoysia is slower to grow and spread than Bermuda, but once established, it forms an exceptionally thick, lush turf that resists weeds, tolerates drought, and feels wonderful underfoot.
Ideal Growing Conditions
| Factor | Ideal Range |
|---|---|
| USDA Zones | 6–10 |
| Soil pH | 6.0–7.0 |
| Sunlight | Full sun to partial shade |
| Soil Type | Well-drained, fertile soil |
| Climate | Warm, humid, and transitional zones |
How Zoysiagrass Differs from Other Lawns
| Grass Type | Growth Speed | Shade Tolerance | Fertilizer Needs | Cold Tolerance | Traffic Tolerance |
|---|---|---|---|---|---|
| Zoysiagrass | Slow | Good | Moderate | Good | Moderate |
| Bermudagrass | Fast | Poor | High | Moderate | Excellent |
| Centipede | Slow | Moderate | Low | Poor | Low |
| St. Augustine | Moderate | Excellent | Moderate | Fair | Moderate |
| Tall Fescue | Cool-season | Good | Moderate | Excellent | Moderate |
Zoysia stands out for being dense yet soft, durable yet elegant. It requires more patience during establishment but rewards homeowners with one of the most uniform and weed-resistant lawns available.
Pros of Zoysiagrass
-
Fine-to-medium blades create a soft, carpet-like feel.
-
Dense growth suppresses weeds naturally.
-
Deep roots improve drought tolerance.
-
Tolerates moderate shade better than Bermuda.
-
Cold-hardy enough for transitional zones.
-
Slower growth means less frequent mowing.
Cons of Zoysiagrass
-
Establishes slowly, taking time to fill in bare areas.
-
Dense growth can lead to thatch buildup if overfertilized.
-
Turns brown during winter dormancy.
-
Difficult to overseed due to its dense canopy.
-
Requires periodic aeration and dethatching.

Southern Lawn Grass Seed
How to Care for Zoysiagrass
Zoysia is forgiving once established. It doesn’t need constant attention but benefits from consistent mowing, soil management, and light feeding.
1. Mowing
-
Maintain a height of 1–2 inches, depending on the variety.
-
Mow every 7–10 days during active growth.
-
Never remove more than one-third of the blade at a time.
Tip: Keep mower blades sharp. Zoysia’s dense texture dulls blades faster than most grasses.
2. Watering
-
Water deeply but infrequently, about 1 inch per week during dry spells.
-
Zoysia tolerates drought but stays greener with consistent moisture.
-
Reduce watering during dormancy.
3. Fertilizing
-
Apply 2–3 lbs of nitrogen per 1,000 sq ft per year, divided into 2–3 feedings.
-
Feed in late spring and mid-summer.
-
Avoid heavy fertilization in late fall to prevent thatch and cold injury.
-
Apply iron supplements in summer if the lawn appears pale.
4. Weed and Pest Management
-
Apply pre-emergent herbicide in early spring.
-
Spot-treat weeds before the dense canopy closes.
-
Watch for billbugs, mole crickets, and nematodes in sandy soils.
-
Avoid overwatering to prevent fungal issues.
5. Aeration and Thatch Control
-
Zoysia can build thatch quickly.
-
Core aerate annually or biannually in late spring or early summer.
-
Dethatch when the thatch layer exceeds ½ inch to improve airflow and root health.
Seasonal Care Calendar
| Season | Key Tasks |
|---|---|
| Spring | Aerate, fertilize lightly, apply pre-emergent herbicide |
| Summer | Mow regularly, water deeply, apply mid-season fertilizer |
| Fall | Reduce fertilization, manage thatch, prepare for dormancy |
| Winter | Allow rest; avoid heavy traffic or overseeding |
Common Problems and Fixes
| Problem | Likely Cause | Solution |
|---|---|---|
| Patchy or slow fill-in | Newly planted or shaded area | Allow time for spreading; Zoysia fills in gradually via stolons and rhizomes |
| Thatch buildup | Overfertilization or infrequent mowing | Dethatch and reduce nitrogen applications |
| Yellowing leaves | Iron deficiency or poor drainage | Apply iron; improve aeration and soil health |
| Brown patches | Fungal disease from overwatering | Reduce moisture and apply fungicide if necessary |
When Zoysiagrass Is the Right Choice
Choose Zoysiagrass if:
-
You live in a warm or transitional climate (USDA zones 6–10).
-
You want a luxurious, soft lawn that looks uniform and elegant.
-
Your yard receives a mix of sun and partial shade.
-
You’re patient enough to allow time for full establishment.
Avoid Zoysiagrass if:
-
You need quick coverage or frequent overseeding.
-
You live in cold northern climates with harsh winters.
-
You don’t plan to aerate or dethatch periodically.
Expert Takeaway
Zoysiagrass is often called the “luxury turf” of warm-season lawns — refined in appearance, soft underfoot, and resilient in diverse conditions. It combines the durability of Bermuda with a slower growth rate and superior texture.
According to the University of Georgia Turfgrass Extension, Zoysia is one of the most adaptable warm-season grasses, valued for its drought tolerance, low nutrient requirements, and ability to thrive in both sun and partial shade.
For homeowners who value comfort, density, and beauty, a Zoysia lawn is an investment that pays off year after year.
Quick Reference Summary
| Category | Details |
|---|---|
| Scientific Name | Zoysia spp. |
| Grass Type | Warm-season, stolon and rhizome spread |
| Soil pH Range | 6.0–7.0 |
| Sunlight Needs | Full sun to partial shade |
| Mowing Height | 1–2 inches |
| Fertilizer Rate | 2–3 lbs N/1,000 sq ft annually |
| Watering | 1 inch per week |
| Best For | Warm or transitional climates with moderate shade |
| Avoid If | You prefer instant results or live in cold regions |
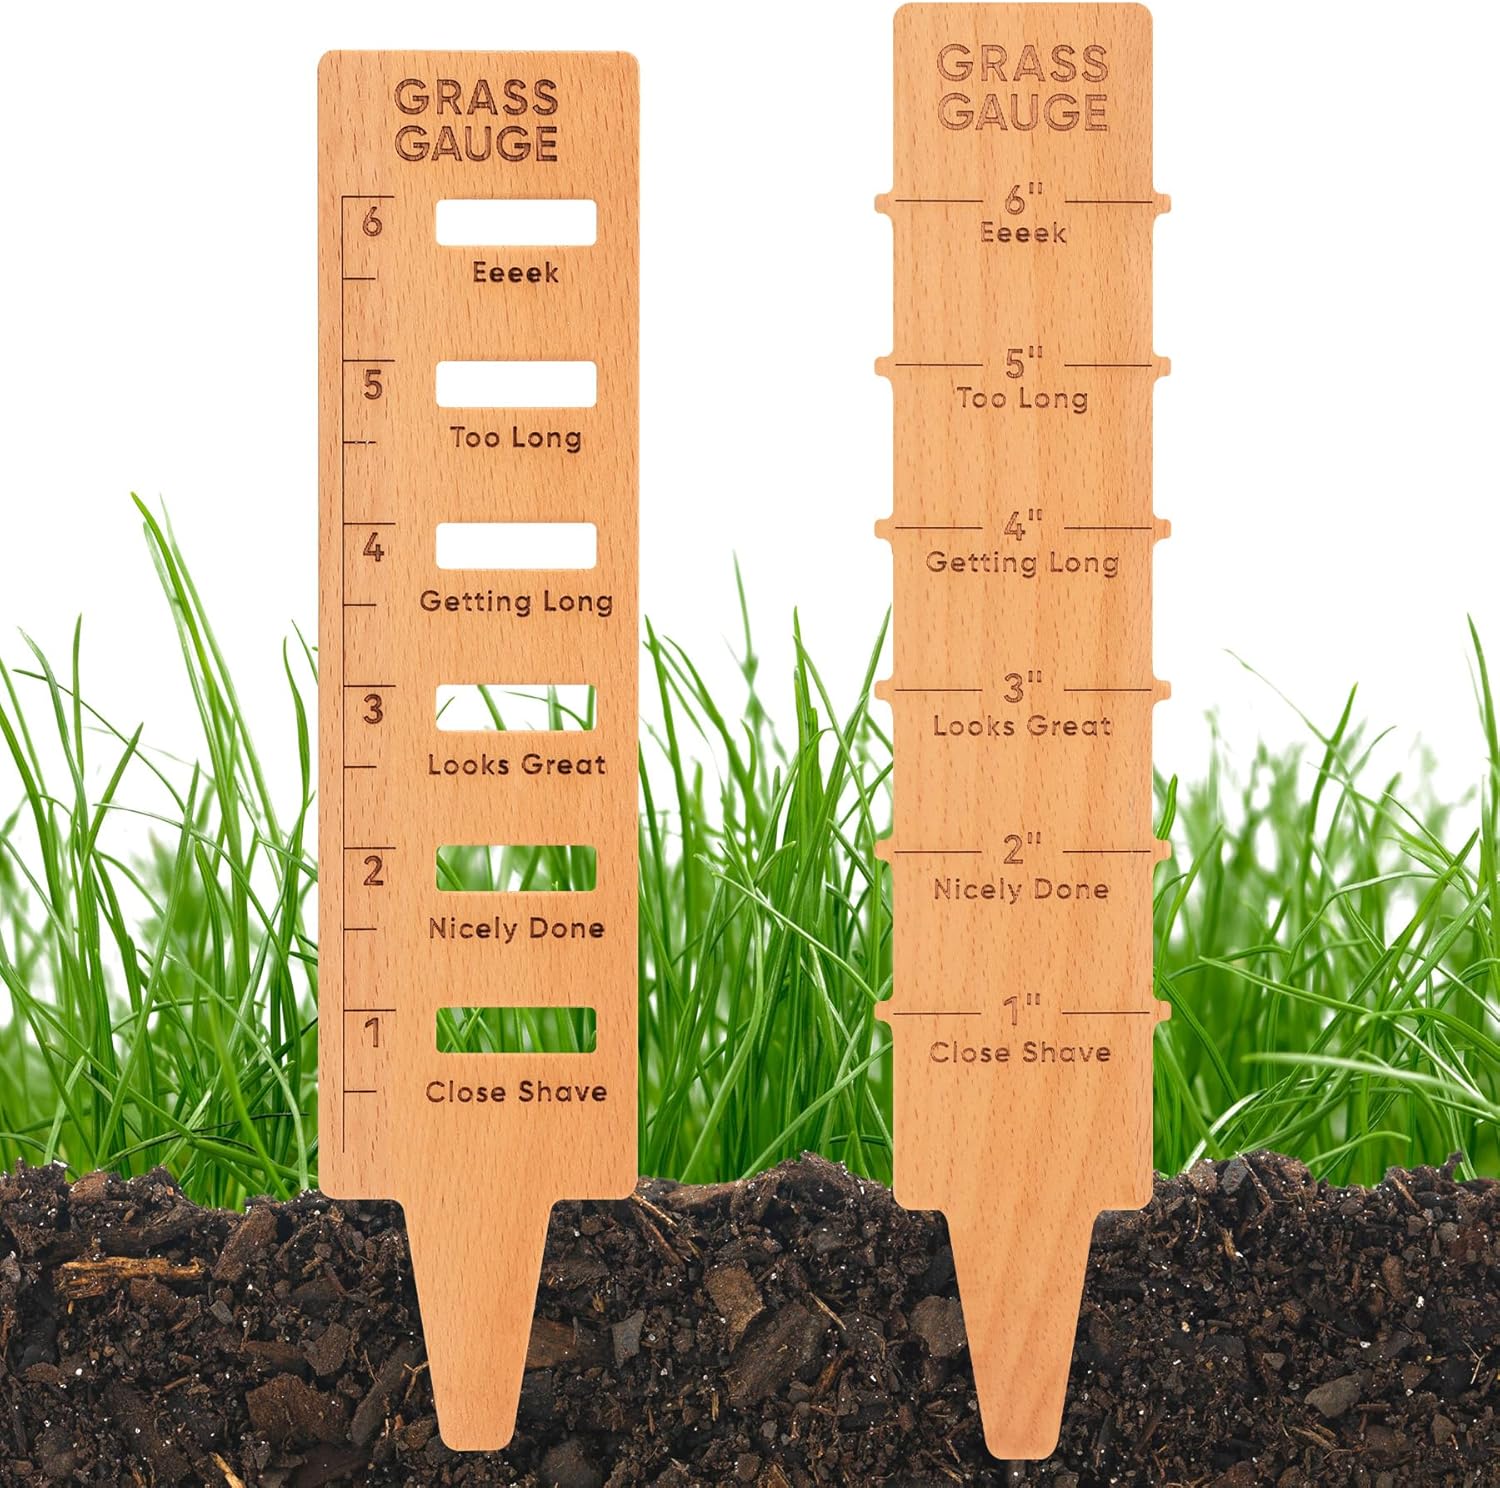
Mowing Height Made Simple: How to Pick the Right Height for Your Lawn (Any Grass, Any Climate)
Choosing the right mowing height might seem like a small detail—but it’s one of the most powerful ways to keep your lawn healthy, green, and weed-free. Whether you’ve got fescue in the north or Bermuda in the south, how high you mow determines everything from water use to root depth to how often you need to mow.
Let’s break it down in simple terms.
Why Mowing Height Matters
Your mower doesn’t just shape your lawn—it shapes its biology.
Each blade of grass is a solar panel for your lawn. The more leaf area you leave behind, the more sunlight your grass can turn into energy. That energy fuels root growth, disease resistance, and recovery from foot traffic or drought.
Cut too low (“scalping”), and you slice off your lawn’s energy source. Cut too high, and you can get matting or excess thatch—but most homeowners never reach that point. The real secret is staying within your grass’s ideal range and never removing more than one-third of the leaf blade at once.
Step 1: Know What Kind of Grass You Have
Every grass species has a preferred range for height of cut (HOC).
If you’re not sure what’s in your yard, these quick clues help:
| Type | Region | Look | Feel | Starting Height |
|---|---|---|---|---|
| Tall Fescue / Hard Fescue | North / Transition | Medium-dark green | Soft, thin blades | 2.5–4.0″ |
| Kentucky Bluegrass / Perennial Rye | North | Bright green | Smooth blades | 2.0–3.5″ |
| Bermudagrass / Zoysiagrass | South | Dense, fine texture | Firm, carpet-like | 0.75–2.0″ |
| St. Augustine / Centipede / Bahia | Coastal South | Coarse, wide blades | Thicker feel | 2.5–4.0″ |
✅ If you’re unsure, start around 2.5–3.0 inches. That’s the safest range for most lawns until you identify your grass.
Step 2: Match Your Height to Your Goals
Different mowing heights create different outcomes. Think of it as balancing looks, maintenance, and resilience.
| Height Range | Pros | Cons | Best For |
|---|---|---|---|
| Lower (≤2″) | Crisp, manicured look; quick recovery after rain | Shallow roots, higher water needs, more weeds if stressed | Level lawns with Bermuda or Zoysia |
| Mid (2–3″) | Balanced look, good density, moderate water use | Needs regular mowing during peak growth | Most mixed lawns |
| Higher (3–4+”) | Deep roots, fewer weeds, drought protection, cooler soil | Can look shaggy if overgrown; may hold dew longer | Tall Fescue, Kentucky Bluegrass, shady lawns |
Step 3: Adjust Seasonally for Stress
Grass height should change with the seasons—just like your wardrobe.
-
Spring: Stay mid-range for clean, quick growth.
-
Summer: Raise mower 0.5–1.0″ for drought and heat protection.
-
Fall: Keep it high for root energy storage.
-
Winter (dormant): Final mow slightly lower to prevent matting and snow mold. Info on winter lawn care.
Step 4: The One-Third Rule (The Secret to Stress-Free Mowing)
Never remove more than one-third of the blade in a single mowing.
Example:
If you want your lawn 3 inches tall, mow before it reaches 4.5 inches.
That keeps roots strong and the grass photosynthesizing efficiently.
Cutting too much at once shocks the plant, halts root growth for up to two weeks, and invites weeds to take over.
Step 5: Fine-Tune for Your Yard’s Conditions
-
Hot & Dry: Raise your height. Shade and deeper roots help conserve water.
-
Shady: Slightly higher helps maximize photosynthesis.
-
High Traffic (kids, pets): Stick mid-range for quick recovery.
-
Uneven Lawn: Avoid very low cuts; you’ll scalp high spots.
Step 6: Set Up Your Mower for Success
-
Measure, don’t guess: Place your mower on pavement, measure from the blade to the ground.
-
Keep blades sharp: Dull blades tear grass, turning tips brown.
-
Alternate directions: Change mowing patterns weekly to avoid ruts and grain.
-
Mulch clippings: They break down quickly and return nutrients, reducing fertilizer needs by up to 25–75%.
Choose the Right Mower for Your Height
Not all mowers can safely maintain every cutting height. The type of mower you use affects both how evenly you can cut and how low or high you can safely mow.
| Mower Type | Best Height Range | Strengths | Watch Out For |
|---|---|---|---|
| Rotary mower (standard gas or electric) | 1.5–4.0″ | Versatile, handles most home lawns | Can scalp on uneven lawns if set too low |
| Reel mower (manual or powered) | 0.5–2.0″ | Precision cut, great for Bermuda & Zoysia | Requires level ground; dull blades shred tall fescue |
| Hover mower | 1.5–3.0″ | Lightweight, ideal for slopes | Limited power on dense turf |
| Robotic mower | 1.5–3.0″ (adjustable) | Maintains consistent height automatically | May struggle with long or uneven grass if height set too low |
| Tractor / Riding mower | 2.5–4.0″+ | Good for large, open lawns | Harder to get uniform cuts on bumps |
| Zero-turn mower | 1.5–3.5″ | Excellent for speed and precision | Needs level terrain to avoid scalping |
Pro tip: For tall fescue or mixed northern lawns, a rotary or riding mower set at 3–4 inches is ideal.
For low-cut southern lawns (Bermuda, Zoysia), a reel mower gives that golf-course finish.
Step 7: Troubleshooting Common Problems
| Problem | Likely Cause | Simple Fix |
|---|---|---|
| Brown tips / frayed edges | Dull blade | Sharpen or replace blade |
| Yellow or thin patches | Cut too low / infrequent mowing | Raise deck; mow more often |
| Weed breakout (crabgrass, dandelions) | Height too low | Raise height 0.5–1″ |
| Grass drying out fast | Shallow roots from low HOC | Raise height and water deeply |
| Shaggy after rain | Too tall between cuts | Stick to one-third rule, mow earlier |
Step 8: Run a Mini Experiment
You can find your “perfect” height in one month:
-
Pick two side-by-side patches.
-
Mow one low (2″) and one high (3.5″).
-
Track: color, weeds, water use, and mowing time.
-
Stick with whichever looks better and needs less effort.
You’ll learn more about your yard than any soil test.
Step 9: Quick Reference Chart: The Best Heights by Grass Type
| Grass Type | Ideal Range | Raise in Summer? | Notes |
|---|---|---|---|
| Tall Fescue | 2.5–4.0″ | ✅ +0.5–1″ | Excellent drought resistance |
| Kentucky Bluegrass | 2.0–3.5″ | ✅ | Raise in heat; avoid <2″ |
| Perennial Rye | 2.0–3.0″ | ✅ | Fast grower; mow often |
| Hard Fescue | 2.5–4.0″ | ✅ | Low-maintenance, slow growth |
| Bermudagrass | 0.75–2.0″ | ❌ | Lower = denser; level surface needed |
| Zoysiagrass | 1.5–2.0″ | ❌ | Dense mat; avoid scalping |
| St. Augustine | 2.5–4.0″ | ✅ | Don’t cut too low—scalps easily |
| Centipede | 1.5–2.0″ | ✅ | Prefers less fertilizer |
| Bahiagrass | 2.5–3.5″ | ✅ | Tolerant of sandy soils |
Final Takeaway
-
Start high—you can always go lower later.
-
Follow the one-third rule religiously.
-
Let your grass type and conditions dictate the fine-tuning.
-
Remember: taller grass usually means fewer weeds, deeper roots, and less work.
Expert tip: A healthy mowing habit beats any fertilizer or spray. Set your mower right, mow regularly, and let your grass do the rest.
Hard Fescue Grass
If you’re looking for a grass that stays green with little water, grows in poor soil, and needs almost no fertilizer, Hard fescue might be exactly what your lawn needs.
This hardy cool-season grass is part of the fine fescue family — known for its fine blades, soft texture, and impressive shade tolerance — but what sets Hard fescue apart is how little care it demands. Once established, it can survive drought, cold, and neglect better than almost any other lawn grass.
What Is Hard Fescue?
Hard fescue (Festuca brevipila) is a cool-season, fine-leaf bunch grass that originated in northern Europe. It’s one of the most rugged members of the fine fescue group, alongside Chewings fescue, creeping red fescue, and sheep fescue.
Unlike Kentucky bluegrass, which spreads through underground rhizomes, Hard fescue grows in tight, upright clumps. That gives it a natural, meadow-like look — soft and slightly tufted — that works beautifully for low-traffic lawns, slopes, and eco-friendly “no-mow” landscapes.
It’s often chosen for lawns where other grasses struggle: sandy soils, hillsides, shaded areas, and northern regions with cold winters and dry summers.
Why People Love Hard Fescue
Here are the main reasons homeowners and turf professionals choose Hard fescue:
-
Exceptionally drought tolerant: Deep roots help it stay green with minimal watering.
-
Low fertilizer needs: Once or twice a year is enough.
-
Fine, soft texture: Looks refined without constant mowing.
-
Cold and heat resistant: Survives freezing winters and tolerates mild summer heat.
-
Thrives in poor soil: Grows well in low-fertility, sandy, or acidic conditions.
-
Low maintenance: Slow growth means you’ll mow less often.
In short, Hard fescue is perfect for people who want a “set it and forget it” lawn — one that looks good but doesn’t need constant care.
When to Plant Hard Fescue
Hard fescue is a cool-season grass, so the best time to plant is during periods of mild temperatures and consistent moisture.
Best planting windows:
-
Early fall (August to mid-October): Ideal time — soil is warm, but air is cool enough for steady growth.
-
Early spring (March to May): Works well if you missed fall, but avoid planting right before summer heat.
Germination time: 10–14 days under proper soil moisture.
Optimal soil temperature: 50–65°F.
If you’re seeding bare soil, lightly rake the surface to create good seed-to-soil contact. Don’t bury the seeds deeply — ¼ inch depth is perfect.
How to Plant Hard Fescue
-
Prepare the area: Loosen compacted soil and remove debris or thatch.
-
Amend soil (optional): Add compost or lime if soil is acidic below pH 5.0.
-
Spread seed: 3–5 lbs per 1,000 sq ft for new lawns, or 2–3 lbs for overseeding.
-
Rake lightly: Cover seed no more than ¼ inch deep.
-
Water gently: Keep the top inch of soil moist until seedlings reach 2 inches tall.
-
First mow: Once grass reaches about 4 inches high, mow to 3 inches.
How to Care for Hard Fescue
Hard fescue is among the easiest grasses to maintain once established. Here’s how to keep it healthy year-round.
Watering
-
New seed: Light daily watering until germination.
-
Established lawns: Deep watering once every 7–10 days during dry spells.
-
It’s drought tolerant — don’t panic if it goes slightly brown in summer. It will recover with rain.
Fertilizing
-
Hard fescue needs very little fertilizer — one light feeding in fall (and optionally one in spring) is enough.
-
Use a slow-release or organic fertilizer with moderate nitrogen (e.g., 10-10-10).
-
Total nitrogen per year: about 0.5–1 lb per 1,000 sq ft (compare that to 3–4 lbs for bluegrass).
Mowing
-
Maintain a height of 3–4 inches.
-
Never cut off more than one-third of the blade at a time.
-
Mow every 3–4 weeks during the growing season; less often in summer and winter.
-
Leave clippings on the lawn — they act as free fertilizer.
Aeration and Thatch
-
Hard fescue produces very little thatch.
-
Aerate only every few years if the soil is compacted or heavy clay.
Seasonal Care Guide
| Season | Tasks |
|---|---|
| Spring | Rake debris, fertilize lightly, mow as needed. Overseed thin spots. |
| Summer | Mow high (3.5–4”), water only during extended drought, avoid fertilizer. |
| Fall | Best time for fertilizing, seeding, or establishing new lawns. |
| Winter | Minimal care — avoid walking on frozen turf. |
Common Problems and Solutions
| Problem | Cause | Fix |
|---|---|---|
| Patchy color or thinning | Heavy shade or poor soil contact | Overseed and prune trees to increase light. |
| Brown in summer | Dormancy from drought | Deep watering will revive it when cooler. |
| Weeds | Sparse new seeding | Keep soil covered during germination; consider mixing with other fine fescues. |
| Uneven growth | Nutrient imbalance | One light fall fertilizer application helps even it out. |
Hard Fescue vs. Chewings Fescue
These two are often blended together because they complement each other.
| Feature | Hard Fescue | Chewings Fescue |
|---|---|---|
| Texture | Fine to medium-fine | Very fine and upright |
| Color | Blue-green | Rich deep green |
| Shade tolerance | Good | Excellent |
| Drought tolerance | Excellent | Good |
| Maintenance needs | Very low | Low |
| Growth rate | Slow | Moderate |
| Best use | Slopes, low-input lawns | Shaded, refined lawns |
If you’re aiming for a rugged, natural-looking lawn, Hard fescue is the better choice.
If you want a manicured, soft texture for shaded yards, Chewings fescue might suit you more.
Recommended Seed Mixes
Hard fescue performs beautifully in blends that improve resilience and appearance:
| Mix Type | Hard Fescue | Chewings Fescue | Creeping Red Fescue |
|---|---|---|---|
| Dry slope mix | 60% | 20% | 20% |
| Low-input lawn mix | 40% | 40% | 20% |
| Eco-lawn blend | 50% | 30% | 20% |
These mixes balance drought resistance, shade performance, and density — ideal for homeowners who want a long-lasting, sustainable lawn.
Final Thoughts
Hard fescue is one of the best grasses for homeowners who want a low-maintenance, water-saving, and environmentally friendly lawn.
It’s not the fastest grower or the best for sports use, but if your lawn goals are simplicity, sustainability, and natural beauty, it’s nearly unbeatable.
Plant it in early fall or spring, mow it tall, and fertilize lightly once a year — that’s really all it asks.
With proper establishment and patience, you’ll enjoy a fine-textured, drought-tolerant lawn that looks good year after year with very little effort.
Chewings Fescue Grass: The Low-Maintenance, Fine-Textured Lawn for Cool Climates
If you want a lawn that looks lush, feels soft, and doesn’t need constant mowing or fertilizing, Chewings fescue might be exactly what you’re looking for.
This cool-season, fine-leaf grass is a favorite among homeowners who want a natural, low-maintenance lawn that thrives in partial shade and cooler regions.
I’ve seen Chewings fescue used on golf course roughs, park areas, and shaded home lawns across the Northeast and Midwest. It’s one of those grasses that looks beautiful year-round with minimal attention — especially when paired with other fine fescues in a blend.
What Is Chewings Fescue?
Chewings fescue (Festuca rubra ssp. commutata) is part of the fine fescue family — a group that also includes hard fescue, sheep fescue, and creeping red fescue.
Unlike creeping red fescue, which spreads through underground rhizomes, Chewings is a bunch-type grass, meaning it grows in dense clumps. This gives it a velvety, carpet-like appearance that’s ideal for lawns with light to moderate foot traffic.
It’s most at home in cool, moist regions — think New England, the Pacific Northwest, or the northern Great Lakes — and it handles shade far better than most lawn grasses.
Key Benefits of Chewings Fescue
-
Fine, elegant texture: The thin blades create a refined, uniform appearance.
-
Low fertilizer needs: It stays green even in poor soils with minimal feeding.
-
Shade tolerant: Performs well under trees and in partial shade.
-
Drought tolerant: Once established, it requires far less water than bluegrass.
-
Low mowing frequency: Slower growth means less time cutting the lawn.
-
Cold hardy: Recovers well after harsh winters and doesn’t brown easily.
It’s not designed for sports fields or high-traffic areas, but for everyday residential lawns — especially shady ones — it’s hard to beat.
Ideal Growing Conditions
| Condition | Ideal Range | Notes |
|---|---|---|
| Sunlight | Partial shade to 6 hours of sun | Best for areas with mixed light. |
| Soil type | Well-drained, slightly acidic | pH between 5.5 and 6.5 is ideal. |
| Temperature | 60–75°F | Active in spring and fall; slows in summer heat. |
| Watering | 1 inch per week | Deep watering less often is better than frequent light watering. |
| Mowing height | 2.5–4 inches | Taller grass tolerates shade and drought better. |
How to Care for Chewings Fescue
Spring Care
-
Rake away debris and lightly aerate compacted soil.
-
Overseed thin patches at 3–5 lbs per 1,000 sq ft.
-
Apply a light fertilizer (0.25–0.5 lb nitrogen per 1,000 sq ft).
-
Mow to 2.5–3.5 inches.
Summer Care
-
Raise mowing height to 3.5–4 inches to reduce stress.
-
Water deeply once a week if rainfall is limited.
-
Avoid fertilizing during hot weather.
-
Limit traffic if the grass is dormant or dry.
Fall Care
-
This is the main growing season for Chewings fescue.
-
Apply a balanced fertilizer such as 10-10-10 or 16-4-8.
-
Overseed again to maintain density.
-
Continue mowing until growth stops in late fall.
Winter Care
-
Avoid walking on frozen or snow-covered turf.
-
Rake leaves before snow to prevent snow mold.
Common Problems and Fixes
| Problem | Cause | Solution |
|---|---|---|
| Brown patches | Drought dormancy | Water deeply; the grass will recover naturally. |
| Red thread or leaf spot | Low nitrogen or high humidity | Apply light fertilizer; mow only when dry. |
| Thin growth | Compaction or dense shade | Aerate, overseed, and trim tree branches. |
| Scalping | Mowing too low | Maintain a minimum height of 2.5 inches. |
Chewings Fescue vs. Other Cool-Season Grasses
Below is a comparison of Chewings fescue against other popular cool-season turfgrasses used in northern regions.
| Grass Type | Texture | Shade Tolerance | Drought Tolerance | Maintenance Level | Traffic Tolerance | Best Regions |
|---|---|---|---|---|---|---|
| Chewings Fescue | Fine | Excellent | Good | Low | Moderate | Cool, shaded areas (Northeast, Pacific NW) |
| Kentucky Bluegrass | Medium-fine | Fair | Good | Medium-high | High | Full sun lawns in northern U.S. |
| Perennial Ryegrass | Fine | Moderate | Fair | Medium | Moderate-high | Overseeding and fast-germinating areas |
| Tall Fescue | Coarse | Moderate | Excellent | Medium | High | Transitional and mid-Atlantic regions |
| Hard Fescue | Fine | Good | Excellent | Very low | Low-moderate | Northern dry soils and slopes |
| Creeping Red Fescue | Fine | Excellent | Good | Low | Moderate | Cool, coastal, or shaded lawns |
Takeaway:
Among fine fescues, Chewings offers the best mix of shade tolerance, aesthetic quality, and low maintenance.
It’s slower to spread than creeping red fescue but more upright and better for uniform turf.
Recommended Seed Blends
Most experts recommend using Chewings fescue as part of a seed blend. Here are common ratios used by turf managers:
| Blend Type | Chewings Fescue | Hard Fescue | Creeping Red Fescue |
|---|---|---|---|
| Shade mix | 40% | 20% | 40% |
| Sun mix | 30% | 50% | 20% |
| Low-input mix | 50% | 30% | 20% |
Cultivars such as SR 5130, Banner II, Ambrose, and Radar are known for strong color, fine texture, and disease resistance.
Final Thoughts
Chewings fescue is the quiet workhorse of the fine fescue family — beautiful, resilient, and forgiving.
If you want a soft, natural-looking lawn that thrives on minimal care, it’s one of the best options available. While it won’t hold up to heavy play or sports use, it will reward you with a green, low-input landscape that looks elegant all year.
If you’re reseeding or renovating your lawn this fall, consider a fine fescue blend with 40–50% Chewings fescue. It’s a smart, sustainable way to enjoy a dense, healthy lawn with less watering, mowing, and fertilizer.
Creeping Red Fescue: The Shade-Loving Cool-Season Grass
If your lawn sits under trees or you’d rather mow and fertilize less, creeping red fescue (Festuca rubra) might be your best option. Unlike tall fescue or perennial ryegrass, which demand more water and maintenance, creeping red fescue thrives in shade, tolerates low-input care, and even spreads to repair thin spots.
In this guide, we’ll explore what makes creeping red fescue unique, its pros and cons, where it thrives, and how it compares to other popular cool-season grasses like tall fescue and ryegrass.
What Is Creeping Red Fescue?
-
Scientific name: Festuca rubra
-
Growth habit: Spreads with short rhizomes (“creeping”), unlike bunch-type ryegrass or tall fescue.
-
Appearance: Very fine blades, soft texture, medium to dark green color.
-
Best traits: Excellent for shade and low-maintenance lawns.
Creeping red fescue belongs to the fine fescue group (along with chewings, hard, and sheep fescues). It’s a staple in shady lawn seed mixes.
Pros and Cons of Creeping Red Fescue
✅ Pros
-
Best shade tolerance of all cool-season grasses.
-
Low maintenance — needs less fertilizer, mowing, and water.
-
Spreads by rhizomes → fills in thin patches.
-
Cold hardy — great for northern climates.
-
Soft, fine texture → carpet-like feel underfoot.
❌ Cons
-
Poor wear tolerance — not for high-traffic lawns.
-
Heat stress — struggles in hot, humid summers.
-
Slow germination (10–14 days).
-
Prone to thatch if unmanaged.
-
Disease risks like red thread and dollar spot in poor conditions.
Where Creeping Red Fescue Thrives (and Where It Doesn’t)
Best Regions
-
Northern U.S. & Canada → cool summers and cold winters.
-
Northeast & Pacific Northwest → coastal, moist, shaded lawns.
-
High-altitude lawns → cooler summer temps.
-
Shaded lawns → under trees, near buildings, woodland edges.
Challenging Regions
-
Deep South & Transition Zone → heat and humidity stress the grass.
-
Heavy-use lawns → too delicate for sports fields or dog yards.
-
Full-sun, droughty soils → better alternatives include tall fescue.
Creeping Red Fescue vs. Tall Fescue vs. Perennial Ryegrass
| Feature | Creeping Red Fescue | Tall Fescue | Perennial Ryegrass |
|---|---|---|---|
| Germination Speed | 10–14 days (slow) | 7–12 days (moderate) | 5–7 days (fastest) |
| Shade Tolerance | Excellent | Moderate | Moderate |
| Heat/Drought Tolerance | Low–Moderate | Excellent (deep roots) | Poor |
| Wear Tolerance | Poor | Good | Excellent |
| Growth Habit | Spreading rhizomes | Bunch-forming | Bunch-forming |
| Maintenance Needs | Low | Moderate | High |
| Best Use Case | Shady, low-maintenance | Tough lawns in hot zones | Fast cover, sports fields |
👉 Choose creeping red fescue if your priority is shade and low-input care.
👉 Choose tall fescue if you want durability and drought resistance in hotter areas.
👉 Choose ryegrass if you need a quick, tough lawn that germinates almost instantly.
Planting Creeping Red Fescue
-
Best time: Early fall (Sept–Oct) or early spring (April–May).
-
Soil temp for germination: 50–65°F.
-
Seeding rate: 4–6 lbs per 1,000 sq ft.
-
Seed depth: ¼ inch or less.
-
Often blended: with bluegrass or ryegrass for balanced lawns.
Lawn Care & Maintenance
Fertilization
-
Annual nitrogen needs: 1–2 lbs per 1,000 sq ft (much lower than ryegrass/fescue).
-
Fertilize lightly in fall and spring.
Watering
-
Moderate drought tolerance once established.
-
Prefers light, infrequent watering.
-
Avoid overwatering in shade → disease risk.
Mowing
-
Height: 2.5–3.5 inches.
-
Frequency: Slow-growing → may need mowing only every 10–14 days.
Thatch Management
-
Creeping habit → may create thatch over time. Aerate or dethatch every 2–3 years.
Common Problems and Solutions
-
Red thread disease: Apply light nitrogen, improve airflow.
-
Dollar spot: Water deeply but infrequently, mow higher.
-
Summer stress: Overseed with tall fescue or ryegrass in transition zone lawns.
-
Thatch: Regular aeration helps avoid buildup.
Best Uses for Creeping Red Fescue
-
Shady lawns under trees or alongside buildings.
-
Low-maintenance lawns with limited mowing/fertilizing.
-
Blended seed mixes for northern climates.
-
Ornamental and naturalized lawns where soft, fine texture is valued.
Conclusion
Creeping red fescue is the shade king of cool-season grasses. It thrives where bluegrass, ryegrass, and tall fescue often fail — in cool, moist, and shaded environments. While it’s not built for heavy use or southern heat, its low-maintenance needs, soft feel, and spreading growth habit make it one of the most useful grasses for northern lawns.