Matt
How Much Is an EGO Riding Lawn Mower? (Price & Features)
If you’re considering an electric riding lawn mower, the EGO Power+ lineup is probably on your radar. EGO is known for premium performance, long battery life, and solid build quality—but what’s the real cost, and is it worth it?
This guide answers the most common questions about EGO riding mowers, including how much they cost, what makes them different, and whether they’re right for your property.
Click for the latest pricing
💰 How Much Does an EGO Riding Mower Cost?
EGO riding mowers typically cost between $3,999 and $5,999, depending on the model and accessories. As of 2025, here are the most common configurations:
| Model | Type | Runtime | Deck Size | Approx. Price |
|---|---|---|---|---|
| EGO Power+ T6 TR4204 | Lawn Tractor | ~75 mins | 42″ | $4,499 |
| EGO Power+ Z6 ZT4205S | Zero Turn | ~90 mins | 42″ | $5,499 |
| EGO Power+ Z6 ZT5207L | Zero Turn | ~90–120 mins | 52″ | $5,999 |
Prices vary slightly by retailer and availability. Some retailers offer bundles with extra batteries or rapid chargers.
🔋 What Makes EGO Riding Mowers Unique?
- Battery System: Uses 56V ARC lithium batteries—same ones used in EGO handheld tools
- Runtime: Can mow up to 2 acres per charge
- Swappable Batteries: Hot-swap design allows for extended runtime using backup batteries
- Quiet Operation: Runs at ~70 dB compared to 90–100 dB for gas mowers
- Fast Charging: Rapid charger can recharge in as little as 60 minutes
✅ Who Is an EGO Mower Best For?
EGO riding mowers are ideal for:
- Homeowners with 1–3 acre properties
- People upgrading from gas and wanting similar power
- Anyone already invested in the EGO tool ecosystem
- Users who want zero emissions and lower maintenance
⚖️ EGO vs Other Electric Brands
| Feature | EGO Power+ | Ryobi | Greenworks |
| Battery Platform | 56V ARC lithium | 80V proprietary | 60V/80V interchangeable |
| Runtime | Up to 2 acres | 1.5–2 acres | ~1 acre |
| Deck Options | 42″ & 52″ | 38″–54″ | 42″ |
| Price Range | $4,499–$5,999 | $3,999–$5,499 | ~$3,999 |
🛠 Maintenance & Ownership
EGO riding mowers require:
- No oil, gas, or filters
- Periodic blade sharpening
- Occasional battery rotation or replacement (every 4–6 years)
- Software updates via onboard screen (newer models)
⚖️ Electric vs Gas Riding Mowers: Pros and Cons
| Category | Electric Mowers | Gas Mowers |
| Noise | Very quiet (~70 dB) | Loud (~90–100 dB) |
| Emissions | Zero emissions | Produces CO2, fumes |
| Maintenance | Minimal (no oil, filters, spark plugs) | Regular maintenance required |
| Operating Cost | Lower (no fuel, fewer repairs) | Higher (fuel, filters, oil changes) |
| Runtime | Limited to battery life (60–120 mins) | Continuous with refueling |
| Power | High torque for most residential needs | Slight edge in raw power for thick terrain |
| Upfront Cost | Higher initial cost | Often more affordable up front |
| Terrain Handling | Best for flat to moderately hilly yards | Better on steep or rough terrain |
In short: Electric is ideal for residential users who want low maintenance and quiet performance. Gas still holds an edge in raw endurance and flexibility, especially for large or rugged properties.
🎯 Final Verdict: Is an EGO Mower Worth It?
If you want top-tier electric mowing performance with a modern design and lower long-term costs, EGO riding mowers are a strong choice. While the price point is on the higher end, the durability, runtime, and swappable battery system make it a smart investment—especially if you already own EGO tools.
This Electric Mower Pays for Itself in Under 5 Years — Here’s the Math
Electric riding lawn mowers are gaining traction, and it’s not just about going green. For many homeowners, these machines actually pay for themselves in just a few years. Whether you’re upgrading from a push mower or ditching your gas guzzler, this guide breaks down how electric riding mowers save you money — and why making the switch might be one of the smartest yard decisions you’ll make.
Who Should Consider an Electric Riding Mower?
- Homeowners with 1+ acre of grass
- Anyone tired of gas engine upkeep
- New property owners looking to invest in a long-term mower
- Eco-conscious buyers who want low-maintenance, high-efficiency gear
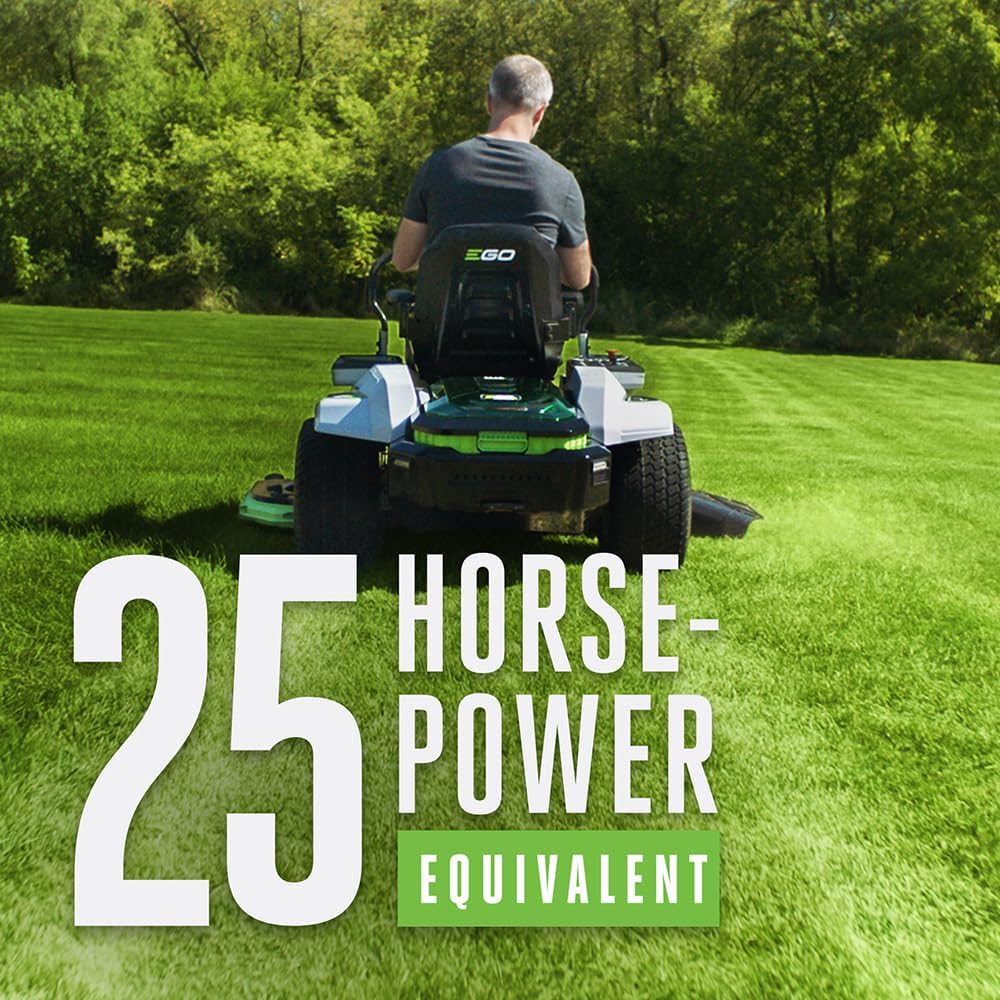
How They Work & What You’re Paying For
Electric riding mowers are powered by rechargeable lithium-ion batteries and high-efficiency brushless motors. Most models deliver 18–25 HP equivalent and can mow up to 2 acres on a single charge. The batteries charge via a home outlet and typically last 60–90 minutes per charge. Deck sizes range from 38″ to 54″.
What you’re paying for upfront is simplicity: no gas, no oil, no belts, and very few moving parts.
The 5-Year Cost Breakdown: Electric vs. Gas
| Expense | Electric Mower | Gas Mower |
|---|---|---|
| Fuel | $0 | ~$500 |
| Maintenance | ~$100 | ~$600+ |
| Battery replacement (1x) | ~$300-$500 | $0 |
| Total (5 yrs) | $400-$600 | $1100+ |
Conclusion: An electric mower can pay for itself in fuel and maintenance savings within 4 to 5 years.
And that’s not even including the time saved from fewer repairs and smoother operation.
What Makes Electric Mowers Cheaper Over Time?
- No oil changes or spark plugs
- No carburetor issues or fuel stabilizers
- Fewer parts = fewer breakdowns
- Lower noise = more flexible mowing times
- Long-lasting batteries (often 5+ years)
Bonus: Some electric models use battery platforms that work across multiple tools (blowers, trimmers, etc.).
But What About Power and Performance?
Modern electric models like the Ryobi 80V 42” ZTR or Ego Power+ T6 can deliver serious cutting power — 18–25 HP equivalent — and easily handle flat or lightly sloped properties.
| Feature | Electric | Gas |
| Power | 18–25 HP equivalent | Slight edge in raw torque |
| Runtime | 60–90 minutes | As long as you have fuel |
| Noise Level | Quiet (~70 dB) | Loud (~90-100 dB) |
| Emissions | None | High |
| Maintenance | Minimal | High (engines, oil, belts) |
Top Electric Riding Mower Brands
| Brand | Why It Stands Out |
| Ryobi | Affordable, strong performance, ZTR models |
| Ego Power+ | Excellent runtime and premium features |
| Greenworks | Hot-swappable batteries and solid build |
| Cub Cadet | Commercial-grade electric lineup |
| Toro | Durable zero-turn options |
Models Worth a Look
| Model | Type | Runtime | Deck Size | Price Range |
| Ryobi 80V 42” ZTR | Zero Turn | ~90 mins | 42″ | $4,000-$5,000 |
| Ego Power+ T6 TR4204 | Lawn Tractor | ~75 mins | 42″ | $4,500 |
| Greenworks Pro 60V CrossoverZ | Zero Turn | ~60 mins | 42″ | $3,999 |
| Cub Cadet XT1 LT42e | Lawn Tractor | ~60 mins | 42″ | $3,900 |
Is It Right for You?
Electric riding mowers aren’t just about saving the planet — they’re also about saving money and hassle. If you:
- Mow more than an acre regularly
- Want lower annual costs
- Are sick of gas engine repairs
- Like a quiet, clean ride
Then yes, it’s probably time to make the switch.
Final Take: Save Money, Mow Smarter
Electric riding mowers start at around $4,000, but they can save you $1,000+ in fuel and upkeep within just 5 years. Add in the convenience, peace and quiet, and low maintenance, and they become a smart long-term investment.
How to Design a Stunning Front Yard on a Budget (Even If You’re New to Landscaping)
Your front yard is the first thing people see—but transforming it doesn’t have to cost a fortune. Whether you just moved in or you’re finally ready to clean up that tired patch of grass and mulch, this guide will help you create a low-maintenance, beautiful front yard without blowing your budget.
Quick Wins for Instant Curb Appeal (Under $100)
You don’t need a professional landscaper to make a big visual impact. Try these fast, affordable upgrades:
- Fresh Mulch: Instantly neatens up garden beds and helps retain moisture.
- Solar Path Lights: Adds nighttime beauty and safety for under $40.
- Simple Stone Edging: Use inexpensive pavers or reclaimed bricks to define beds.
- Paint the Mailbox / House Numbers: Small detail, big improvement.
- Container Plants: Add pops of color near the entrance using thrifted planters.
Best Low-Cost, Low-Maintenance Plants for Zone 5
If you’re in a colder climate like New York (Zone 5), here are some native and well-adapted plants that won’t drain your time or wallet:
Shrubs:
- Ninebark (Physocarpus opulifolius) – Tough, colorful foliage, native
- Red Twig Dogwood (Cornus sericea) – Striking red stems in winter
- Common Witch Hazel (Hamamelis virginiana) – Fall-blooming, unique structure
Perennials:
- Heuchera (Coral Bells) – Colorful foliage year-round
- Black-eyed Susan (Rudbeckia fulgida) – Bright yellow blooms, long season
- Bee Balm (Monarda didyma) – Attracts hummingbirds
Groundcovers:
- Creeping Phlox (Phlox subulata) – Spring bloom carpet
- Wild Ginger (Asarum canadense) – Heart-shaped leaves, great for shade
Easy Front Yard Layout Ideas Anyone Can Copy
The Rule of Three: Group plants in odd numbers (3 or 5) for a natural look.
Layered Heights:
- Back/Middle (near the house): Taller shrubs for structure
- Middle layer: Upright perennials and fillers
- Front edge: Groundcovers or small bloomers to define the space
Bonus Tip: Avoid planting too close to your walkway. Choose upright plants near paths to prevent overgrowth.
What to Plant in Part Shade
Got trees or limited sun? You’re not out of luck. These plants thrive in dappled light:
- Foamflower (Tiarella cordifolia)
- Solomon’s Seal (Polygonatum biflorum)
- Partridge Berry (Mitchella repens) for the base of trees
The $500 Front Yard Makeover Plan
Here’s a sample breakdown of what you could do with $500:
- $50 – Mulch
- $60 – 2 Ninebark or Witch Hazel shrubs
- $100 – 3 Coral Bells + 3 Black-eyed Susans
- $50 – 6 Creeping Phlox (groundcover)
- $30 – Solar path lighting
- $60 – Basic tools or stone edging
- $50 – DIY soil amendments (compost, topsoil)
- $100 – Wiggle room or save for fall planting
Use our Landscaping Calculator to estimate exactly how much mulch or how many plants you need—before you buy.
Free Bonus: Download Your Weekend Curb Appeal Guide
Want quick, easy landscaping projects you can finish in a day?
Get our free Weekend Curb Appeal Guide — perfect for DIYers, homeowners, and lawn lovers who want fast results without a designer. It includes:
- ✅ 7 simple landscaping projects you can finish in a day
- ✅ Quick wins that instantly upgrade your yard
- ✅ Beginner-friendly ideas with pro results
- ✅ Bonus checklist & design tips included
Creating a front yard you love doesn’t require a degree in horticulture or a huge bank account. Start small, think smart, and you’ll be amazed what a few well-placed plants and design tricks can do. doesn’t require a degree in horticulture or a huge bank account. Start small, think smart, and you’ll be amazed what a few well-placed plants and design tricks can do.
How To Aerate & Dethatch a Lawn
Over time, soil can end up compacted due to foot traffic, heavy machinery, or natural settling. Aeration is the process of creating small holes in the compacted soil, allowing air, water, and nutrients to get deep into the root zone. Compacted soil restricts root growth and hinders the absorption of vital resources, leading to a weak and unhealthy lawn. Aeration alleviates compaction, fostering a thriving environment for your grass to flourish.
Signs Your Lawn Needs Aeration:
- Water puddling or runoff after rain
- Thatch buildup (a layer of dead and decaying organic matter)
- Thin or patchy grass
- Compacted soil, especially in high-traffic areas
Benefits of Aeration:
- Improved soil drainage and aeration
- Enhanced nutrient and water absorption
- Increased root growth and overall lawn health
- Reduced thatch buildup

Dethatching: Clearing the Path for Growth
Thatch, while beneficial in small amounts, can become a problem when it accumulates excessively. Thatch acts as a barrier, that blocks air, water, and nutrients from reaching the roots. This can lead to a variety of problems, including shallow root growth, disease susceptibility, and pest infestations. Dethatching removes this excess thatch, allowing your lawn to breathe and thrive.
Signs Your Lawn Needs Dethatching:
- Thatch layer exceeding ½ inch
- Spongy or bouncy feeling when walking on the lawn
- Difficulty penetrating the soil with a screwdriver or probe
- Thin or unhealthy grass despite proper fertilization and watering
Benefits of Dethatching:
- Improved air, water, and nutrient circulation
- Reduced risk of pests and diseases
- Thicker, healthier grass growth
- Enhanced lawn resilience to stress
When to Aerate and Dethatch
The optimal time for aeration and dethatching depends on your grass type:
- Cool-season grasses (e.g., Kentucky bluegrass, fescue): Early spring or fall, when grass is growing
- Warm-season grasses (e.g., Bermuda grass, Zoysia grass): Late spring or early summer, after the second mowing
Avoid aerating or dethatching during extreme heat or drought.
Tools and Equipment for the Job
Aerator: Core aerator (most effective for compacted soil)
- Spike aerator (suitable for light aeration)
- Liquid aeration (less effective but convenient option)
Dethatcher: Manual dethatching rake (ideal for small lawns or light thatch)
- Power rake (more efficient for larger lawns or moderate thatch)
- Verticutter (best for heavy thatch but can be aggressive)
Other essentials: Lawnmower
- Garden hose
- Rake
- Fertilizer and grass seed (for overseeding)
Step-by-Step Guide
Preparation:
- Mow your lawn to a height of about 1-2 inches.
- Water your lawn thoroughly a day or two before aerating or dethatching to soften the soil.
Aeration:
- Choose the appropriate aerator for your lawn size and soil condition.
- Make multiple passes over your lawn, ensuring thorough coverage.
- If using a core aerator, leave the soil plugs on the lawn so they decompose and add nutrients back to the soil.
Dethatching:
- Select the right dethatching tool based on the thickness of the thatch layer.
- Work systematically across your lawn, making overlapping passes for complete thatch removal.
- Rake and dispose of thatch debris.
Aftercare:
- Water your lawn deeply after aerating or dethatching.
- Consider fertilizing and overseeding to promote recovery and new growth.
- Continue to water and care for your lawn as usual.
Extra Tips for a Thriving Lawn
- Maintain a regular mowing, watering, and fertilizing schedule.
- Address any underlying issues, such as soil pH imbalances or pest infestations.
- Hire a local lawn care service if you have a large lawn or heavy thatch buildup.
50 Small Backyard Garden Ideas
Don’t let limited space cramp your gardening style! Many people believe they can’t have a beautiful garden if their backyard is small. But the truth is, even the tiniest spaces can be transformed into vibrant and inviting havens. This blog post will showcase many ideas to maximize your small backyard’s potential, proving that size doesn’t limit beauty or functionality.
50 Small Backyard Garden Ideas
Space-Saving Solutions for Small Backyards
- Vertical Gardens: Utilize walls, fences, and trellises to grow plants upwards, creating a lush green backdrop.
- Hanging Baskets: Suspend colorful blooms or trailing plants from hooks or beams, adding vertical interest.
- Window Boxes: Brighten up your home’s exterior with vibrant flowers or herbs.
- Tiered Planters: Stack planters of varying heights to create visual interest and maximize growing space.
- Espalier: Train fruit trees or shrubs to grow flat against a wall, garage, or fence, saving space and creating a unique design element.
- Living Walls: Transform plain walls into lush green backdrops with climbing plants or modular living wall systems.
- Pocket Gardens: Tuck miniature gardens into unused corners or nooks, adding charm and greenery to unexpected spaces.
- Raised Beds: Control soil quality, maximize growing space and make gardening easier with raised beds.
- Container Gardens: Utilize pots, barrels, and window boxes to grow various plants, even in the tiniest of spaces.
- Rooftop Gardens: If you have a rooftop, transform it into an urban oasis with container gardens, raised beds, or even a green roof.
Diverse Garden Styles for Small Spaces
- Cottage Gardens: Overflowing with colorful blooms, winding pathways, and charming accents, cottage gardens create a whimsical and inviting atmosphere.
- Japanese Gardens: Serene spaces featuring carefully placed rocks, water features, and meticulously pruned plants, Japanese gardens offer a tranquil escape.
- Mediterranean Gardens: Drought-tolerant plants like lavender, rosemary, and succulents create a warm and inviting space with earthy tones.
- Zen Gardens: Minimalist designs incorporating sand, gravel, and carefully raked patterns, Zen gardens promote contemplation and relaxation.
- Modern Gardens: Clean lines, geometric shapes, and minimalist plantings characterize modern gardens, offering a sleek and contemporary aesthetic.
- Tropical Gardens: Lush foliage, vibrant colors, and exotic plants create a tropical paradise in your backyard, even if you live in a colder climate.
- Woodland Gardens: Shade-loving plants and natural elements like logs and rocks create a peaceful and enchanting woodland retreat.
- Herb Gardens: Fragrant and functional herb gardens provide fresh herbs for cooking and can be easily incorporated into small spaces.
- Vegetable Gardens: Grow your fresh produce, even in a limited area, with compact varieties and vertical gardening techniques.
- Cutting Gardens: Cultivate beautiful blooms to create stunning indoor arrangements throughout the season.
Creative Planting Ideas for Small Backyards
- Succulent Gardens: Drought-tolerant and low-maintenance, succulents are perfect for sunny spots and add a touch of desert to your backyard.
- Fairy Gardens: Create a whimsical miniature world with tiny plants, figurines, and decorative elements, perfect for sparking imagination and delighting children.
- Rock Gardens: Combine rocks, gravel, and hardy plants like succulents and alpines to create a textured and visually interesting landscape.
- Butterfly Gardens: Attract colorful butterflies with nectar-rich flowers like milkweed, coneflowers, and asters.
- Hummingbird Gardens: Entice these tiny birds with tubular flowers like trumpet vine, salvia, and bee balm.
- Moon Gardens: Feature white and silver foliage plants like lamb’s ears, artemisia, and snow-in-summer for a luminous nighttime display.
- Sensory Gardens: Plants like jasmine and lavender, textured foliage like lamb’s ears, and colorful blooms.
- Pollinator Gardens: Support bees, butterflies, and other beneficial insects with diverse flowering plants.
- Edible Landscaping: For beauty and functionality, incorporate edible plants like fruit trees, berry bushes, and herbs into your ornamental garden.
- Ornamental Grasses: Add movement, texture, and visual interest with graceful ornamental grasses like feather reed grass, fountain grass, and miscanthus.
Functional Features to Enhance Your Small Garden
- Water Features: Fountains, birdbaths, or small ponds add a touch of tranquility and visual appeal to your garden.
- Outdoor Seating: Create comfortable spaces for relaxation and entertaining with chairs, benches, or hammocks.
- Dining Areas: Enjoy meals al fresco in your garden oasis with a small table and chairs or a built-in dining area.
- Pathways: Use stepping stones, gravel paths, or pavers to guide visitors through your garden and create visual flow.
- Trellises and Arbors: Support climbing plants and create shaded areas for seating or dining.
- Pergolas: Cover a pergola with climbing plants or vines to add architectural interest and create a defined outdoor room.
- Greenhouses: Extend your growing season and protect delicate plants with a small greenhouse or cold frame.
- Compost Bins: Recycle kitchen scraps and yard waste into nutrient-rich compost for your garden.
- Rain Barrels: Collect rainwater to water your garden, conserve water, and reduce environmental impact.
- Fire Pits: On cool evenings, gather around a cozy fire to extend your outdoor enjoyment into the fall and winter months.
Additional Tips and Ideas
- Upcycled Planters: Repurpose old containers, furniture, or even pallets into unique and creative planters.
- Vertical Herb Gardens: Grow herbs in hanging pockets, wall-mounted planters, or repurposed shoe organizers.
- Fairy Lights: They add a magical touch to your garden with twinkling fairy lights strung through trees, shrubs, or along fences.
- Bird Feeders: Attract gorgeous birds to your backyard with bird feeders and birdbaths.
- DIY Projects: Create garden art, sculptures, or decorative elements to personalize your space.
- Garden Journal: Document your garden’s progress, track plant growth, and plan for future seasons.
- Container Vegetable Gardening: Grow vegetables in pots, barrels, or window boxes for fresh produce even in limited space.
- Miniature Greenhouses: Protect seedlings and delicate plants in small, DIY greenhouses or cold frames.
- Terrariums: Create miniature enclosed gardens in glass containers, perfect for showcasing succulents, ferns, and other small plants.
- Hydroponics: Explore growing plants without soil using nutrient-rich water solutions, ideal for small spaces and controlled environments.
Remember, even the smallest backyard can be transformed into a beautiful and functional garden space with a bit of creativity and planning! Don’t let limited space prevent you from creating your dream garden oasis. Explore these ideas today and watch your small backyard blossom into a haven of beauty and tranquility.
Best Times to Water Grass (with Regions)
Maintaining a lush, and beatutiful green lawn requires proper watering, but timing is everything. Watering at the wrong time can lead to water wastage, fungal diseases, and even damage to your lawn. Let’s explore the best time to water your lawn and how to adjust your schedule based on your location.
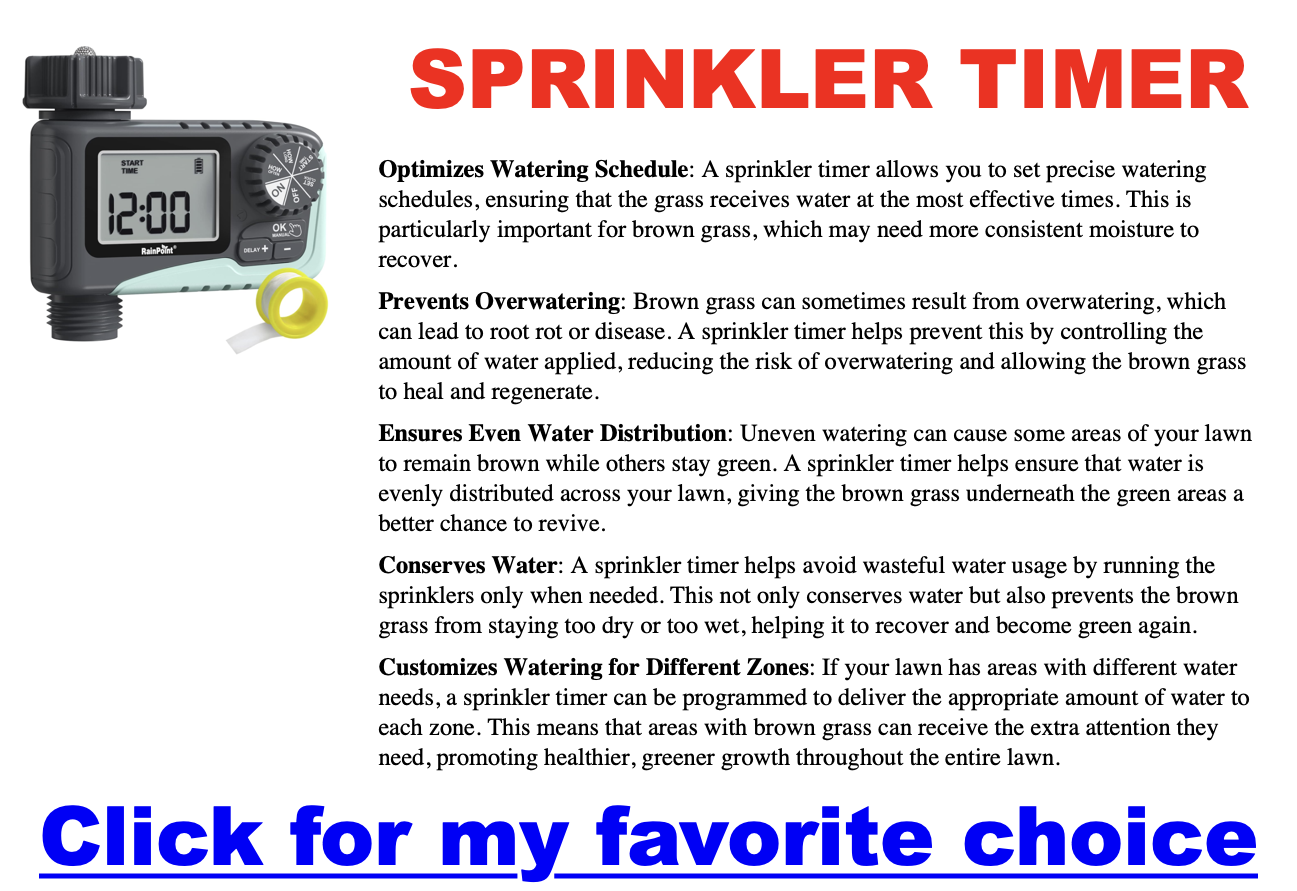
The Golden Rule: Early Morning Watering
Across most regions, early morning is the gold standard for watering your lawn. Ideally, aim for the window between 6 a.m. and 10 a.m.
| Region | Best Time to Water |
|---|---|
| Northeast | 6 a.m. – 10 a.m. |
| Southeast | 6 a.m. – 10 a.m. |
| Midwest | 6 a.m. – 10 a.m. |
| Southwest | 4 a.m. – 6 a.m. |
| Northwest | 6 a.m. – 10 a.m. |
Why is early morning watering so beneficial?
- Reduced Evaporation: Cooler temperatures and lower wind speeds minimize water loss due to evaporation. This means more water reaches your lawn’s roots, where it’s needed most.
- Disease Prevention: Morning watering allows the grass blades to dry out in the sun throughout the day, which reduces the risk of fungal diseases that thrive in damp conditions.
Regional Variations: Tailoring Your Watering ScheduleWhile early morning watering is generally recommended, certain climates require slight adjustments:
- Warm Climates (e.g., Texas, Florida, Arizona):
- Consider watering even earlier in regions with scorching summers, between 4 a.m. and 6 a.m. This helps to avoid the peak heat that can cause significant water loss through evaporation.
- Cooler Climates (e.g., Pacific Northwest, Northeast):
- Early morning remains the prime time for watering. However, during particularly dry spells, watering in late afternoon or early evening can be an option. Just avoid watering too late at night, as this can keep the grass wet for extended periods, increasing the risk of disease.
Key Takeaways:
- Prioritize early morning watering: It’s the most efficient way to ensure your lawn gets the hydration it needs while minimizing water wastage and disease risk.
- Consider regional factors: Adjust your watering schedule based on your local climate and weather conditions.
- Monitor your lawn: Look for signs of stress, such as browning or wilting, and adjust your watering frequency accordingly.
25+ Cheap DIY Garden Path Ideas
Let’s be honest: We all dream of a beautiful garden. But sometimes, those landscape projects can put a dent in our wallets. Good news! A charming garden path doesn’t have to cost a fortune. With some creativity and DIY spirit, you can create a stunning, budget-friendly, and unique walkway.
Natural Beauty
Sometimes, the simplest materials from nature can make the prettiest paths.
- Mulch: Soft, forgiving, and easy to replenish. Choose your favorite color for a natural look.
- Pea Gravel: This affordable classic provides excellent drainage and a satisfying crunch underfoot.
- Decomposed Granite: Create a more formal, slightly firmer path with the warm tones of this material.
- River Rocks: Their smooth texture and variety of sizes add a touch of organic elegance.
- Wood Slices: Rustic, charming, and free if you have trees to trim! Vary the wood types for added interest.
Stepping Stone Style
Click here for my favorite landscaping book filled with inexpensive garden path ideas…
Stepping stones create whimsical, informal paths. Here are some easy-to-use options:
- Flagstone: Nestle these natural stones into grass or sand for a rustic look.
- Reclaimed Bricks: Add old-world charm (and save money) with repurposed bricks.
- Concrete Pavers: Uniform squares offer a tidy look. Experiment with different patterns.
- Poured Concrete ‘Lily Pads’: Make your round stepping stones for a custom touch.
- Painted Rocks: Transform plain stones into a vibrant walkway with a bit of paint.
Upcycling Magic
Turn everyday objects into extraordinary paths! This is where your personality can shine.
- Bottle Cap Mosaic: Create a colorful, quirky path by embedding bottle caps in concrete.
- Broken Dishes: Upcycle those chipped plates and bowls into a whimsical mosaic path.
- Recycled Tires: Stack or cut tires for a unique path – especially useful for slopes.
- Wine Corks: A massive wine cork collection? Turn them into a soft and springy path.
- Old Pallet Boardwalk: Repurposed wood pallets create a raised walkway with character.
Hybrid Designs
Combine materials for a customized look that’s both beautiful and practical.
- Gravel with Edging: Add structure to loose gravel with metal or brick edging.
- Stepping Stones and Gravel: Use large stepping stones surrounded by smaller gravel.
- Grass and Pavers: Soften the look of pavers by allowing grass to grow between them.
- Mulch with Brick Borders: Define your mulch path and prevent spreading with a brick edge.
- Stone and Moss Encourage moss growth between stones for a lush, fairytale vibe.

Tips & Tricks
Click here for landscaping ideas that don’t require hiring costly designers
Plan it Out: Before you grab your shovel and start digging, take a pen and paper (or your favorite drawing app) and sketch out the path you envision. Consider the following:
- Starting and ending points: Determine the overall length of your path. Where will your path begin and end?
- Curves and bends: Do you want a straight path, or would you like to incorporate gentle curves or bends? Consider the flow of your garden and how the path will wind around existing features.
- Width: How wide should your path be? Think about how many people will be using the path at once and allow for comfortable foot traffic.
- Functionality: What is the purpose of your path? Is it purely decorative, or will it be a high-traffic zone that needs to be extra durable? Knowing this will help you determine the best materials and construction methods for your path.
- Connection to other areas: How will your path connect to different parts of your garden? Consider the overall layout and ensure the path provides a smooth flow of movement.
Conclusion
See? A beautiful garden path doesn’t have to break the bank. The best part about DIY projects is that you can express your creativity and build something uniquely yours. So roll up your sleeves, grab your materials, and get ready to transform your garden!
Can You Reseed Over Dead Sod?
A once beautiful lawn marred by large brown, dead patches can be discouraging. The good news is that you might be able to restore its lushness without completely starting over. Let’s dive into if reseeding over dead sod is the right fix for your situation.
Why Does Sod Die?
Before tackling a lawn fix, it’s wise to understand what might have caused the damage:
- Extreme Weather: Droughts, excessive heat, or prolonged freezing can hurt your lawn.
- Pests and Disease: Grubs, fungus, and other issues can take a toll.
- Neglect: Improper care (watering, mowing, fertilizing) weakens grass over time.
- Foot Traffic: Heavy use can compact soil and damage grass roots.
Can Reseeding Help?
Reseeding over dead sod can be successful, but it’s important to assess the situation first:
- Is It Dead or Dormant? Gently tug at the brown grass. If it comes out easily, the roots are likely dead. The grass could be dormant and recover with improved care if you see some green growth.
- Check the Soil: Is it compacted? Hard, compacted soil makes it difficult for new grass to take root.
How to Reseed Over Dead Sod
Click here for landscaping ideas without hiring costly designers
If reseeding is your path, here’s the detailed plan:
- Remove the Dead Stuff: Remove as much dead grass, thatch, and debris as possible. This will improve seed-to-soil contact and germination.
- Prepare the Soil: This is the most crucial step for successful reseeding!
-
- Loosen it up: Aerate the compacted soil. Aeration allows for better water infiltration, drainage, and root growth.
- Test it: A simple soil test kit can reveal if your soil needs amendments to adjust its nutrient levels and pH balance. For example, if your soil is too acidic, it might need lime to raise the pH. Adding compost can improve both drainage and nutrient content.
- Choose the Right Seed: Pick a grass seed that matches your existing lawn and thrives in your climate. Consider sun exposure, drought, and traffic tolerance when selecting.
- Spread the Seed: Use a spreader to ensure even distribution. The recommended seeding rate will vary depending on the grass seed you choose, so follow the instructions on the package.
- Topdress (Optional): Cover the area with a thin layer of compost or topsoil. This helps protect the seeds from erosion and drying out and provides some additional germination nutrients.
- Water Thoroughly: Keep the seeded area moist (but not soggy) for optimal seed germination.
Important Reminders
- Timing Matters: Seed at the right time of year for your grass type and location.
- Patience is Key: Don’t expect overnight miracles. New grass takes time to establish.
- Fix the Root Cause: Reseeding is a temporary fix if you don’t address what caused the sod to die.
When to Replace Sod: DIY vs. Calling a Landscaper
Click here for cheap landscaping ideas
Replacing sod is a more extensive project than reseeding. Here’s a breakdown to help you decide if you should tackle it yourself or call in a professional:
- Do it Yourself: If the dead area is relatively small (less than 100 square feet) and you’re comfortable with yard work, DIY sod replacement is manageable. You’ll need to rent a sod cutter (a machine that removes existing sod) and be prepared for some physical labor.
- Call a Landscaper: For larger areas, severe soil problems, or if you’d rather not invest the time and effort, hiring a landscaper is a good option. They have the experience and equipment to handle the job efficiently.
Get Your Lawn Back to Green
- Reseeding over dead sod can be a viable solution to reviving your lawn. By carefully evaluating the damage, preparing your soil, and choosing the right grass seed, you could avoid the cost and labor of replacing your entire lawn.
Cheap simple front yard landscaping ideas
Let’s be honest: we all want a beautiful front yard. But the thought of expensive plants and complicated projects can be enough to make you retreat back indoors. Fear not—a stunning front yard doesn’t have to cost a fortune or require a landscaping degree! Here are some simple and budget-friendly ideas to transform your space.

Simple yard landscaping ideas
Click here for landscaping ideas without hiring costly designers
Sometimes, the biggest transformations come from the smallest details.
- Edging is everything: Define your flower beds or create a winding path with bricks, stones, or inexpensive plastic landscaping. This simple step instantly gives your yard a polished look and helps prevent unwanted grass and weeds from creeping into your flower beds.
- Mulch magic: A layer of mulch does wonders for your yard. It suppresses weeds, moistens your soil, and adds a bright color. Look around to see if your community offers free mulch programs, or consider buying in bulk for extra savings. When choosing mulch, pick a color that compliments your house and the plants you plan to feature. Classic brown or black mulch is always a safe choice, but don’t be afraid to experiment with colored mulch in moderation for a more playful touch.
- Plant smart: You don’t have to buy a truckload of plants. Choose a few statement pieces – think colorful perennials that flower throughout the season. These low-maintenance shrubs add structure or native plants that thrive in your area and attract pollinators like butterflies and bees.
Softscaping for Small Spaces
- Embrace Native Plants: Opt for native grasses, drought-tolerant plants, and low-growing ground cover. These beauties require minimal maintenance and thrive in your local climate.
- Plant native grasses
- Plant drought-tolerant plants
- Plant low-growing groundcover
- Plant shade-loving plants under trees
- Use native plants for easy care.
- Colorful Accents:
- Create a container garden
- Plant colorful annuals in borders
- Plant a small flowering tree
- Create a small herb garden
- Use hanging baskets for color
- Plant a dwarf fruit tree
- Plant fragrant flowers near the entrance
- Install window boxes
- Vertical Gardening: Maximize your space with trellises, hanging baskets, or window boxes, adding dimension and visual interest.
- Install a simple trellis
- Use vertical gardening techniques
- Attract Wildlife: Create a haven for butterflies with a dedicated garden or plant fragrant flowers to entice pollinators. Consider adding a bird bath to welcome feathered friends as well.
- Create a butterfly garden
- Install a bird bath
- Shady Solutions: Utilize shade-loving plants under trees to create a lush, layered look.
- Textured Accents: Incorporate ornamental grasses for movement and visual interest in your landscape.
- Privacy & Greenery: Plant a privacy hedge or add evergreens for year-round color and seclusion

Hardscaping for Curb Appeal
- Define and Divide: Use edging pavers, decorative edging, or even simple rocks to create clean lines and define different areas in your yard.
- Edge pavers with grass
- Paths and Walkways: Create a charming stepping stone path or use pea gravel for a low-maintenance and textured ground cover
- Use pea gravel for low-maintenance ground cover
- Create a stepping stone path
- Focal Points: Draw the eye with a small landscaped fountain, a mature tree, or a unique garden statue
- Add a small landscaped fountain
- Use mature trees as focal points
- Install a decorative mailbox
- Use decorative rocks as accents
- Create a focal point with a garden statue
- Use decorative planters for instant impact
- Upcycled Charm: Repurpose materials for planters or incorporate decorative rocks to add personality and reduce waste.
- Mailbox Makeover: Upgrade your mailbox to a decorative one for an instant curb appeal boost
- Fencing & Edging: Add structure and visual appeal with decorative fencing or edging for flower beds.
- Use decorative edging for flower beds
- Use decorative fencing

Low-Effort, High-Impact Additions
- Container Gardens: Enjoy the flexibility of container gardens to showcase colorful annuals or even a dwarf fruit tree
- Rock Gardens and Succulents: Embrace the low-maintenance beauty of rock gardens and succulents, ideal for small, sunny spaces.
- Create a rock garden
- Create a succulent garden
- Mulch and Weed Control: Apply mulch to suppress weeds and retain moisture in your soil
- Use mulch for weed control
- Landscape Lighting: Illuminate your front yard with solar-powered landscape lights for ambiance and safety
- Install landscape lighting
- Use solar-powered landscape lights
- Water Features: Add tranquility and attract wildlife with a small water feature or rain garden. Consider a small pond or a rain barrel system for sustainable irrigation
- Install a small water feature
- Create a rain garden
- Install a small pond
- Create a small rain barrel system for irrigation
More Inspiring Ideas
- Focus on sculpted shrubs to add a touch of elegance
- Create a small seating area for relaxation and enjoyment
- Design a small zen garden for peaceful contemplation
- Plant a wildflower meadow for a burst of natural beauty
- Install a small pergola for shade and a touch of romance
- Start a small vegetable garden for fresh produce
- Plant low-maintenance perennials for year after year beauty
- Provide shade and energy savings with a strategically placed shade tree
- Craft a gravel garden for a modern and minimalist look
DIY Projects with Major Wow-Factor
Ready to unleash your inner DIY superstar? These projects are fun and will seriously impress your neighbors:
- Step it up: Create a charming walkway with stepping stones or affordable pavers. Get creative with placement and add pebbles or low-growing plants between the stones.
- Rock your entrance: Paint your house numbers on a large, interesting rock and place it prominently in your front yard.
- Light it up: String lights add a touch of magic to your front yard. Hang them over a patio area, drape them around a tree, or weave them through a climbing vine.
- Let there be art: Turn an old rake or shovel into a beautiful garden feature. Paint it a cheerful color and hang it on your fence or shed.
- Mailbox makeover: Give your mailbox a fresh coat of paint and some decorative hardware. Add a hanging planter or window box for a pop of color.
- Welcome mat magic: A colorful and inviting welcome mat sets the tone for your front yard.
- Think vertical: Hanging planters are a great way to add plants and visual interest to a small space. Place them on your porch, fence, or even a shepherd’s crook.
- Shutter chic: If you have old shutters, put them to good use! Lean them against the house or fence and decorate them with planters or hanging baskets.
- Crafty containers: Repurpose old tin cans, buckets, or boots as unique and quirky planters.
- Pinecone paradise: Gather some pinecones and spray paint them in metallic colors for festive and affordable front yard decoration.
Low-Maintenance = Long-Term Savings
Think ahead to save time and money in the long run.
- Ground covers to the rescue: Plant low-maintenance groundcovers like creeping thyme or sedum to fill spaces and crowd out weeds.
- Hardscaping heroes: Incorporate gravel, crushed stone, or river rocks to create beautiful, low-upkeep pathways, patios, or garden features.
- Love the drought? Choose drought-tolerant plants suited to your climate. You’ll save on water bills and have plants that naturally thrive with minimal fuss.
Resources & Inspiration
- Tap into your community: Check for local resources like community gardens that offer free plants or cuttings or online marketplaces where you can find free or discounted landscaping materials.
- Get those creative juices flowing: Websites like Pinterest are packed with budget-friendly front yard landscaping ideas. Let those images spark your imagination!
The Takeaway
A stunning front yard isn’t about spending a fortune; it’s about clever choices and creativity. Start with one or two of these projects and see how your space transforms. Remember, you can always add more over time!
Mushrooms Growing on Your Lawn? Here’s What’s Going On
Mushrooms might look strange, but they’re actually a sign that your soil is doing its job. Mushrooms are the above-ground fruiting part of a fungus—think of them like apples on a tree. The rest of the fungus lives in the soil, where it breaks down organic matter like old roots, leaves, or even grass clippings. All this decaying material makes for a feast for fungi!
Are They a Problem?
The good news is that the vast majority of mushrooms popping up in your lawn are harmless to both your grass and your pets. They might be a bit of an eyesore, but they’re also an indicator of healthy, active soil.
Getting Rid of Mushrooms
- Temporary fix: If you simply don’t like the look of them, knocking them over or raking them up will do the trick. They usually disappear on their own as the weather dries out.
- Longer-term management: To reduce mushroom appearances in the long term, focus on creating a less favorable environment for fungi. Here’s how:
- Watering: Mushrooms thrive in moist environments. Adjust your watering habits to avoid creating constantly soggy soil. This encourages deeper root growth in your grass and discourages fungal growth near the surface.
- Aeration: Compacted soil can trap moisture and create ideal conditions for mushrooms. Aeration ican improve drainage and air circulation. This allows excess moisture to escape and makes the environment less hospitable for fungi.
- Dethatching: A thick thatch layer, a buildup of dead grass stems and clippings at the base of grass plants, can trap moisture near the soil surface. This creates a prime breeding ground for mushrooms. Dethatching your lawn removes this layer, improving air circulation and reducing moisture buildup.
What about Poisonous Mushrooms?
While most lawn mushrooms are harmless, accurately identifying mushroom types can be tricky. If you have young children or pets who might put things in their mouths, it’s safest to err on caution and remove any mushrooms you see. If you’re seriously concerned, contact your local university extension service or a mycologist (mushroom expert) for help with identification.