Matt
Mowing Height Made Simple: How to Pick the Right Height for Your Lawn (Any Grass, Any Climate)
Choosing the right mowing height might seem like a small detail—but it’s one of the most powerful ways to keep your lawn healthy, green, and weed-free. Whether you’ve got fescue in the north or Bermuda in the south, how high you mow determines everything from water use to root depth to how often you need to mow.
Let’s break it down in simple terms.
Why Mowing Height Matters
Your mower doesn’t just shape your lawn—it shapes its biology.
Each blade of grass is a solar panel for your lawn. The more leaf area you leave behind, the more sunlight your grass can turn into energy. That energy fuels root growth, disease resistance, and recovery from foot traffic or drought.
Cut too low (“scalping”), and you slice off your lawn’s energy source. Cut too high, and you can get matting or excess thatch—but most homeowners never reach that point. The real secret is staying within your grass’s ideal range and never removing more than one-third of the leaf blade at once.
Step 1: Know What Kind of Grass You Have
Every grass species has a preferred range for height of cut (HOC).
If you’re not sure what’s in your yard, these quick clues help:
| Type | Region | Look | Feel | Starting Height |
|---|---|---|---|---|
| Tall Fescue / Hard Fescue | North / Transition | Medium-dark green | Soft, thin blades | 2.5–4.0″ |
| Kentucky Bluegrass / Perennial Rye | North | Bright green | Smooth blades | 2.0–3.5″ |
| Bermudagrass / Zoysiagrass | South | Dense, fine texture | Firm, carpet-like | 0.75–2.0″ |
| St. Augustine / Centipede / Bahia | Coastal South | Coarse, wide blades | Thicker feel | 2.5–4.0″ |
✅ If you’re unsure, start around 2.5–3.0 inches. That’s the safest range for most lawns until you identify your grass.
Step 2: Match Your Height to Your Goals
Different mowing heights create different outcomes. Think of it as balancing looks, maintenance, and resilience.
| Height Range | Pros | Cons | Best For |
|---|---|---|---|
| Lower (≤2″) | Crisp, manicured look; quick recovery after rain | Shallow roots, higher water needs, more weeds if stressed | Level lawns with Bermuda or Zoysia |
| Mid (2–3″) | Balanced look, good density, moderate water use | Needs regular mowing during peak growth | Most mixed lawns |
| Higher (3–4+”) | Deep roots, fewer weeds, drought protection, cooler soil | Can look shaggy if overgrown; may hold dew longer | Tall Fescue, Kentucky Bluegrass, shady lawns |
Step 3: Adjust Seasonally for Stress
Grass height should change with the seasons—just like your wardrobe.
-
Spring: Stay mid-range for clean, quick growth.
-
Summer: Raise mower 0.5–1.0″ for drought and heat protection.
-
Fall: Keep it high for root energy storage.
-
Winter (dormant): Final mow slightly lower to prevent matting and snow mold. Info on winter lawn care.
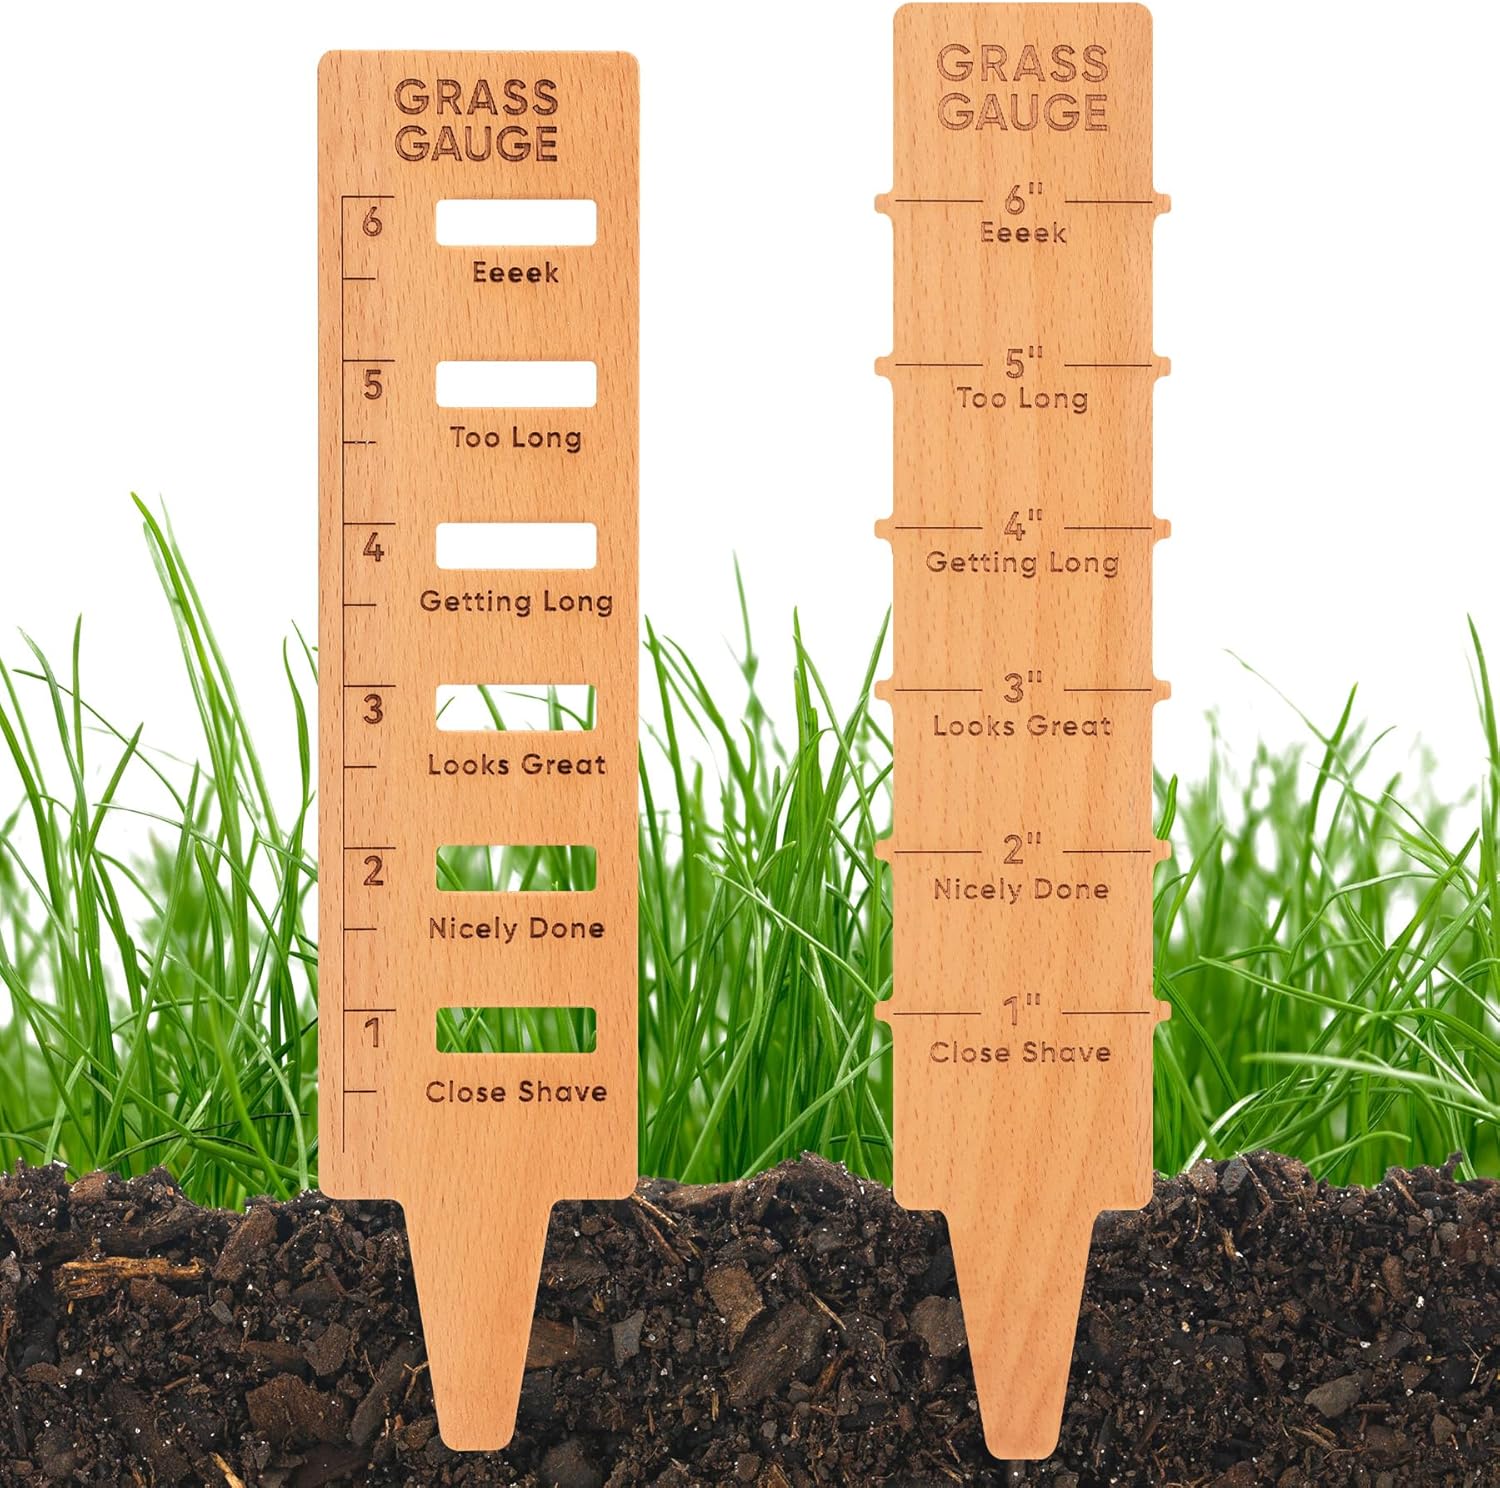
Step 4: The One-Third Rule (The Secret to Stress-Free Mowing)
Never remove more than one-third of the blade in a single mowing.
Example:
If you want your lawn 3 inches tall, mow before it reaches 4.5 inches.
That keeps roots strong and the grass photosynthesizing efficiently.
Cutting too much at once shocks the plant, halts root growth for up to two weeks, and invites weeds to take over.
Step 5: Fine-Tune for Your Yard’s Conditions
-
Hot & Dry: Raise your height. Shade and deeper roots help conserve water.
-
Shady: Slightly higher helps maximize photosynthesis.
-
High Traffic (kids, pets): Stick mid-range for quick recovery.
-
Uneven Lawn: Avoid very low cuts; you’ll scalp high spots.
Step 6: Set Up Your Mower for Success
-
Measure, don’t guess: Place your mower on pavement, measure from the blade to the ground.
-
Keep blades sharp: Dull blades tear grass, turning tips brown.
-
Alternate directions: Change mowing patterns weekly to avoid ruts and grain.
-
Mulch clippings: They break down quickly and return nutrients, reducing fertilizer needs by up to 25–75%.
Choose the Right Mower for Your Height
Not all mowers can safely maintain every cutting height. The type of mower you use affects both how evenly you can cut and how low or high you can safely mow.
| Mower Type | Best Height Range | Strengths | Watch Out For |
|---|---|---|---|
| Rotary mower (standard gas or electric) | 1.5–4.0″ | Versatile, handles most home lawns | Can scalp on uneven lawns if set too low |
| Reel mower (manual or powered) | 0.5–2.0″ | Precision cut, great for Bermuda & Zoysia | Requires level ground; dull blades shred tall fescue |
| Hover mower | 1.5–3.0″ | Lightweight, ideal for slopes | Limited power on dense turf |
| Robotic mower | 1.5–3.0″ (adjustable) | Maintains consistent height automatically | May struggle with long or uneven grass if height set too low |
| Tractor / Riding mower | 2.5–4.0″+ | Good for large, open lawns | Harder to get uniform cuts on bumps |
| Zero-turn mower | 1.5–3.5″ | Excellent for speed and precision | Needs level terrain to avoid scalping |
Pro tip: For tall fescue or mixed northern lawns, a rotary or riding mower set at 3–4 inches is ideal.
For low-cut southern lawns (Bermuda, Zoysia), a reel mower gives that golf-course finish.
Step 7: Troubleshooting Common Problems
| Problem | Likely Cause | Simple Fix |
|---|---|---|
| Brown tips / frayed edges | Dull blade | Sharpen or replace blade |
| Yellow or thin patches | Cut too low / infrequent mowing | Raise deck; mow more often |
| Weed breakout (crabgrass, dandelions) | Height too low | Raise height 0.5–1″ |
| Grass drying out fast | Shallow roots from low HOC | Raise height and water deeply |
| Shaggy after rain | Too tall between cuts | Stick to one-third rule, mow earlier |
Step 8: Run a Mini Experiment
You can find your “perfect” height in one month:
-
Pick two side-by-side patches.
-
Mow one low (2″) and one high (3.5″).
-
Track: color, weeds, water use, and mowing time.
-
Stick with whichever looks better and needs less effort.
You’ll learn more about your yard than any soil test.
Step 9: Quick Reference Chart: The Best Heights by Grass Type
| Grass Type | Ideal Range | Raise in Summer? | Notes |
|---|---|---|---|
| Tall Fescue | 2.5–4.0″ | ✅ +0.5–1″ | Excellent drought resistance |
| Kentucky Bluegrass | 2.0–3.5″ | ✅ | Raise in heat; avoid <2″ |
| Perennial Rye | 2.0–3.0″ | ✅ | Fast grower; mow often |
| Hard Fescue | 2.5–4.0″ | ✅ | Low-maintenance, slow growth |
| Bermudagrass | 0.75–2.0″ | ❌ | Lower = denser; level surface needed |
| Zoysiagrass | 1.5–2.0″ | ❌ | Dense mat; avoid scalping |
| St. Augustine | 2.5–4.0″ | ✅ | Don’t cut too low—scalps easily |
| Centipede | 1.5–2.0″ | ✅ | Prefers less fertilizer |
| Bahiagrass | 2.5–3.5″ | ✅ | Tolerant of sandy soils |
Final Takeaway
-
Start high—you can always go lower later.
-
Follow the one-third rule religiously.
-
Let your grass type and conditions dictate the fine-tuning.
-
Remember: taller grass usually means fewer weeds, deeper roots, and less work.
Expert tip: A healthy mowing habit beats any fertilizer or spray. Set your mower right, mow regularly, and let your grass do the rest.
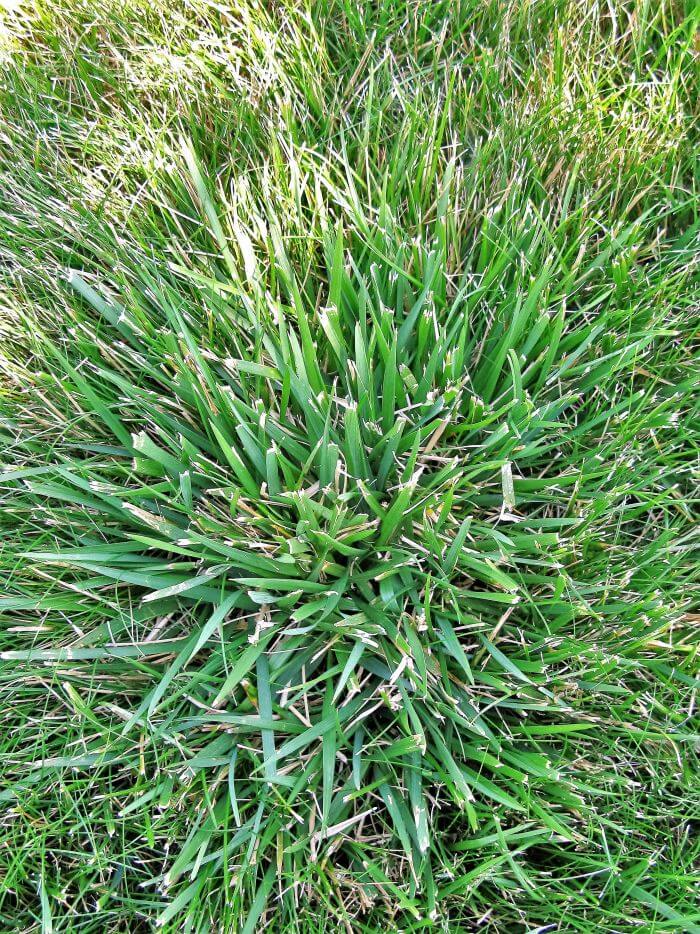
Hard Fescue Grass
If you’re looking for a grass that stays green with little water, grows in poor soil, and needs almost no fertilizer, Hard fescue might be exactly what your lawn needs.
This hardy cool-season grass is part of the fine fescue family — known for its fine blades, soft texture, and impressive shade tolerance — but what sets Hard fescue apart is how little care it demands. Once established, it can survive drought, cold, and neglect better than almost any other lawn grass.
What Is Hard Fescue?
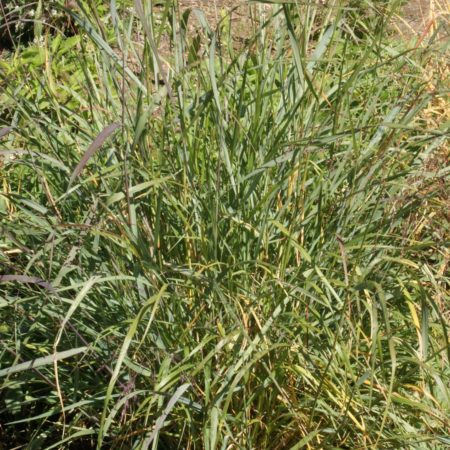
Hard fescue (Festuca brevipila) is a cool-season, fine-leaf bunch grass that originated in northern Europe. It’s one of the most rugged members of the fine fescue group, alongside Chewings fescue, creeping red fescue, and sheep fescue.
Unlike Kentucky bluegrass, which spreads through underground rhizomes, Hard fescue grows in tight, upright clumps. That gives it a natural, meadow-like look — soft and slightly tufted — that works beautifully for low-traffic lawns, slopes, and eco-friendly “no-mow” landscapes.
It’s often chosen for lawns where other grasses struggle: sandy soils, hillsides, shaded areas, and northern regions with cold winters and dry summers.
Why People Love Hard Fescue
Here are the main reasons homeowners and turf professionals choose Hard fescue:
-
Exceptionally drought tolerant: Deep roots help it stay green with minimal watering.
-
Low fertilizer needs: Once or twice a year is enough.
-
Fine, soft texture: Looks refined without constant mowing.
-
Cold and heat resistant: Survives freezing winters and tolerates mild summer heat.
-
Thrives in poor soil: Grows well in low-fertility, sandy, or acidic conditions.
-
Low maintenance: Slow growth means you’ll mow less often.
In short, Hard fescue is perfect for people who want a “set it and forget it” lawn — one that looks good but doesn’t need constant care.
When to Plant Hard Fescue
Hard fescue is a cool-season grass, so the best time to plant is during periods of mild temperatures and consistent moisture.
Best planting windows:
-
Early fall (August to mid-October): Ideal time — soil is warm, but air is cool enough for steady growth.
-
Early spring (March to May): Works well if you missed fall, but avoid planting right before summer heat.
Germination time: 10–14 days under proper soil moisture.
Optimal soil temperature: 50–65°F.
If you’re seeding bare soil, lightly rake the surface to create good seed-to-soil contact. Don’t bury the seeds deeply — ¼ inch depth is perfect.
How to Plant Hard Fescue
-
Prepare the area: Loosen compacted soil and remove debris or thatch.
-
Amend soil (optional): Add compost or lime if soil is acidic below pH 5.0.
-
Spread seed: 3–5 lbs per 1,000 sq ft for new lawns, or 2–3 lbs for overseeding.
-
Rake lightly: Cover seed no more than ¼ inch deep.
-
Water gently: Keep the top inch of soil moist until seedlings reach 2 inches tall.
-
First mow: Once grass reaches about 4 inches high, mow to 3 inches.
How to Care for Hard Fescue
Hard fescue is among the easiest grasses to maintain once established. Here’s how to keep it healthy year-round.
Watering
-
New seed: Light daily watering until germination.
-
Established lawns: Deep watering once every 7–10 days during dry spells.
-
It’s drought tolerant — don’t panic if it goes slightly brown in summer. It will recover with rain.
Fertilizing
-
Hard fescue needs very little fertilizer — one light feeding in fall (and optionally one in spring) is enough.
-
Use a slow-release or organic fertilizer with moderate nitrogen (e.g., 10-10-10).
-
Total nitrogen per year: about 0.5–1 lb per 1,000 sq ft (compare that to 3–4 lbs for bluegrass).
Mowing
-
Maintain a height of 3–4 inches.
-
Never cut off more than one-third of the blade at a time.
-
Mow every 3–4 weeks during the growing season; less often in summer and winter.
-
Leave clippings on the lawn — they act as free fertilizer.
Aeration and Thatch
-
Hard fescue produces very little thatch.
-
Aerate only every few years if the soil is compacted or heavy clay.
Seasonal Care Guide
| Season | Tasks |
|---|---|
| Spring | Rake debris, fertilize lightly, mow as needed. Overseed thin spots. |
| Summer | Mow high (3.5–4”), water only during extended drought, avoid fertilizer. |
| Fall | Best time for fertilizing, seeding, or establishing new lawns. |
| Winter | Minimal care — avoid walking on frozen turf. |
Common Problems and Solutions
| Problem | Cause | Fix |
|---|---|---|
| Patchy color or thinning | Heavy shade or poor soil contact | Overseed and prune trees to increase light. |
| Brown in summer | Dormancy from drought | Deep watering will revive it when cooler. |
| Weeds | Sparse new seeding | Keep soil covered during germination; consider mixing with other fine fescues. |
| Uneven growth | Nutrient imbalance | One light fall fertilizer application helps even it out. |
Hard Fescue vs. Chewings Fescue
These two are often blended together because they complement each other.
| Feature | Hard Fescue | Chewings Fescue |
|---|---|---|
| Texture | Fine to medium-fine | Very fine and upright |
| Color | Blue-green | Rich deep green |
| Shade tolerance | Good | Excellent |
| Drought tolerance | Excellent | Good |
| Maintenance needs | Very low | Low |
| Growth rate | Slow | Moderate |
| Best use | Slopes, low-input lawns | Shaded, refined lawns |
If you’re aiming for a rugged, natural-looking lawn, Hard fescue is the better choice.
If you want a manicured, soft texture for shaded yards, Chewings fescue might suit you more.
Recommended Seed Mixes
Hard fescue performs beautifully in blends that improve resilience and appearance:
| Mix Type | Hard Fescue | Chewings Fescue | Creeping Red Fescue |
|---|---|---|---|
| Dry slope mix | 60% | 20% | 20% |
| Low-input lawn mix | 40% | 40% | 20% |
| Eco-lawn blend | 50% | 30% | 20% |
These mixes balance drought resistance, shade performance, and density — ideal for homeowners who want a long-lasting, sustainable lawn.
Final Thoughts
Hard fescue is one of the best grasses for homeowners who want a low-maintenance, water-saving, and environmentally friendly lawn.
It’s not the fastest grower or the best for sports use, but if your lawn goals are simplicity, sustainability, and natural beauty, it’s nearly unbeatable.
Plant it in early fall or spring, mow it tall, and fertilize lightly once a year — that’s really all it asks.
With proper establishment and patience, you’ll enjoy a fine-textured, drought-tolerant lawn that looks good year after year with very little effort.
Chewings Fescue Grass: The Low-Maintenance, Fine-Textured Lawn for Cool Climates
If you want a lawn that looks lush, feels soft, and doesn’t need constant mowing or fertilizing, Chewings fescue might be exactly what you’re looking for.
This cool-season, fine-leaf grass is a favorite among homeowners who want a natural, low-maintenance lawn that thrives in partial shade and cooler regions.
I’ve seen Chewings fescue used on golf course roughs, park areas, and shaded home lawns across the Northeast and Midwest. It’s one of those grasses that looks beautiful year-round with minimal attention — especially when paired with other fine fescues in a blend.
What Is Chewings Fescue?
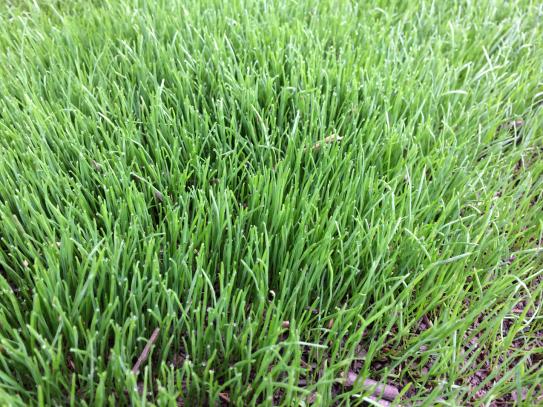
Chewings fescue (Festuca rubra ssp. commutata) is part of the fine fescue family — a group that also includes hard fescue, sheep fescue, and creeping red fescue.
Unlike creeping red fescue, which spreads through underground rhizomes, Chewings is a bunch-type grass, meaning it grows in dense clumps. This gives it a velvety, carpet-like appearance that’s ideal for lawns with light to moderate foot traffic.
It’s most at home in cool, moist regions — think New England, the Pacific Northwest, or the northern Great Lakes — and it handles shade far better than most lawn grasses.
Key Benefits of Chewings Fescue
-
Fine, elegant texture: The thin blades create a refined, uniform appearance.
-
Low fertilizer needs: It stays green even in poor soils with minimal feeding.
-
Shade tolerant: Performs well under trees and in partial shade.
-
Drought tolerant: Once established, it requires far less water than bluegrass.
-
Low mowing frequency: Slower growth means less time cutting the lawn.
-
Cold hardy: Recovers well after harsh winters and doesn’t brown easily.
It’s not designed for sports fields or high-traffic areas, but for everyday residential lawns — especially shady ones — it’s hard to beat.
Ideal Growing Conditions
| Condition | Ideal Range | Notes |
|---|---|---|
| Sunlight | Partial shade to 6 hours of sun | Best for areas with mixed light. |
| Soil type | Well-drained, slightly acidic | pH between 5.5 and 6.5 is ideal. |
| Temperature | 60–75°F | Active in spring and fall; slows in summer heat. |
| Watering | 1 inch per week | Deep watering less often is better than frequent light watering. |
| Mowing height | 2.5–4 inches | Taller grass tolerates shade and drought better. |
How to Care for Chewings Fescue
Spring Care
-
Rake away debris and lightly aerate compacted soil.
-
Overseed thin patches at 3–5 lbs per 1,000 sq ft.
-
Apply a light fertilizer (0.25–0.5 lb nitrogen per 1,000 sq ft).
-
Mow to 2.5–3.5 inches.
Summer Care
-
Raise mowing height to 3.5–4 inches to reduce stress.
-
Water deeply once a week if rainfall is limited.
-
Avoid fertilizing during hot weather.
-
Limit traffic if the grass is dormant or dry.
Fall Care
-
This is the main growing season for Chewings fescue.
-
Apply a balanced fertilizer such as 10-10-10 or 16-4-8.
-
Overseed again to maintain density.
-
Continue mowing until growth stops in late fall.
Winter Care
-
Avoid walking on frozen or snow-covered turf.
-
Rake leaves before snow to prevent snow mold.
Common Problems and Fixes
| Problem | Cause | Solution |
|---|---|---|
| Brown patches | Drought dormancy | Water deeply; the grass will recover naturally. |
| Red thread or leaf spot | Low nitrogen or high humidity | Apply light fertilizer; mow only when dry. |
| Thin growth | Compaction or dense shade | Aerate, overseed, and trim tree branches. |
| Scalping | Mowing too low | Maintain a minimum height of 2.5 inches. |
Chewings Fescue vs. Other Cool-Season Grasses
Below is a comparison of Chewings fescue against other popular cool-season turfgrasses used in northern regions.
| Grass Type | Texture | Shade Tolerance | Drought Tolerance | Maintenance Level | Traffic Tolerance | Best Regions |
|---|---|---|---|---|---|---|
| Chewings Fescue | Fine | Excellent | Good | Low | Moderate | Cool, shaded areas (Northeast, Pacific NW) |
| Kentucky Bluegrass | Medium-fine | Fair | Good | Medium-high | High | Full sun lawns in northern U.S. |
| Perennial Ryegrass | Fine | Moderate | Fair | Medium | Moderate-high | Overseeding and fast-germinating areas |
| Tall Fescue | Coarse | Moderate | Excellent | Medium | High | Transitional and mid-Atlantic regions |
| Hard Fescue | Fine | Good | Excellent | Very low | Low-moderate | Northern dry soils and slopes |
| Creeping Red Fescue | Fine | Excellent | Good | Low | Moderate | Cool, coastal, or shaded lawns |
Takeaway:
Among fine fescues, Chewings offers the best mix of shade tolerance, aesthetic quality, and low maintenance.
It’s slower to spread than creeping red fescue but more upright and better for uniform turf.
Recommended Seed Blends
Most experts recommend using Chewings fescue as part of a seed blend. Here are common ratios used by turf managers:
| Blend Type | Chewings Fescue | Hard Fescue | Creeping Red Fescue |
|---|---|---|---|
| Shade mix | 40% | 20% | 40% |
| Sun mix | 30% | 50% | 20% |
| Low-input mix | 50% | 30% | 20% |
Cultivars such as SR 5130, Banner II, Ambrose, and Radar are known for strong color, fine texture, and disease resistance.
Final Thoughts
Chewings fescue is the quiet workhorse of the fine fescue family — beautiful, resilient, and forgiving.
If you want a soft, natural-looking lawn that thrives on minimal care, it’s one of the best options available. While it won’t hold up to heavy play or sports use, it will reward you with a green, low-input landscape that looks elegant all year.
If you’re reseeding or renovating your lawn this fall, consider a fine fescue blend with 40–50% Chewings fescue. It’s a smart, sustainable way to enjoy a dense, healthy lawn with less watering, mowing, and fertilizer.
Creeping Red Fescue: The Shade-Loving Cool-Season Grass
If your lawn sits under trees or you’d rather mow and fertilize less, creeping red fescue (Festuca rubra) might be your best option. Unlike tall fescue or perennial ryegrass, which demand more water and maintenance, creeping red fescue thrives in shade, tolerates low-input care, and even spreads to repair thin spots.
In this guide, we’ll explore what makes creeping red fescue unique, its pros and cons, where it thrives, and how it compares to other popular cool-season grasses like tall fescue and ryegrass.
What Is Creeping Red Fescue?
-
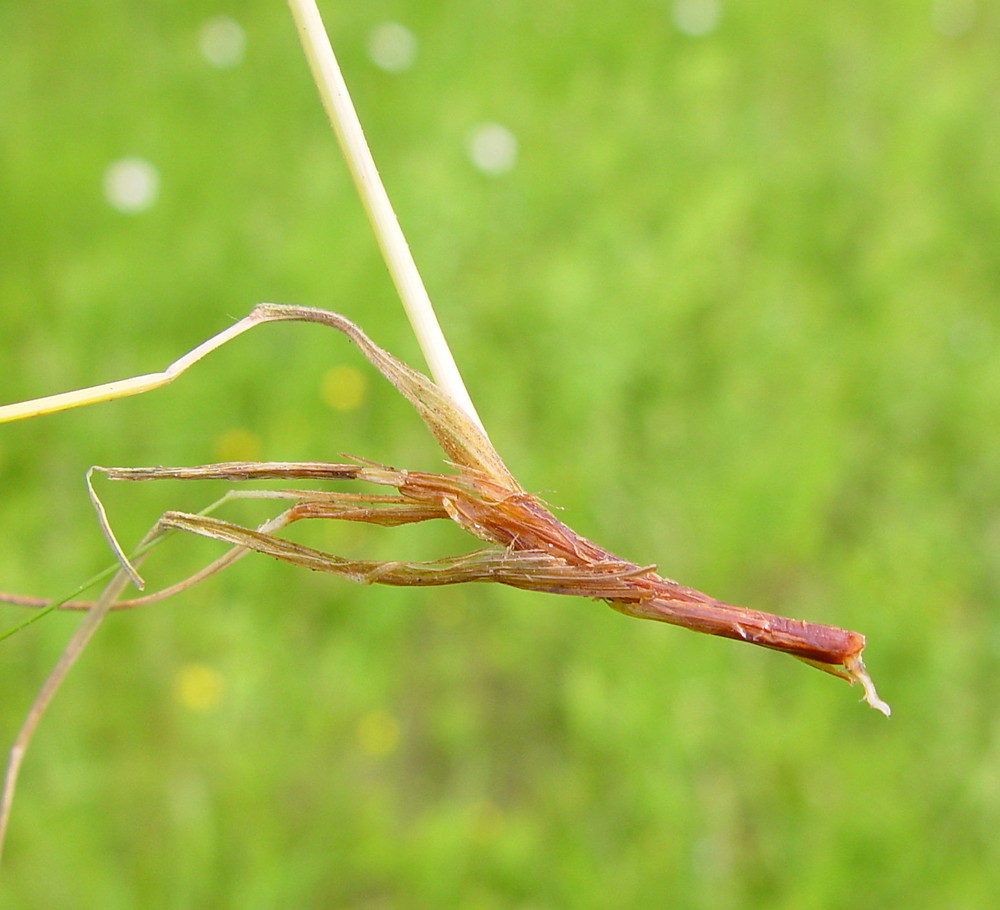
Scientific name: Festuca rubra
-
Growth habit: Spreads with short rhizomes (“creeping”), unlike bunch-type ryegrass or tall fescue.
-
Appearance: Very fine blades, soft texture, medium to dark green color.
-
Best traits: Excellent for shade and low-maintenance lawns.
Creeping red fescue belongs to the fine fescue group (along with chewings, hard, and sheep fescues). It’s a staple in shady lawn seed mixes.
Pros and Cons of Creeping Red Fescue
✅ Pros
-
Best shade tolerance of all cool-season grasses.
-
Low maintenance — needs less fertilizer, mowing, and water.
-
Spreads by rhizomes → fills in thin patches.
-
Cold hardy — great for northern climates.
-
Soft, fine texture → carpet-like feel underfoot.
❌ Cons
-
Poor wear tolerance — not for high-traffic lawns.
-
Heat stress — struggles in hot, humid summers.
-
Slow germination (10–14 days).
-
Prone to thatch if unmanaged.
-
Disease risks like red thread and dollar spot in poor conditions.
Where Creeping Red Fescue Thrives (and Where It Doesn’t)
Best Regions
-
Northern U.S. & Canada → cool summers and cold winters.
-
Northeast & Pacific Northwest → coastal, moist, shaded lawns.
-
High-altitude lawns → cooler summer temps.
-
Shaded lawns → under trees, near buildings, woodland edges.
Challenging Regions
-
Deep South & Transition Zone → heat and humidity stress the grass.
-
Heavy-use lawns → too delicate for sports fields or dog yards.
-
Full-sun, droughty soils → better alternatives include tall fescue.
Creeping Red Fescue vs. Tall Fescue vs. Perennial Ryegrass
| Feature | Creeping Red Fescue | Tall Fescue | Perennial Ryegrass |
|---|---|---|---|
| Germination Speed | 10–14 days (slow) | 7–12 days (moderate) | 5–7 days (fastest) |
| Shade Tolerance | Excellent | Moderate | Moderate |
| Heat/Drought Tolerance | Low–Moderate | Excellent (deep roots) | Poor |
| Wear Tolerance | Poor | Good | Excellent |
| Growth Habit | Spreading rhizomes | Bunch-forming | Bunch-forming |
| Maintenance Needs | Low | Moderate | High |
| Best Use Case | Shady, low-maintenance | Tough lawns in hot zones | Fast cover, sports fields |
👉 Choose creeping red fescue if your priority is shade and low-input care.
👉 Choose tall fescue if you want durability and drought resistance in hotter areas.
👉 Choose ryegrass if you need a quick, tough lawn that germinates almost instantly.
Planting Creeping Red Fescue
-
Best time: Early fall (Sept–Oct) or early spring (April–May).
-
Soil temp for germination: 50–65°F.
-
Seeding rate: 4–6 lbs per 1,000 sq ft.
-
Seed depth: ¼ inch or less.
-
Often blended: with bluegrass or ryegrass for balanced lawns.
Lawn Care & Maintenance
Fertilization
-
Annual nitrogen needs: 1–2 lbs per 1,000 sq ft (much lower than ryegrass/fescue).
-
Fertilize lightly in fall and spring.
Watering
-
Moderate drought tolerance once established.
-
Prefers light, infrequent watering.
-
Avoid overwatering in shade → disease risk.
Mowing
-
Height: 2.5–3.5 inches.
-
Frequency: Slow-growing → may need mowing only every 10–14 days.
Thatch Management
-
Creeping habit → may create thatch over time. Aerate or dethatch every 2–3 years.
Common Problems and Solutions
-
Red thread disease: Apply light nitrogen, improve airflow.
-
Dollar spot: Water deeply but infrequently, mow higher.
-
Summer stress: Overseed with tall fescue or ryegrass in transition zone lawns.
-
Thatch: Regular aeration helps avoid buildup.
Best Uses for Creeping Red Fescue
-
Shady lawns under trees or alongside buildings.
-
Low-maintenance lawns with limited mowing/fertilizing.
-
Blended seed mixes for northern climates.
-
Ornamental and naturalized lawns where soft, fine texture is valued.
Conclusion
Creeping red fescue is the shade king of cool-season grasses. It thrives where bluegrass, ryegrass, and tall fescue often fail — in cool, moist, and shaded environments. While it’s not built for heavy use or southern heat, its low-maintenance needs, soft feel, and spreading growth habit make it one of the most useful grasses for northern lawns.
Tall Fescue: The Toughest Cool-Season Grass for Lawns
If you’ve ever struggled to keep your lawn alive through summer heat, you’re not alone. Many cool-season grasses look great in spring and fall but fade when temperatures rise. That’s where tall fescue (Festuca arundinacea) comes in.
Tall fescue is one of the most adaptable and durable cool-season grasses. Thanks to its deep root system, it handles drought better than most other turf types. In this guide, we’ll break down the pros and cons, show you where it thrives, explain how it compares to other cool-season grasses, and share practical care tips.
What Is Tall Fescue?
-
Scientific name: Festuca arundinacea (also classified as Schedonorus arundinaceus).
-
Growth habit: Bunch-forming; turf-type varieties may spread slightly with short rhizomes.
-
Appearance: Medium to coarse blades, upright growth, dark green color.
-
Root system: Roots can reach 2–3 feet deep, giving it exceptional drought resistance.
Unlike perennial ryegrass or Kentucky bluegrass, tall fescue is not prized for a “carpet-perfect” look — but it shines in resilience and versatility.
Pros and Cons of Tall Fescue
✅ Pros
-
Heat & drought tolerant — deeper roots mean it stays green longer in summer.
-
Adaptable to soil types — clay, sandy, or loamy soils all support growth.
-
Good durability — handles family use, pets, and light sports.
-
Lower maintenance than ryegrass (fewer fertilizer and water demands).
-
Turf-type varieties (TTTFs) — finer blades, denser growth, better disease resistance.
❌ Cons
-
Doesn’t spread much — bare spots won’t repair themselves.
-
Slower germination (7–12 days compared to ryegrass’s 5–7).
-
Texture is coarser than bluegrass or ryegrass in some cultivars.
-
Can clump if not overseeded.
-
Disease risk — especially brown patch in hot, humid summers.
Where Tall Fescue Thrives (and Where It Doesn’t)
Best Regions
-
Transition zone (Virginia through Missouri, Kentucky, Tennessee): where summers are too hot for bluegrass but winters too cold for Bermuda.
-
Mid-Atlantic & Midwest: thrives in many temperate regions.
-
Parts of the Northeast: does well but sometimes blended with bluegrass for a finer look.
Challenging Regions
-
Deep South: hot, humid summers stress tall fescue.
-
Northernmost states: survives but less winter-hardy than bluegrass.
-
Poor-draining soils: roots can rot if the ground stays soggy.
👉 As North Carolina State Extension puts it: “Tall fescue is the best all-purpose grass for the transition zone due to its tolerance of both cold and heat.”
Tall Fescue vs. Other Cool-Season Grasses
| Feature | Tall Fescue | Perennial Ryegrass | Kentucky Bluegrass | Fine Fescues |
|---|---|---|---|---|
| Germination Speed | 7–12 days (moderate) | 5–7 days (very fast) | 14–28 days (slow) | 7–14 days |
| Root Depth | Deep (2–3 ft) | Shallow | Medium (6–18 in) | Medium |
| Heat/Drought Tolerance | Excellent for cool-season | Poor | Moderate | Moderate–High |
| Wear Tolerance | Good | Excellent | Good | Poor–Fair |
| Shade Tolerance | Moderate | Moderate | Moderate | Excellent |
| Maintenance Needs | Moderate | High | Moderate | Low |
👉 Bottom line: Choose tall fescue if you want a lawn that survives heat and drought without constant pampering.
Planting Tall Fescue
-
Best planting windows:
-
Fall (Sept–Oct): strongest establishment.
-
Spring (March–May): possible, but weeds compete and summer heat comes fast.
-
-
Soil temp for germination: 55–65°F.
-
Seeding rate: 5–8 lbs per 1,000 sq ft.
-
Seed depth: ¼–½ inch, lightly covered.
-
Overseeding: Every 2–3 years to maintain density and prevent clumping.
Lawn Care & Maintenance
Fertilization
-
Annual nitrogen needs: 2–4 lbs per 1,000 sq ft.
-
Schedule:
-
Early fall: starter/balanced fertilizer.
-
Late fall: nitrogen-heavy feeding for winter storage.
-
Early spring: light feeding to encourage green-up.
-
Late spring: moderate feeding to prepare for heat.
-
Watering
-
Establishment: keep soil moist until seedlings are 2 inches tall.
-
Established lawns: ~1 inch per week.
-
Summer: water deeply and infrequently to encourage deeper roots.
Mowing
-
Height: 3–4 inches (taller than ryegrass or bluegrass).
-
Frequency: about once per week.
-
Rule: never cut more than ⅓ of the blade.
Aeration
-
Aerate every 2–3 years to relieve compaction and improve seed-to-soil contact during overseeding.
Common Problems and Solutions
-
Brown patch (humid summers): mow higher, avoid evening watering, reduce nitrogen.
-
Clumping: overseed regularly to maintain density.
-
Insect issues: choose endophyte-enhanced seed for natural pest resistance.
Best Uses for Tall Fescue
-
Residential lawns in the transition zone.
-
Erosion control on slopes and new construction.
-
Parks, schools, and sports fields needing a durable turf.
-
Mixed with ryegrass and bluegrass for balanced performance.
Tips and Lesser-Known Facts
-
Turf-type tall fescues (TTTF) look finer and more uniform than the old pasture varieties.
-
Endophyte-enhanced cultivars help resist surface-feeding insects.
-
Good shade tolerance, though fine fescues are still better for heavy shade.
-
Overseeding every 2–3 years is the secret to avoiding a clumpy look.
Conclusion
Tall fescue is one of the most versatile cool-season grasses, offering durability, heat tolerance, and lower maintenance than ryegrass. While it doesn’t spread like bluegrass or germinate as fast as ryegrass, its deep roots make it a reliable choice in challenging climates — especially the transition zone.
Choose tall fescue if you want a tough, attractive lawn that stays green through summer without constant care. With the right overseeding schedule and mowing height, it can give you years of consistent performance.
Perennial Ryegrass: A Complete Guide to This Cool-Season Grass
Choosing the right grass seed makes the difference between a lawn that thrives and one that struggles. For homeowners in northern climates or those looking for a fast-germinating turf, perennial ryegrass (Lolium perenne) is often at the top of the list.
As a cool-season grass (more cool-season grasses), it delivers a lush, green lawn quickly — but it also comes with unique care needs. In this guide, we’ll explore the pros and cons of perennial ryegrass, how it compares to other cool-season species, where it grows best, and the right way to plant and maintain it.
What Is Perennial Ryegrass?
-
Scientific name: Lolium perenne
-
Growth habit: Bunch-forming (no spreading stolons or rhizomes).
-
Germination speed: 5–7 days (fastest of the cool-season grasses).
-
Appearance: Fine to medium blade, dark green color, and glossy texture.
Originally from Europe, perennial ryegrass is now widely used in the U.S. for lawns, sports fields, and even golf courses thanks to its rapid establishment and excellent wear tolerance.
Pros and Cons of Perennial Ryegrass
✅ Pros
-
Fastest germination — great for new lawns or overseeding.
-
High traffic tolerance — perfect for kids, pets, and sports fields.
-
Attractive turf — dark green, dense, fine-textured lawn.
-
Good disease resistance in cool, dry climates.
-
Excellent winter overseeding option for warm-season grasses (e.g., Bermuda).
❌ Cons
-
Doesn’t spread — bare spots require reseeding.
-
Weaker summer performance — struggles in hot, dry climates.
-
Higher water and fertilizer needs compared to fescues.
-
Disease issues — gray leaf spot, rust, and brown patch in humid summers.
Where Perennial Ryegrass Thrives (and Where It Doesn’t)
Best Regions
-
Pacific Northwest (Oregon, Washington) → cool, moist, ideal conditions.
-
Northeast & Upper Midwest → strong performance in temperate summers.
-
Coastal California → mild winters keep it green year-round.
-
Transition zones → excellent for overseeding Bermuda/Zoysia in fall.
Challenging Regions
-
Deep South (Georgia, Florida, Louisiana) → heat and humidity cause stress.
-
Southwest deserts (Arizona, Nevada) → extreme drought makes upkeep costly.
-
Southern Great Plains → hot summers thin ryegrass quickly.
👉 As the University of California Extension notes, perennial ryegrass is “best suited for mild coastal regions and as a temporary winter turf in southern states.”
Perennial Ryegrass vs. Other Cool-Season Grasses
| Feature | Perennial Ryegrass | Kentucky Bluegrass | Tall Fescue | Fine Fescues |
|---|---|---|---|---|
| Germination Speed | 5–7 days (fastest) | 14–28 days (slow) | 7–12 days | 7–14 days |
| Spreading Ability | Bunch-forming (no) | Yes (rhizomes) | Bunch-forming | Some (creeping types) |
| Heat/Drought Tolerance | Low | Moderate | High | Moderate to High |
| Wear Tolerance | Excellent | Good | Good | Poor–Fair |
| Shade Tolerance | Moderate | Moderate | Moderate | Excellent |
| Maintenance Needs | High (fertilizer/water) | Moderate | Moderate | Low |
👉 Choose perennial ryegrass if you want instant green and durability.
👉 Choose bluegrass if you want self-repairing lawns long-term.
👉 Choose tall fescue if you live in hotter/drier summers.
👉 Choose fine fescues for shady, low-maintenance areas.
When and How to Plant Perennial Ryegrass
-
Best planting time:
-
Fall (September–October) → strong roots before winter.
-
Spring (March–May) → possible, but weeds and summer heat are challenges.
-
-
Soil temp for germination: 50–65°F.
-
Seed depth: ¼ inch, lightly covered with soil.
-
Seeding rate: 5–9 lbs per 1,000 sq ft.
-
Overseeding southern lawns: Sow in October–November for green winter turf.
Fertilizing and Lawn Care
Fertilization Schedule
-
Early Fall: Starter fertilizer with balanced NPK.
-
Late Fall: High-nitrogen feeding for winter storage.
-
Early Spring: Light feeding to encourage green-up.
-
Late Spring: Moderate nitrogen before summer stress.
👉 Annual nitrogen requirement: 3–5 lbs per 1,000 sq ft (higher than fescues).
Watering
-
Establishment: Light, frequent watering to keep soil moist.
-
Established lawn: 1–1.5 inches per week, split into 2–3 deep waterings.
-
Summer: Increase irrigation or expect thinning.
Mowing
-
Height: 2–3 inches.
-
Frequency: 1–2x per week in spring/fall.
-
Rule: Never remove more than ⅓ of blade height.
Overseeding
Since ryegrass doesn’t spread, overseed every 1–2 years to maintain density. Aeration helps seeds contact soil.
Common Problems and Solutions
-
Gray leaf spot: Avoid overfertilizing in hot, humid weather.
-
Rust: Improve airflow with regular mowing.
-
Brown patch: Water early in the day; avoid evening irrigation.
-
Bare patches: Overseed annually since ryegrass won’t self-repair.
Best Uses for Perennial Ryegrass
-
Quick new lawns where instant coverage is needed.
-
Sports fields, dog parks, and playgrounds.
-
Winter overseeding for warm-season grasses in the South.
-
Temporary erosion control on slopes or construction sites.
Expert Recommendations
Most turf experts recommend blending perennial ryegrass with bluegrass or fescue to balance strengths:
-
Ryegrass = fast cover & durability.
-
Bluegrass = spreading/self-repair.
-
Fescue = heat/shade tolerance.
As Penn State Extension notes: “Perennial ryegrass performs best in mixtures rather than as a single-species lawn.”
Conclusion
Perennial ryegrass is one of the fastest and most attractive cool-season grasses available. It delivers instant results and holds up well under heavy use — but requires consistent fertilization, irrigation, and reseeding to stay thick and green.
If you’re in the northern U.S. or coastal climates, it can be an excellent choice, especially when paired with bluegrass or fescue. In hotter or drier areas, tall fescue may be a better long-term option.
👉 Bottom line: Choose perennial ryegrass if you want fast, lush turf now — and don’t mind putting in the extra care to keep it looking its best.
Choosing the Right Cool-Season Grass: Which Type Will Transform Your Lawn This Year?
Maintaining a healthy lawn begins with choosing the right type of grass for your climate. In the northern United States and other cooler regions, cool-season grasses dominate because they thrive in moderate spring and fall temperatures. These grasses establish quickly, stay green longer into the season, and recover well after stress periods if managed correctly.
This guide explains what cool-season grasses are, outlines the most common species, and provides a side-by-side comparison to help you choose the right option for your property.
What Are Cool-Season Grasses?
Cool-season grasses are turf species adapted to climates where temperatures are moderate for much of the year. Their primary growth periods occur in spring and fall when soil and air temperatures are between 60°F and 75°F.
Key traits include:
- Seasonal growth cycles: Vigorous growth in spring and fall, slower in summer heat, and possible dormancy during drought.
- Adaptation zones: Ideal for the northern U.S., the Pacific Northwest, and higher elevations in transition zones.
- Blending potential: Many lawns use seed blends to combine strengths such as drought resistance, shade tolerance, and fast germination.
Major Types of Cool-Season Grasses
Here are the most common species used in residential lawns, athletic fields, and commercial landscapes:
- Kentucky Bluegrass: Dense, self-repairing turf with a rich green color; requires irrigation in drought.
- Perennial Ryegrass: Germinates rapidly and provides quick cover; widely used for overseeding and sports turf.
- Tall Fescue: Known for deep roots and drought tolerance; modern “turf-type” cultivars offer improved texture.
- Fine Fescues (Creeping Red, Chewings, Hard, Sheep): Perform well in shade and low-maintenance areas.
- Creeping Bentgrass: Extremely fine-textured grass used on golf greens; not recommended for home lawns due to its intensive maintenance needs.
Which Grass To Use?
The best choice depends on your site conditions, and your maintenance goals:
- Sunny, traditional lawns: Kentucky Bluegrass offers dense coverage and recovery but requires more inputs.
- Quick establishment: Perennial Ryegrass is the fastest germinating option.
- Drought and traffic: Tall Fescue provides resilience in high-use or water-limited areas.
- Shade tolerance: Fine Fescues excel in low-light environments.
- Low-maintenance landscapes: Hard and Sheep Fescue thrive with minimal mowing and fertilization.
- Specialized use: Creeping Bentgrass is reserved for golf courses and requires professional care.
We’ve got a breakdown of the different cool season grasses that can help you choose which grass to pick.
Final Thoughts
While each species has unique strengths, blends are often the most practical solution for homeowners because they balance quick germination, drought tolerance, and disease resistance.
If you’re starting a new lawn or renovating an existing one, consider soil testing and consult with a local extension office or turf professional to refine your choice. With the right species—or combination—you can achieve a healthy, sustainable lawn that performs well year after year.
Cool-Season Grasses By Type, Shade, Drought Tolerance, Growth Speed & More
🌱 Cool-Season Grasses
Want to learn more about cool season grass? We’ve got a little more info over here.
If interested in mow heights, please read here.
| Grass Type | Texture | Growth Type | Shade Tolerance | Drought Tolerance | Germination Speed | Primary Use |
|---|---|---|---|---|---|---|
| Kentucky Bluegrass | Fine-Medium | Rhizomes | Low–Medium | Low–Medium | Slow (14–30 days) | Lawns, blends (self-repairing turf) |
| Perennial Ryegrass | Medium | Bunch | Low | Low | Fast (5–10 days) | Sports fields, overseeding, quick cover |
| Tall Fescue | Coarse-Medium | Bunch | Medium | High | Medium (7–12 days) | Lawns, high-traffic, drought-prone areas |
| Creeping Red Fescue | Fine | Rhizomes | High | Medium | Medium (7–14 days) | Shade lawns, blends |
| Chewings Fescue | Fine | Bunch | High | Medium | Medium (7–14 days) | Shade lawns, blends |
| Hard Fescue | Fine | Bunch | High | High | Slow (10–20 days) | Low-maintenance, drought-tolerant lawns |
| Sheep Fescue | Fine | Bunch | High | High | Slow (10–20 days) | Naturalized or low-mow lawns |
| Creeping Bentgrass | Very Fine | Stolons | Low | Low | Slow (14–21 days) | Golf greens, fairways (high-maintenance) |
The Ultimate Guide to a Lush Kentucky Bluegrass Lawn
Kentucky Bluegrass: A Homeowner’s Guide to a Lush Lawn
For homeowners who dream of a dense, vibrant, and resilient lawn, Kentucky bluegrass (Poa pratensis L.) is often the top choice. Its rich, emerald-to-blue-green hue and fine texture create a picture-perfect landscape that can be the envy of the neighborhood. But achieving that coveted, carpet-like appearance requires more than just wishful thinking—it demands knowledge and consistent care.
This comprehensive guide provides expert knowledge and actionable advice to help you grow and maintain a stunning Kentucky bluegrass lawn. From the science of its growth to best practices for establishment and long-term maintenance, this article equips you with everything you need for success.
Understanding Kentucky Bluegrass
Before you can effectively care for Kentucky bluegrass, it’s essential to understand its unique characteristics.
Key Characteristics
- Color and Texture: Dark green to blue-green color with a medium to fine texture, creating a soft, dense turf.
- Growth Habit: A sod-forming grass that spreads by underground rhizomes, filling in bare spots naturally.
- Climate Preference: Thrives in cool, humid regions with active growth in spring and fall.
- Sunlight Requirements: Needs 6–8 hours of direct sunlight per day; light shade tolerated but less dense.
- Soil Needs: Prefers fertile, well-drained soil with pH between 6.0 and 7.0.
Strengths
- Excellent cold tolerance for northern climates.
- Self-repairs due to rhizomatous growth.
- Beautiful, high-quality appearance.
Weaknesses
- Shallow roots make it less drought- and heat-tolerant.
- High maintenance compared to other grasses.
- Slow germination requiring patience.
Planting and Establishment
Establishing Kentucky bluegrass requires careful planning and patience. Site preparation and timing are critical.
Site Preparation
- Weed Eradication: Remove existing weeds; use a non-selective herbicide for severe infestations.
- Soil Testing: Test pH and nutrients. Amend with lime or organic matter as needed.
- Seedbed Prep: Till to 4–6 inches, smooth, and firm soil for good seed-to-soil contact.
Best Planting Times
- Fall (Recommended): Mid-August to mid-October for ideal soil temps, fewer weeds, and strong root growth before winter.
- Spring: Possible but more challenging due to weeds and heat stress.
Seeding Tips
- Rate: 2–3 lbs per 1,000 sq ft (half for overseeding).
- Depth: ¼–½ inch, lightly raked in.
- Seed Quality: Always buy from a reputable supplier.
Initial Care
- Keep seedbed moist until seedlings establish.
- Use a starter fertilizer formulated for new lawns.
- Delay herbicides until grass thickens naturally.
Using Sod
For instant results, lay sod on prepared soil, water thoroughly, and maintain consistent moisture for rooting.
Maintenance Practices
Mowing
- Height: 2.5–3.5 inches. Higher in summer for drought and weed tolerance.
- One-Third Rule: Never cut more than one-third of blade height.
- Clippings: Leave unless excessive—adds nutrients back into soil.
Watering
- Amount: 1–1.5 inches per week, including rainfall.
- Frequency: Deep, infrequent watering (1–2 times per week).
- Best Time: Early morning (4–9 AM) to reduce disease risk.
Fertilization
- Timing: Fall is most important; lighter applications in spring.
- Type: Balanced fertilizer with slow-release nitrogen (e.g., 12-4-8).
- Rate: 3–4 lbs of nitrogen per 1,000 sq ft annually.
Pest and Disease Control
- Grubs: Watch for brown patches; use milky spore or insecticides if needed.
- Billbugs & Armyworms: Treat with targeted insecticides.
- Fungal Issues: Necrotic ring spot and summer patch can be reduced with proper mowing, watering, and resistant varieties.
Conclusion
Cultivating a Kentucky bluegrass lawn is a rewarding process. While it requires effort—consistent mowing, watering, fertilization, and vigilance against pests—the result is a lush, resilient, and beautiful lawn. By following these practices and adjusting your care to the needs of the grass, you’ll enjoy a thriving lawn that enhances your home’s curb appeal for years to come.
The Cold-Weather Landscaping Hacks Every Homeowner Needs Before Hosting Outdoors
Most homeowners retreat indoors when the temperatures dip, assuming their backyards are off-limits until spring. But with the right landscaping hacks, your outdoor space can become just as inviting in the cold months as it is in summer.
From fire features to evergreen plantings, smart design choices don’t just make your yard look beautiful—they make it functional for winter entertaining. Here’s how to turn your backyard into a cozy, safe, and unforgettable space for cold-weather gatherings.
Why Landscaping Matters for Winter Entertaining
Great landscaping does more than improve curb appeal. In winter, it solves three big problems:
-
Warmth: Fire features and hardscape design help you retain heat outdoors.
-
Lighting: Shorter days mean you need safe, stylish illumination.
-
Safety: Smart landscaping minimizes hazards like slippery walkways and wind exposure.
Instead of shutting down your outdoor space until spring, these cold-weather hacks help you use it year-round.
Heat-Friendly Landscaping Features
Built-In Fire Pit or Fireplace
Nothing brings people together like a fire. A well-placed stone fire pit or masonry fireplace becomes both a heat source and a design focal point. Choose durable materials like slate, brick, or concrete pavers that can withstand winter conditions.
Outdoor Kitchens or Pizza Ovens
These aren’t just for summer barbecues. Wood-fired pizza ovens or brick kitchens radiate heat while serving up comfort food. They add ambiance and keep guests lingering outside longer.
Patio Heaters
Modern propane or electric heaters can be built into pergolas, mounted overhead, or placed strategically around patios. They extend warmth to areas where a fire pit might not reach.
Shelter & Wind Protection
Pergolas with Curtains
Draping outdoor curtains around a pergola creates a semi-enclosed room that blocks wind and holds in heat.
Gazebos and Pavilions
Permanent structures allow gatherings in almost any weather. Add clear vinyl side panels for a greenhouse-style effect that traps warmth.
Evergreen Plantings & Hedges
Living landscaping doubles as décor and function. Dense hedges or rows of evergreens break chilly winds while keeping your yard visually alive in winter.
Lighting That Works in Winter
Short days demand a lighting plan that’s both practical and atmospheric:
-
Pathway Lighting: Solar or low-voltage lights make icy walkways safe.
-
String Lights & Lanterns: Provide a warm glow for patios, pergolas, and gathering spaces.
-
LED Spotlights: Highlight trees, architectural details, or even snow-covered shrubs.
Hardscape Hacks for Cold Weather
Heated Patios & Walkways
Installing radiant heat beneath stone or concrete pavers keeps ice and snow at bay—an investment that pays off in both safety and comfort.
Outdoor Rugs & Layered Flooring
Adding outdoor rugs on top of stone or wood keeps feet warm and defines entertaining zones.
Non-Slip Surfaces
If you’re installing new hardscaping, choose textured finishes or permeable pavers that resist ice buildup.
Landscaping for Comfort & Décor
Seasonal Plants
Incorporate winter-hardy plants like holly, boxwood, juniper, and red twig dogwood for color and structure.
Natural Materials
Wood benches, stone walls, and textured features bring warmth to stark winter landscapes.
Décor Integration
Use retaining walls, raised beds, or built-in planters as platforms for lanterns, candles, or festive décor.
Entertaining Essentials in a Cold Landscape
-
Blanket Storage: Incorporate waterproof benches or storage chests for throws and cushions.
-
Food & Drink Stations: Position hot cocoa bars or fondue stations near heat sources, not at the far end of the yard.
-
Snow-Friendly Fun: If you have kids, carve out a small sledding hill or snow play zone away from fire pits and heaters.
Safety First: Cold-Weather Hosting Must-Knows
-
Fire Safety: Keep fire pits and fireplaces on non-flammable surfaces with adequate clearance.
-
Snow & Ice Management: Shovel walkways and use pet- and plant-safe salt or heated mats.
-
Ventilation: Never use propane or gas heaters in fully enclosed tents without ventilation. Carbon monoxide safety should always come first.
Frequently Asked Questions (FAQ)
How do I keep my backyard warm enough for entertaining in winter?
Combine multiple heat sources: a fire pit, portable heaters, and wind-blocking landscaping. Layering blankets and outdoor rugs adds extra comfort.
Can I install a fire pit or outdoor fireplace on an existing patio?
Yes, with proper clearance and a fireproof base. Many homeowners add stone pads or redesign small sections of patio for fire features.
What are the best plants for year-round landscaping appeal?
Evergreens like boxwood, juniper, and holly provide greenery. Red twig dogwood and ornamental grasses add texture and color.
Are heated patios worth the investment?
If you live in a snowy climate and frequently entertain outdoors, radiant-heated patios and walkways prevent ice hazards and extend usability.
How do I prevent slippery walkways for guests?
Install non-slip pavers, keep surfaces shoveled, and use heated mats or salt alternatives. Good lighting also prevents accidents.
Conclusion
Cold weather doesn’t have to close your backyard. With the right landscaping hacks—fire features, smart lighting, heated hardscapes, and evergreen plantings—you can transform your outdoor space into a winter-ready retreat.
Your backyard isn’t just for summer cookouts; with a little planning, it becomes a four-season entertainment space that impresses guests and keeps your family enjoying the outdoors all year long.